
To make biblical clay oil lamps, you need clay, a pinch pot technique, a wick, and olive oil. In ancient times, oil lamps were a common source of light in households, and they have religious significance in many cultures.
Making your own biblical clay oil lamp can be a fun and educational activity that allows you to connect with history and explore your creative side. Using simple materials like clay, olive oil, and a wick, you can recreate these ancient lamps and experience the warm and soft light they produce.
We will provide step-by-step instructions on how to make your own biblical clay oil lamps, allowing you to bring a bit of history into your home. So let’s get started!
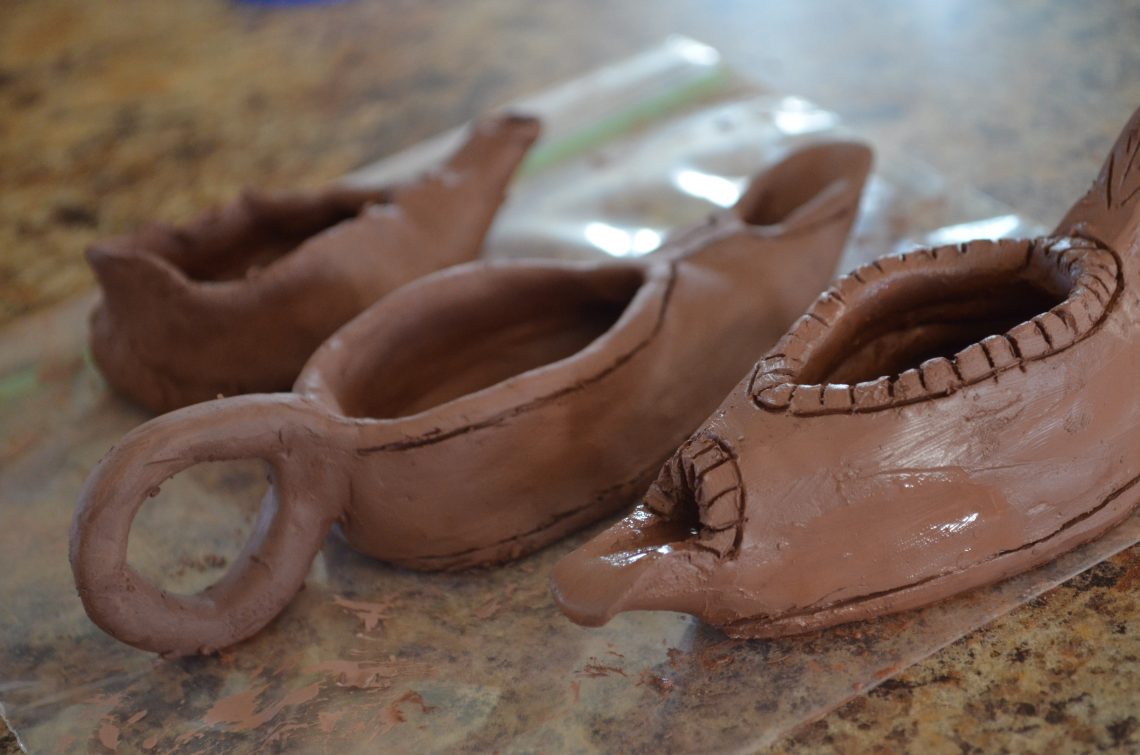
Credit: thepartysaint.com
How to Make Biblical Clay Oil Lamps: Step-by-Step Guide
Materials And Tools
Before you can create your own biblical clay oil lamps, you’ll need to gather a few essential materials and tools. The process is relatively simple, and you don’t need any specialized equipment. Here’s what you’ll need:
Clay
To make a clay oil lamp, you’ll need a suitable clay material. Look for a natural, air-dry clay that is pliable and easy to work with. You can typically find this type of clay at art supply stores or online. Alternatively, if you have access to natural clay deposits, you can harvest your own clay.
Oil
An important component of any oil lamp is the fuel source. In biblical times, olive oil was commonly used due to its availability and clean-burning properties. You can use olive oil for an authentic experience or choose another type of lamp oil that is suitable for burning indoors. Lamp oil can be found at home improvement stores or online.
Wicks
A wick is necessary to draw the oil up and provide a flame. You can purchase pre-made oil lamp wicks at craft stores or make your own using cotton or linen fabric. Cut the fabric into strips and braid them together to create a long, sturdy wick.
Mold Or Shaping Tool
To shape your clay into a lamp, you may want to use a mold or a shaping tool. While not necessary, these tools can help you achieve a consistent and traditional lamp shape. You can find lamp molds online or create your own using everyday objects like small bowls or cups.
Optional: Decorative Elements
If you want to add a personal touch to your clay oil lamp, consider incorporating decorative elements. These can range from simple patterns and textures created with tools or stamps to more intricate designs carved into the clay. Keep in mind that the main function of the lamp is to provide light, so any decorative elements should not obstruct the flame.
Incorporating these materials and tools into your biblical clay oil lamp project will set you on the path to creating a beautiful and functional piece that represents the ancient traditions of lighting and illumination.
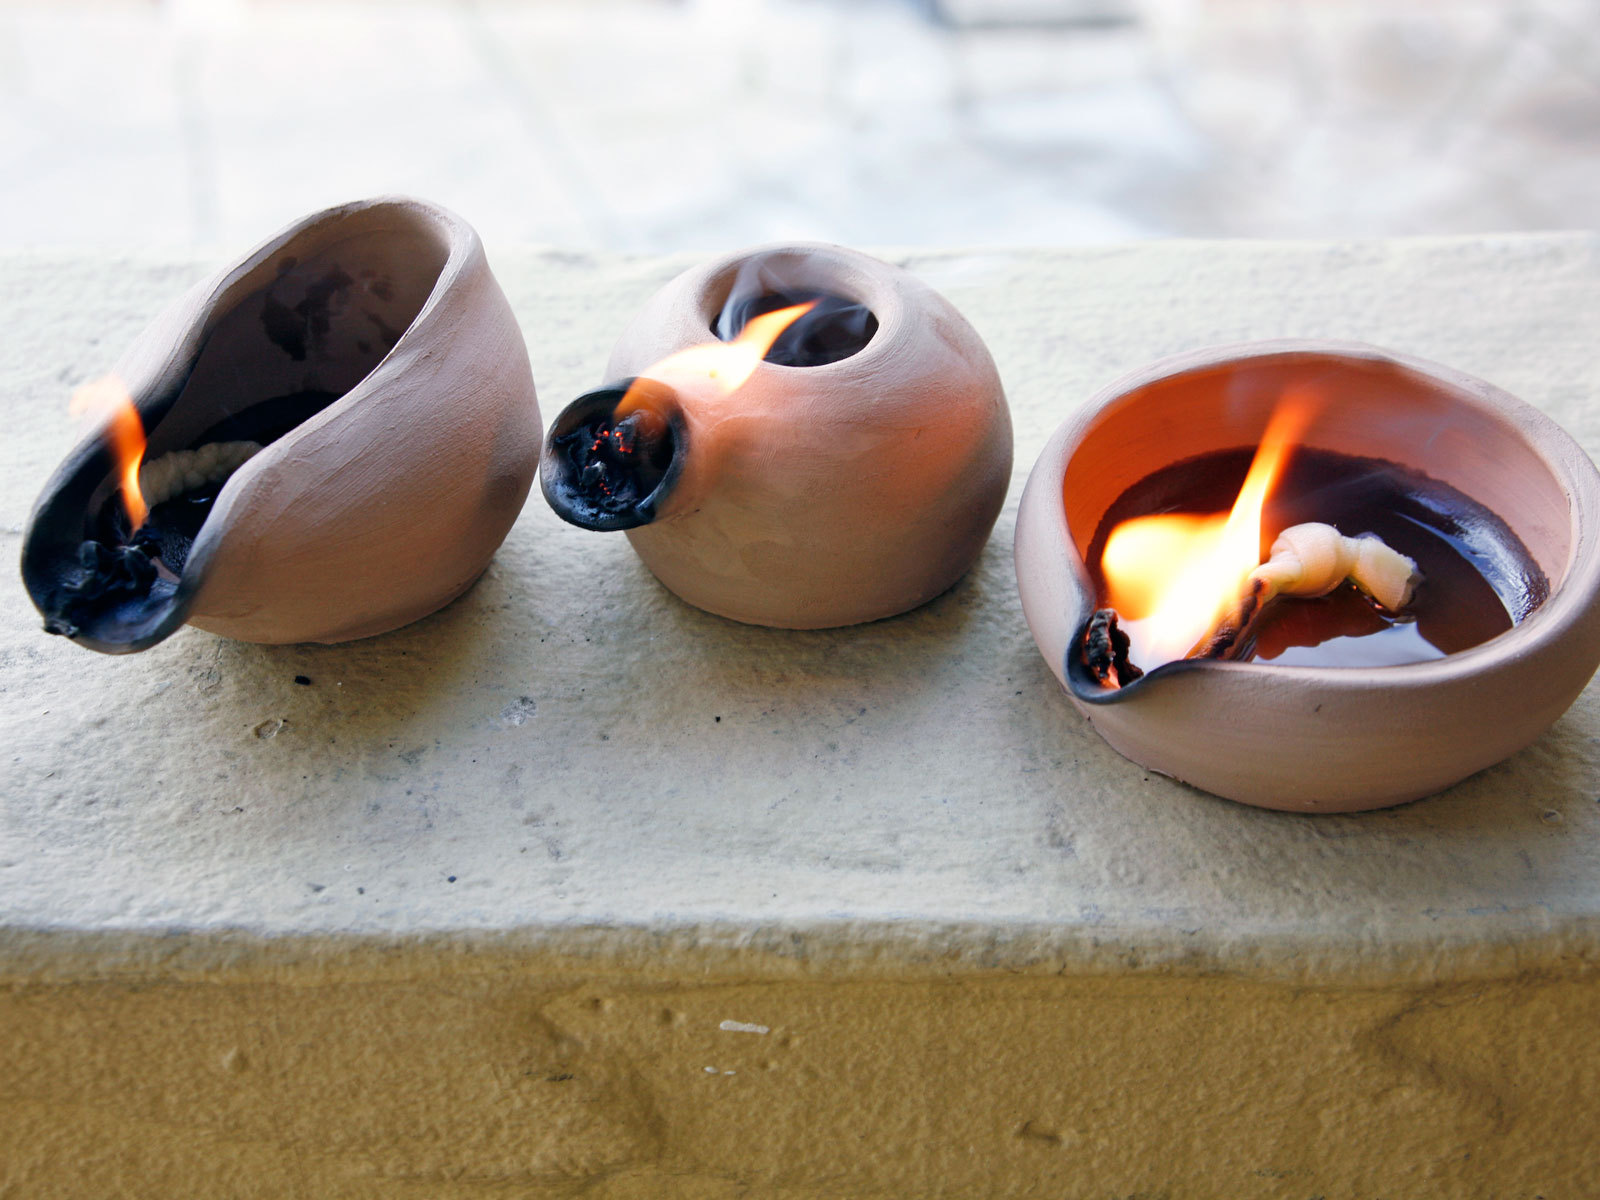
Credit: makezine.com
Preparing The Clay
Learn how to prepare the clay for making biblical clay oil lamps in this informative guide. Discover the step-by-step process for creating these authentic lamps using high-quality clay.
Choosing The Right Type Of Clay
When it comes to making biblical clay oil lamps, one of the most important steps is choosing the right type of clay. There are various types of clay available, but not all are suitable for this specific purpose. For making clay oil lamps, it is recommended to use clay that has a high clay content and low sand content. This will ensure that the clay is easy to mold and shape, while also being able to withstand the heat of the lamp’s flame.
It’s best to choose a clay that is specifically meant for pottery or sculpting, as these types of clay are often well-suited for creating durable and long-lasting oil lamps. A popular choice is earthenware clay, as it is known for its workability and ability to be fired at lower temperatures.
Kneading And Shaping The Clay
Once you have chosen the right type of clay, the next step is to knead and shape it. Kneading the clay helps to remove any air bubbles that may be trapped inside, ensuring a smooth and even consistency. This can be done by pressing and pushing the clay in your hands, using a rolling pin, or even a pottery wheel if you have access to one.
After kneading, it’s time to shape the clay into the desired form of an oil lamp. Start by creating a basic cylinder shape, similar to a vase. Use your hands to shape the clay, smooth it out, and form a well-defined base. It’s important to maintain the thickness of the clay walls, as this will help to retain heat and prevent the lamp from cracking during firing.
Creating A Hollow For The Fuel
With the clay shaped into the lamp’s basic form, the next step is to create a hollow to hold the fuel. This can be done by gently pressing the tip of your thumb or a small rounded tool into the center of the clay cylinder. Gradually widen and deepen the hollow to create an opening that is wide enough to hold the oil for the lamp.
Take care to ensure that the depth of the hollow is sufficient to hold a sufficient amount of fuel, while also leaving enough space for the wick. It’s a good idea to refer to references or examples of biblical oil lamps to get an idea of the appropriate size and shape of the hollow.
Allowing The Clay To Dry
Once the clay oil lamp has been shaped and the hollow has been created, it’s time to allow the clay to dry. This step is crucial to ensure that the clay becomes firm and stable before firing. Place the lamp in a cool and dry area, away from direct sunlight or heat sources, to allow the clay to dry slowly and evenly.
Depending on the climate and humidity level, the drying process can take anywhere from a few days to a couple of weeks. It’s important to be patient and not rush this step, as drying too quickly can cause the clay to crack or warp.
To ensure that the clay dries evenly, you can rotate the lamp periodically. This will help prevent any deformation or warping that may occur if one side of the clay is exposed to more air or heat than the other.
Creating The Wick
When it comes to making biblical clay oil lamps, one of the crucial components to consider is the wick. A properly crafted wick will ensure a steady and reliable source of light. In this section, we will guide you through the process of creating the perfect wick for your clay lamp.
Selecting The Appropriate Material For The Wick
Choosing the right material for your wick is essential for optimal performance. The traditional materials used for wicks in biblical times were flax, cotton, or hemp. These natural fibers have a capillary action that allows the oil to be drawn up to the flame, providing a long-lasting and even burn. Today, you can easily find cotton or hemp wick materials in craft stores or online.
Cutting And Preparing The Wick
Once you have selected the material for your wick, it’s time to cut and prepare it. Follow these steps:
- Measure and cut the wick to the desired length. For optimal performance, it should be slightly longer than the height of your clay lamp.
- Remove any loose fibers or knots from the ends of the wick.
- If your wick is made of flax or cotton, you can further enhance its performance by soaking it in saltwater solution or olive oil for a few hours. This helps to remove impurities and increase its absorbency.
Inserting The Wick Into The Clay Lamp
Now that you have prepared the wick, it’s time to insert it into your clay lamp. Follow these steps:
- Gently thread one end of the wick through the nozzle or opening of the clay lamp. Make sure it is long enough to reach the bottom of the lamp.
- If your clay lamp has a separate wick holder, secure the other end of the wick into it. If not, simply let it hang freely inside the lamp.
- Ensure that the wick is centered and straight to promote an even and steady flame.
By following these steps, you can successfully create the wick for your biblical clay oil lamp. Remember, selecting the appropriate material, cutting and preparing the wick, and inserting it properly into the lamp are the key factors for a reliable light source. Now, your custom-made clay lamp is ready to illuminate any space with its warm and authentic glow.
Finishing And Using The Oil Lamp
Once you’ve crafted your own biblical clay oil lamp, it’s time to add the finishing touches and start using it to create a warm and atmospheric glow. Here’s a step-by-step guide on how to decorate, cure, fire, add oil, and properly use your clay oil lamp.
Decorating The Clay Lamp (optional)
Decorating your clay lamp can be a fun and creative way to personalize it and add a touch of uniqueness. You can carve intricate patterns, etch symbols or religious motifs, or even incorporate different colors using non-toxic paint.
If you choose to decorate your clay lamp, make sure to do it before it goes through the curing and firing process, as the added clay decorations may crack or break during firing. Keep in mind that less is often more when it comes to clay lamp decorations, as you want to ensure the integrity and functionality of the lamp itself.
Curing And Firing The Clay Lamp
Before you can use your clay oil lamp, it needs to go through a curing and firing process to remove any moisture and strengthen the clay. Place the lamp in a well-ventilated area and let it air dry for a few days.
Once the clay feels completely dry, carefully move the lamp to a kiln or oven for firing. Follow the recommended temperature and time instructions for firing clay, which will depend on the type and thickness of the clay you used. Firing the clay lamp will transform it into a more durable and heat-resistant object.
Adding Oil To The Lamp
After the clay lamp has been cured and fired, it’s time to add the oil. Choose a high-quality lamp oil that burns cleanly and produces minimal smoke and odor. Fill the lamp’s reservoir with the oil, taking care not to overfill it as it may spill when lit.
Recommended Lamp Oils:
- Olive oil: Traditional and commonly used lamp oil that provides a soft, warm, and aromatic glow.
- Clear liquid paraffin oil: Odorless and smokeless option that burns longer than olive oil.
Lighting And Using The Oil Lamp
With the oil in place, it’s time to light up your clay oil lamp and enjoy its gentle radiance. To light the lamp, follow these steps:
- Carefully position the wick in the lamp’s opening, making sure it’s fully submerged in the oil.
- Allow the wick to absorb the oil for a few minutes before attempting to light it.
- Using a lighter or long match, ignite the tip of the wick and let it burn for a few seconds.
- Adjust the flame by trimming the wick if necessary, aiming for a steady and controlled burn.
Remember to always keep an eye on the lit lamp and avoid leaving it unattended. Ensure that the lamp is placed on a stable and non-flammable surface to prevent accidents. When you’re done using the lamp, wait for it to cool before refilling the reservoir or storing it.
Frequently Asked Questions On How To Make Biblical Clay Oil Lamps
How Do You Make Clay Oil Lamps?
To make clay oil lamps, shape clay into a shallow dish, create a spout, and let it dry. Add fuel and a wick to light.
What Materials Do I Need To Make Biblical Clay Oil Lamps?
To make biblical clay oil lamps, you’ll need clay, water, a shaping tool, a wick, and fuel such as oil or fat.
How Were Clay Oil Lamps Used In Biblical Times?
Clay oil lamps in biblical times were used for lighting homes and religious ceremonies, serving as an essential light source.
Can I Use Clay Oil Lamps For Decoration?
Yes, you can use clay oil lamps as decorative items in your home, creating a cozy and vintage atmosphere.
Conclusion
To sum up, crafting biblical clay oil lamps can be a fulfilling and educational experience. By following the simple steps outlined in this blog post, you can create beautiful and functional replicas of the lamps used in ancient times.
Whether you want to enhance your historical understanding, engage in a hands-on activity, or simply add a unique decor piece to your home, this DIY project is sure to bring you joy and satisfaction.
So gather your materials and embark on a journey through time as you recreate these fascinating artifacts. Happy crafting!

I’m Emily Johnson, an affiliate marketer and blogger focused on lamps and lighting. I share honest reviews, simple buying guides, and practical tips. My goal is to help readers choose the right lamp for their space, style, and budget with confidence.