To make oil lamps from bottles, simply gather empty glass bottles, insert a wick, and fill with oil. Now let’s explore the step-by-step process of creating DIY oil lamps from bottles.
An oil lamp can be a practical and attractive lighting option, especially during power outages or outdoor gatherings. By repurposing empty glass bottles, you can create unique and eco-friendly lamps to add a warm and cozy ambiance to your space.
Plus, making oil lamps from bottles is a simple and cost-effective project that requires minimal materials and tools. Follow these step-by-step instructions to create your own oil lamps from bottles and enjoy the soothing glow of candle-like illumination.
2. Gathering Materials
Before you can start making your own oil lamps from bottles, you will need to gather the necessary materials. This section will guide you through the process of choosing the right bottle, selecting the wick, and gathering additional supplies for your DIY oil lamps.
2.1 Choosing The Right Bottle
When it comes to making oil lamps from bottles, it’s important to choose the right bottle to ensure safety and functionality. Here are a few factors to consider:
- Size: Look for a bottle that is large enough to hold a sufficient amount of oil, but not too bulky or heavy.
- Material: Opt for a glass bottle, as it is durable and can withstand the heat of the flame. Avoid plastic bottles, as they can melt or release toxic fumes.
- Shape: Bottles with a wider base provide stability and make it easier to place the wick. Additionally, bottles with a narrow neck help control the flow of oil and prevent spills.
By considering these factors, you can find the perfect bottle for your DIY oil lamp project.
2.2 Selecting The Wick
Choosing the right wick is crucial for the proper functioning of your oil lamp. Follow these tips to select the most suitable wick:
- Material: Cotton wicks are commonly used for oil lamps as they absorb and distribute the oil effectively.
- Size: The size of the wick depends on the size of your bottle and the desired flame intensity. Experiment with different sizes to achieve the desired result.
- Treatment: Some wicks come pre-treated with chemicals to improve their burning properties. If you prefer a more natural option, look for untreated cotton wicks.
By taking these factors into account, you can ensure that your wick performs optimally in your homemade oil lamp.
2.3 Gathering Additional Supplies
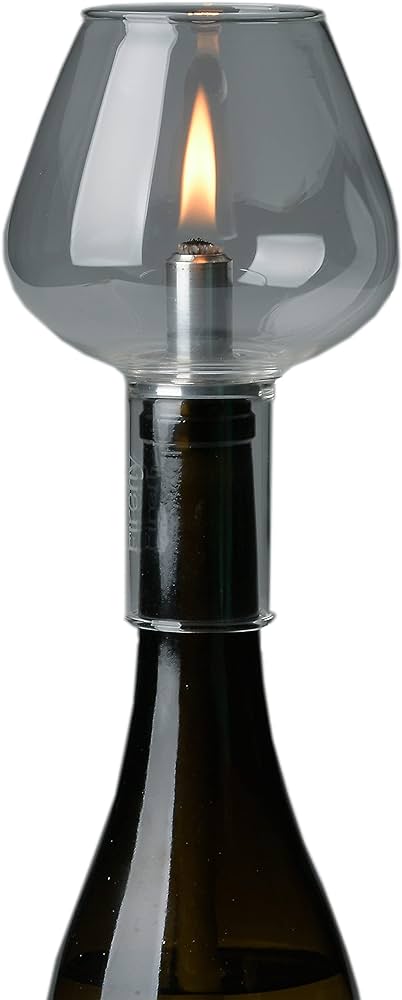
In addition to choosing the right bottle and wick, you will need a few additional supplies to complete your oil lamp project. Here’s what you’ll need:
| Supplies | Description |
|---|---|
| Lamp Oil | A combustible fuel that will provide the necessary flame for your oil lamp. |
| Funnel | For easy and mess-free pouring of oil into the bottle. |
| Scissors | To trim the wick to the desired length. |
| Lighter or Matches | For igniting the wick and lighting up your oil lamp. |
By gathering these additional supplies, you’ll be well-equipped to make your own oil lamps from bottles.

Credit: www.amazon.com
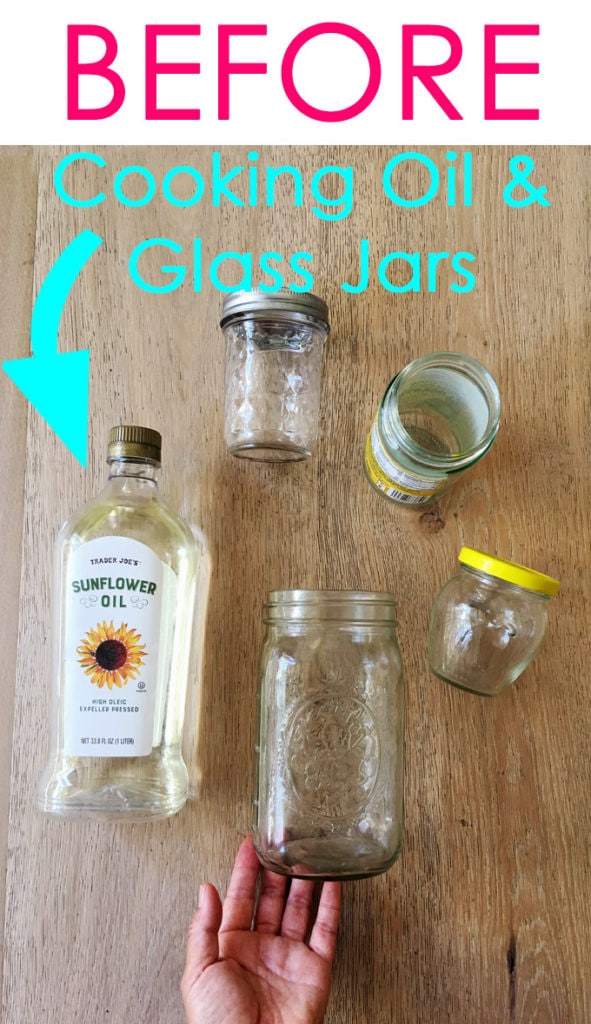
3. Preparing The Bottle
Learn how to prepare the bottle for making oil lamps from scratch. This simple and easy process will help you create beautiful and functional lighting decor for any occasion.
Before you can transform your old bottles into beautiful oil lamps, you need to properly prepare them. This involves removing the labels and residue and thoroughly cleaning the bottles. Follow these simple steps to ensure your bottles are ready for their new purpose.
3.1 Removing Labels And Residue
One of the first things you need to do when preparing your bottle is to remove any labels or sticky residue that might be present. Not only will this ensure your lamp looks pristine, but it will also prevent any unwanted odors while burning the oil.
To remove labels, begin by soaking the bottle in warm water for about 20 minutes. This will help to loosen the adhesive. Once the label is sufficiently soaked, gently peel it off using your fingers or a plastic scraper. If any residue remains, you can use a mixture of baking soda and oil to create a paste and scrub it off. Rinse the bottle thoroughly to remove any residue from the cleaning solution.
3.2 Cleaning The Bottle
Cleaning the bottle is an important step to ensure that no dust, dirt, or impurities are left behind that could interfere with the functionality of your oil lamp. Here’s a simple method to effectively clean your bottle:
- Fill a sink or a basin with warm water and add a few drops of mild dish soap.
- Submerge the bottle in the soapy water and use a sponge or a bottle brush to scrub the inside and outside surfaces.
- Rinse the bottle thoroughly under running water to remove any soap residue.
- For a spotless finish, leave the bottle to air dry upside down on a drying rack.
Remember to clean your bottle as soon as possible after removing its label. This will prevent any sticky residue from hardening or becoming more difficult to remove.
Now that you have successfully removed labels and residue and thoroughly cleaned your bottle, you are ready to move on to the next step of creating beautiful oil lamps. Stay tuned for our next section where we will guide you through the process of assembling your homemade oil lamp.
4. How to Make Oil Lamps from Bottles? Eco-Friendly Glow
Making oil lamps from bottles is a fun and creative way to add some rustic charm to your home decor. In this section, we will go through the process of creating your own oil lamp step-by-step. From filling the bottle with lamp oil to adjusting the wick height, you’ll soon have a beautiful and functional oil lamp to light up your space.
4.1 Filling The Bottle With Lamp Oil
Filling the bottle with lamp oil is the first step towards creating your oil lamp. Lamp oil, also known as liquid paraffin, is widely available and can be found at most hardware stores or online retailers. Follow these simple steps to fill your bottle:
- Select a bottle with a narrow opening for better control over the flow of oil.
- Place a funnel into the bottle’s opening, ensuring a tight fit.
- Slowly pour the lamp oil into the funnel, allowing it to flow into the bottle.
- Fill the bottle about three-quarters full, leaving enough space for the wick and room for the oil to expand.
- Remove the funnel carefully, wiping any spills or drips to keep the bottle clean.
4.2 Inserting The Wick
Now that you’ve filled the bottle with lamp oil, it’s time to insert the wick. The wick acts as a fuel source, absorbing the oil and providing a steady flame. Follow these steps to insert the wick:
- Choose a cotton wick that fits the size of the bottle’s opening.
- Trim the wick to a length that extends about half an inch above the bottle’s opening.
- Insert one end of the wick into the bottle, making sure it reaches the bottom and is fully submerged in the oil.
- Leave the other end of the wick hanging over the top of the bottle, making it accessible for lighting.
- Ensure the wick is centered and straight for an even burn.
4.3 Adjusting The Wick Height
Adjusting the wick height is crucial to maintain the desired flame size and prevent excessive smoke. Follow these steps to find the optimal wick height:
- Light the wick using a long-reach lighter or match.
- Observe the flame and adjust the wick height gradually by pulling it up or down.
- For a smaller flame, lower the wick slightly. For a larger flame, raise the wick gently.
- Continue adjusting the wick until you achieve a clean, steady flame without excessive smoke.
- Remember to trim the wick periodically to remove any charred or blackened portions.
By following these steps, you can easily create your own unique oil lamps from bottles. Whether you’re looking to enhance your outdoor ambiance or add a cozy touch to your indoor space, these homemade oil lamps will surely impress. Decorative and functional, they provide a warm and inviting glow that will create a charming atmosphere in any setting.
5. Enhancing The Lamp’s Appearance
Now that you have learned how to create your own oil lamp from a bottle, it’s time to take it a step further and enhance its appearance.
By adding decorative elements and personal touches, you can transform your homemade lamp into a unique and eye-catching piece. Let’s explore some ideas to make your oil lamp truly stand out.
5.1 Adding Decorative Elements
To make your oil lamp more visually appealing, consider incorporating decorative elements that complement your personal style. These elements can be easily found or repurposed, adding a touch of creativity to your lamp.
Here are a few ideas:
- Attach colorful ribbons or twine around the neck of the bottle to add a pop of color.
- Apply adhesive gems or rhinestones to create a sparkling effect.
- Wrap the bottle with decorative lace or fabric for a vintage look.
- Paint intricate designs or patterns on the surface using glass paint.
Be sure to choose materials that are heat-resistant and safe for use around the open flame of the oil lamp.
5.2 Personalizing The Lamp
Personalizing your oil lamp can make it even more meaningful and special. You can add elements that reflect your personality, interests, or the theme of the room where the lamp will be displayed.
Consider these ideas for personalizing your oil lamp:
- Create a label with a unique name for your lamp and attach it to the bottle using adhesive or twine.
- Engage in the ancient art of calligraphy and write an inspiring quote or your favorite phrase on the bottle.
- Add elements that showcase your hobbies or passions, such as small seashells for a beach-themed lamp or tiny toy figures for a whimsical touch.
- Use colorful glass bottles or jars to match the color scheme of your room or to create a vibrant focal point.
Remember to consider the overall aesthetics and keep the lamp’s functionality in mind while personalizing it.
By adding decorative elements and personal touches, you can elevate the appearance of your homemade oil lamp. Get creative and make it a reflection of your style and personality. With these enhancements, your oil lamp will not only provide a warm and cozy glow but also serve as a visually striking piece of decor.
Credit: www.apieceofrainbow.com
Frequently Asked Questions Of How To Make Oil Lamps From Bottles
How Do You Make Oil Lamps From Bottles?
To make oil lamps from bottles, you will need some key materials like bottles, wicks, and lamp oil. Clean the bottles thoroughly, insert the wick, and fill them with lamp oil. It’s that simple!
What Types Of Bottles Can Be Used For Oil Lamps?
You can use various types of bottles for making oil lamps, such as wine bottles, glass bottles, or mason jars. Just ensure that the bottle has a secure neck to hold the wick in place.
Where Can I Get Lamp Oil For My Oil Lamps?
Lamp oil can be found at most hardware stores, home improvement centers, or specialty stores that sell oil lamp supplies. Additionally, you can also purchase lamp oil online from various retailers and websites.
How Long Do Oil Lamps Burn For?
The burning time of oil lamps varies depending on the size of the bottle and the amount of oil used. On average, a bottle filled with lamp oil can burn for approximately 6 to 8 hours, providing a cozy and romantic glow to any setting.
Conclusion
To conclude, making oil lamps from bottles is a simple yet creative way to add beauty and functionality to your space. By repurposing everyday items, you can create unique lighting solutions while reducing waste.
Whether for a cozy ambience or as an emergency light source, these DIY oil lamps offer a cost-effective and eco-friendly alternative.
So, gather your materials and get crafting to illuminate your surroundings with a touch of DIY charm.

I’m Emily Johnson, an affiliate marketer and blogger focused on lamps and lighting. I share honest reviews, simple buying guides, and practical tips. My goal is to help readers choose the right lamp for their space, style, and budget with confidence.