To paint a lamp, first ensure that the lamp is clean and dry. Next, apply painter’s tape to any areas that you don’t want to paint.
Painting a lamp is a great way to update its look and give it a fresh new style. Whether you want to match it to your existing decor or create a statement piece, painting a lamp can be a fun and rewarding DIY project. In this guide, we’ll walk you through the step-by-step process of how to paint a lamp like a professional.
From prepping the surface to choosing the right paint and applying the finishing touches, we’ll cover everything you need to know to achieve a flawless result. So if you’re ready to transform your old lamp into something beautiful and unique, let’s get started!
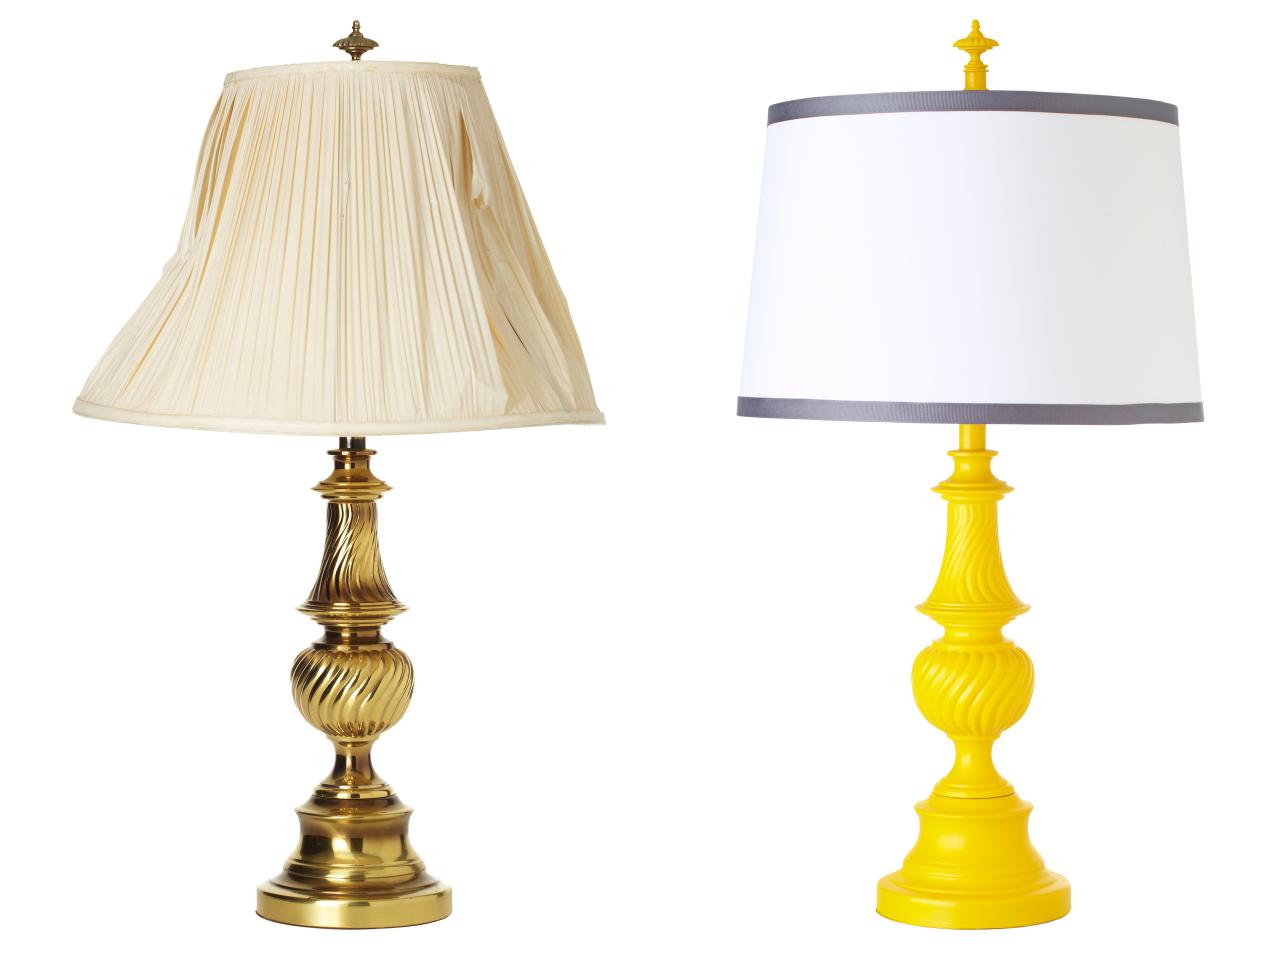
Credit: www.jennasuedesign.com
Tools and materials needed for painting a lamp
Before you begin painting your lamp, it is important to gather all the necessary tools and materials. Here is a list of items you will need:
-
Lamp base and shade
-
Screwdriver
-
Sandpaper (medium and fine grit)
-
Primer
-
Paint (acrylic or spray paint)
-
Paintbrushes (small and medium-sized)
-
Painter’s tape
-
Drop cloth or newspaper
-
Clear topcoat (optional)
-
Decorative elements (optional)
Having these tools and materials on hand will ensure that you have everything you need to successfully complete your lamp painting project.
Preparing the lamp for painting
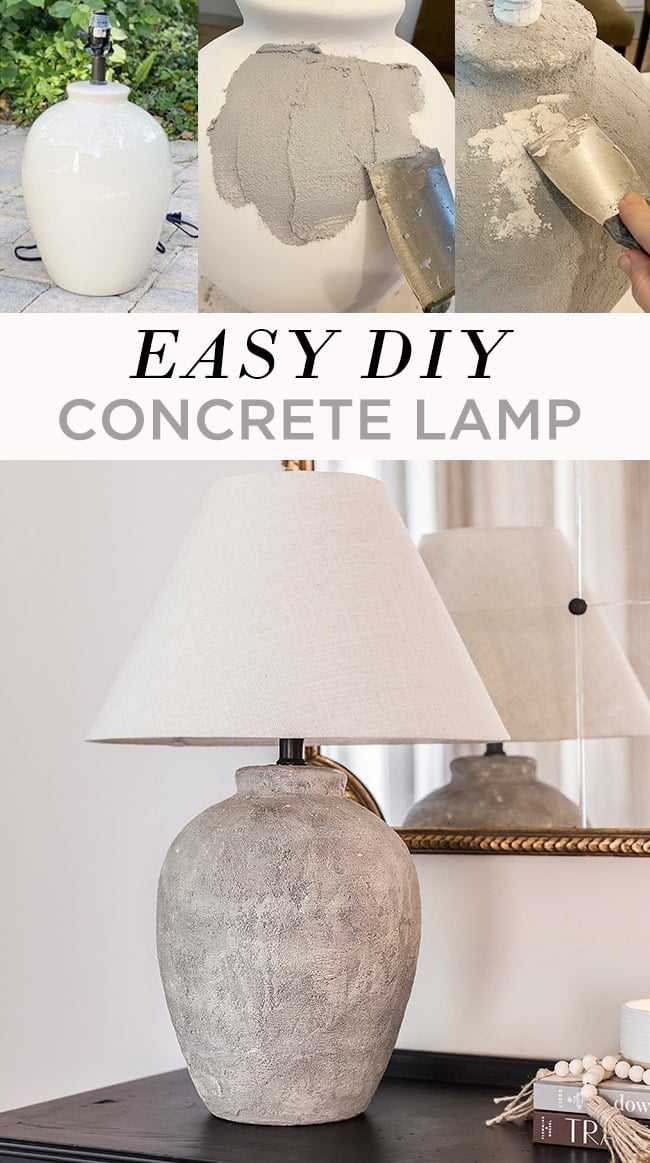
The first step in painting a lamp is to prepare the lamp base and shade for painting. Start by removing the lampshade and any other detachable parts, such as the harp or finial, using a screwdriver. Set these aside in a safe place.
Next, use medium-grit sandpaper to lightly sand the surface of the lamp base and shade. This will help to remove any existing finish or roughen up the surface, allowing the paint to adhere better. After sanding, wipe down the lamp with a damp cloth to remove any dust or debris.
If the lamp base or shade has any imperfections or cracks, now is the time to repair them. Use wood filler or epoxy putty to fill in any cracks or holes, and sand the area smooth once it is dry. This will ensure that your painted lamp has a smooth and flawless finish.
Choosing the right paint for your lamp
When it comes to choosing the right paint for your lamp, there are a few factors to consider. First, decide whether you want to use acrylic paint or spray paint. Acrylic paint is great for small projects and allows for more control and precision. Spray paint, on the other hand, is ideal for larger projects or when you want to achieve a smooth and even finish.
Next, consider the type of surface you are painting. If your lamp base or shade has a glossy or shiny finish, it is recommended to use a primer before applying the paint. The primer will help the paint adhere to the surface and prevent any chipping or peeling.
Lastly, think about the color and finish you want for your lamp. Consider the overall aesthetic of the room where the lamp will be placed and choose a color that complements the decor.
Additionally, decide if you want a matte, satin, or glossy finish. Keep in mind that a glossy finish can highlight imperfections, while a matte finish can give a more rustic or vintage look.
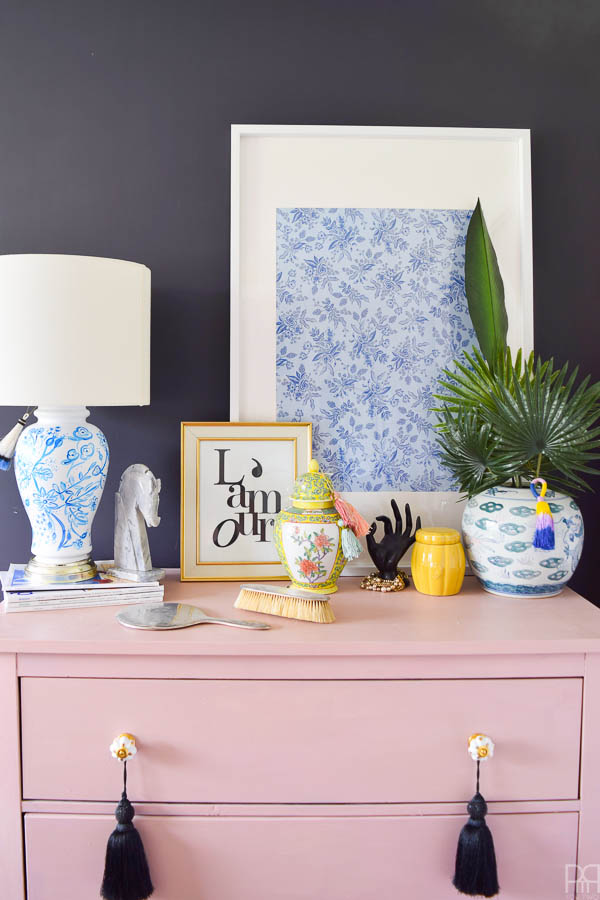
Credit: www.pmqfortwo.com
Lamp Makeover Magic: How to Paint Your Lamp Like a Pro
Now that you have gathered the necessary tools and materials and prepared the lamp for painting, it’s time to start painting! Follow this step-by-step guide to achieve a professional finish:
-
Step 1: Protect the surrounding area – Lay down a drop cloth or newspaper to protect the surface underneath the lamp from any paint splatters or spills.
-
Step 2: Apply primer (if necessary) – If your lamp base or shade has a glossy or shiny finish, apply a thin coat of primer and let it dry completely before painting.
-
Step 3: Apply the first coat of paint – Start by applying a thin and even coat of paint to the lamp base. Use smooth brush strokes or even sprays if using spray paint. Let the first coat dry completely before applying additional coats.
-
Step 4: Apply additional coats (if needed) – Depending on the color and finish you are trying to achieve, you may need to apply multiple coats of paint. Allow each coat to dry before applying the next one, and make sure to follow the manufacturer’s instructions for drying times.
-
Step 5: Paint the lampshade (if desired) – If you want to paint the lampshade, use the same technique as painting the lamp base. Keep in mind that depending on the material of the lampshade, you may need to use a fabric-specific paint or a spray adhesive before painting.
-
Step 6: Let the paint cure – Once you have achieved the desired color and finish, allow the paint to cure for at least 24 hours before reassembling the lamp.
Tips and tricks for achieving a professional finish
To ensure that your painted lamp looks like it was done by a pro, here are some tips and tricks to keep in mind:
-
Prepare the surface properly – Properly sanding and priming the lamp base and shade will create a smooth and even surface for the paint to adhere to.
-
Use thin coats of paint – Applying thin coats of paint will prevent drips and allow for better control and coverage. It is better to apply multiple thin coats than one thick coat.
-
Allow for proper drying time – Patience is key when it comes to painting a lamp. Make sure to follow the manufacturer’s instructions for drying times between coats and before reassembling the lamp.
-
Consider adding a topcoat – If you want extra protection or a glossy finish, consider applying a clear topcoat once the paint has dried. This will help seal the paint and make it more durable.
-
Get creative with decorative touches – Once the paint has dried, you can add decorative touches to your painted lamp. Consider stenciling a design, adding a decal, or using metallic paint for an extra touch of elegance.
Adding decorative touches to your painted lamp
Now that you have successfully painted your lamp, it’s time to add some decorative touches to make it truly unique. Here are some ideas to inspire you:
-
Stenciling – Use a stencil and acrylic paint to add a pattern or design to the lamp base or shade. This can range from simple geometric shapes to intricate floral motifs.
-
Decals or stickers – Apply decorative decals or stickers to the lamp base or shade. This can be anything from a favorite quote or phrase to a whimsical image or pattern.
-
Metallic accents – Use metallic paint to add accents or details to your painted lamp. This can be done by painting the base or shade with a metallic color or by adding metallic accents with a small brush.
-
Mixed media – Get creative and incorporate other materials into your lamp design. Consider adding fabric, ribbon, or even beads to the lampshade for a textured and unique look.
Remember, the possibilities are endless when it comes to adding decorative touches to your painted lamp. Let your creativity shine and have fun with the process!
Caring for your painted lamp
To ensure that your painted lamp stays looking fresh and beautiful for years to come, it is important to properly care for it. Here are some tips for caring for your painted lamp:
-
Dust regularly – Use a soft, dry cloth or a feather duster to remove any dust or debris from the lamp base and shade. Avoid using harsh chemicals or abrasive materials that can scratch or damage the paint.
-
Avoid direct sunlight – Direct sunlight can cause the paint to fade or discolor over time. If possible, place your painted lamp away from direct sunlight or use UV-protective window film or curtains.
-
Handle with care – When moving or handling your painted lamp, be gentle to avoid any chipping or scratching. If necessary, use a soft cloth or gloves to protect the painted surface.
By following these simple care tips, you can enjoy your beautifully painted lamp for many years to come.
Inspiring lamp painting ideas
Looking for some inspiration for your lamp painting project? Here are some ideas to get you started:
-
Ombre effect – Create a beautiful ombre effect by painting the lamp base or shade with different shades of the same color. Start with a darker shade at the bottom and gradually lighten the color as you move upward.
-
Color blocking – Paint the lamp base and shade with contrasting colors for a bold and modern look. Consider using complementary colors or even metallic and neutral tones for an elegant touch.
-
Nature-inspired – Bring the beauty of nature indoors by painting your lamp with floral or botanical motifs. Consider using soft pastel colors for a delicate and feminine look.
-
Abstract art – Let your creativity flow and create an abstract masterpiece on your lamp base or shade. Use bold and vibrant colors for a statement piece or opt for a more muted and subtle palette for a minimalist look.
Remember, these ideas are just a starting point. Let your imagination run wild and create a lamp that reflects your personal style and taste.

Credit: www.amazon.com
Frequently Asked Questions On How To Paint A Lamp
What Paint Do You Use To Paint A Lamp?
You can use Rust-Oleum spray paint to paint a lamp. Make sure the lamp is clean and dry before painting. Use painter’s tape to protect areas you don’t want to paint. Spray paint can also be used on ceramic lamp bases.
Acrylic paint and chalk paint are other options for lamp makeovers.
Can You Paint A Lamp Base With Acrylic Paint?
Yes, you can paint a lamp base with acrylic paint. It’s a simple process that can transform an ordinary lamp into something unique and special.
Can I Spray Paint A Ceramic Lamp?
Yes, you can spray paint a ceramic lamp for a quick and easy makeover. Clean the lamp first, then use Rust-Oleum spray paint or acrylic paint to change its look. Make sure to protect the areas you don’t want to paint with painter’s tape.
How Do You Paint An Old Table Lamp?
To paint an old table lamp, lightly sand the surface for better paint adhesion. Use fine-grit sandpaper and wipe away dust with a tack cloth. Work in a well-ventilated area and protect your floors and work surfaces with tarps or newspapers.
Choose a paint like Rust-Oleum spray paint and make sure the lamp is clean and dry before painting. Add painter’s tape to areas you don’t want to paint.
Conclusion
Whether you want to give your old lamp a fresh look or transform a plain lamp into a statement piece, painting a lamp is a simple and effective way to update your home decor. By following the right steps and using the appropriate paint, you can achieve professional-looking results.
Remember to prep the lamp, apply even coats of paint, and finish with a sealant for long-lasting durability. With just a little time and effort, you can create a personalized and stylish lamp that perfectly complements your space. So go ahead, unleash your creativity, and give your lamps a new lease on life.

I’m Emily Johnson, an affiliate marketer and blogger focused on lamps and lighting. I share honest reviews, simple buying guides, and practical tips. My goal is to help readers choose the right lamp for their space, style, and budget with confidence.