
Learn how to make a table lamp from a bottle by following these simple steps. Gather an empty bottle, a bottle lamp kit, a lamp shade, and a light bulb.
Begin by drilling a hole in the back of the bottle for the electrical cord. Clean off any glass dust, then assemble the bottle lamp using the lamp kit. Finally, tighten the rest of the kit components and attach the lamp shade.
Voila! You now have a unique and stylish table lamp made from a bottle.
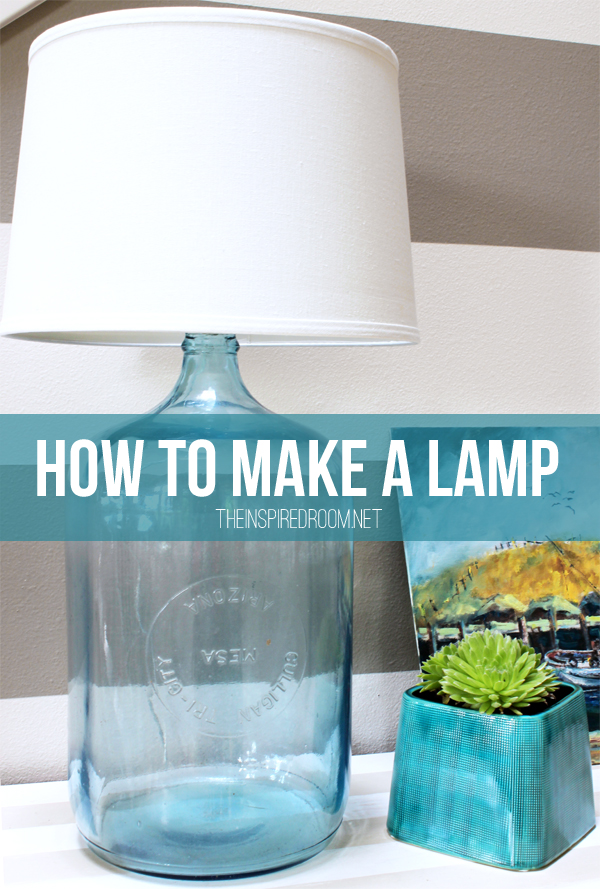
Credit: theinspiredroom.net
1. Introduction To Making A Table Lamp From A Bottle
Are you looking for a creative and eco-friendly way to brighten up your living space? Making a table lamp from a bottle is a fantastic DIY project that can add a touch of uniqueness to your home decor. Not only does it give new life to old bottles, but it also allows you to showcase your creativity.
In this article, we will guide you through the process of making a table lamp from a bottle, step by step. So let’s get started and transform a bottle into a stylish and functional lamp!
1.1 Why Make A Table Lamp From A Bottle
Making a table lamp from a bottle offers numerous benefits and advantages. Here are a few reasons why you should consider this DIY project:
- Cost-effective: It’s an affordable way to create a unique lamp without spending a fortune.
- Sustainability: By repurposing old bottles, you contribute to reducing waste and promoting sustainability.
- Customization: You can choose bottles that hold sentimental value or match your home decor, allowing you to create a personalized lamp.
- Artistic expression: Making a table lamp from a bottle allows you to unleash your creativity and showcase your artistic skills.
1.2 Materials And Tools Needed
Before you begin, gather the following materials and tools:
| Materials | Tools |
|---|---|
|
|
1.3 Safety Precautions
When working on this DIY project, it’s essential to take necessary safety precautions. Follow these guidelines to ensure your safety:
- Wear safety goggles and gloves to protect your eyes and hands while handling the drill and glass.
- Work in a well-ventilated area to avoid inhaling any dust or fumes.
- Use caution when drilling the bottle to prevent any accidents or injury.
- Unplug the lamp from the power source before making any adjustments or replacing the light bulb.
Now that you have a clear introduction to making a table lamp from a bottle, let’s dive into the step-by-step process to create your unique lamp. Stay tuned!
2. Step-by-step Guide To Making A Table Lamp From A Bottle
Are you looking to add a unique touch to your home decor? Making a table lamp from a bottle is a creative and budget-friendly DIY project that can instantly elevate the ambiance of any space. In this step-by-step guide, we will walk you through the process of turning a bottle into a stunning table lamp. Let’s get started!
2.1 Preparing The Bottle
The first step in making a table lamp from a bottle is to prepare the bottle itself. Follow these simple instructions:
- Choose an empty bottle that you find visually appealing or holds sentimental value. Clean the bottle thoroughly to remove any dirt or residue.
- Using painter’s tape, mark the spot on the bottle where you want to drill a hole for the lamp cord.
- Secure the bottle and drill the hole carefully using a glass drill bit.
- Remove the painter’s tape and clean the bottle again to eliminate any glass dust or debris.
2.2 Wiring The Lamp
Once the bottle is prepared, it’s time to wire your lamp. Follow these steps:
- Split the cord in half using a wire cutter, exposing the wires.
- Strip the insulation off the exposed wires, revealing the copper conductors.
- Connect the wires to the interior terminals of the lamp kit, ensuring a secure connection.
- Tighten the wire connections using a screwdriver or pliers, making sure they are firmly in place.
2.3 Assembling The Lamp
Now that the wiring is complete, it’s time to assemble your bottle lamp. Follow these instructions:
- Insert the lamp cord through the hole in the bottle, allowing the socket to rest at the base of the bottle.
- Secure the lamp socket in place using the provided locknut.
- Attach the harp and finial to the socket, if desired.
- Place the lamp based on a flat surface and position the bottle on top, ensuring it is stable.
2.4 Adding The Lampshade
Finally, complete your bottle lamp by adding a lampshade. Follow these final steps:
- Select a lampshade that complements the style and size of your bottle lamp.
- Attach the lampshade to the harp using a finial, ensuring it is securely in place.
- Turn on your newly created bottle lamp and enjoy the warm and inviting glow it brings to your space.
With these simple steps, you can transform a regular bottle into a stunning table lamp that adds a touch of elegance to your home decor. Get creative and experiment with different bottle shapes and colors to personalize your lamp and make it truly unique.
3. Alternative Methods To Make A Bottle Lamp Without Drilling
While drilling a hole in a bottle is a commonly used method to make a bottle lamp, there are alternative methods that you can explore if you don’t have access to a drill or prefer not to drill into your bottle. In this section, we will discuss three alternative methods to make a bottle lamp without drilling.
3.1 Using A Bottle Lamp Kit
If you want to make a bottle lamp without drilling, using a bottle lamp kit is a great option. A bottle lamp kit comes with all the necessary components you need to transform your bottle into a functional lamp. Here are the steps to follow:
- Select a bottle of your choice that you want to turn into a lamp.
- Ensure that the bottle is clean and free of any labels or residue.
- Attach the lamp socket to the opening of the bottle.
- Thread the electrical cord through the bottle and connect it to the lamp socket.
- Screw in a light bulb of your choice into the socket.
- Finally, attach a lampshade to the lamp socket and your bottle lamp is ready to use!
3.2 Using Fairy Lights
Another creative way to make a bottle lamp without drilling is by using fairy lights. Here’s how you can do it:
- Select a bottle that you want to turn into a lamp.
- Ensure that the bottle is clean and dry.
- Insert the fairy lights into the bottle, one set at a time, using a thin tool or your fingers.
- Arrange the fairy lights inside the bottle in a way that creates a beautiful and even distribution of light.
- Place the battery pack outside the bottle.
- Secure the battery pack in position using tape or adhesive.
- Turn on the fairy lights and enjoy the magical glow of your bottle lamp!
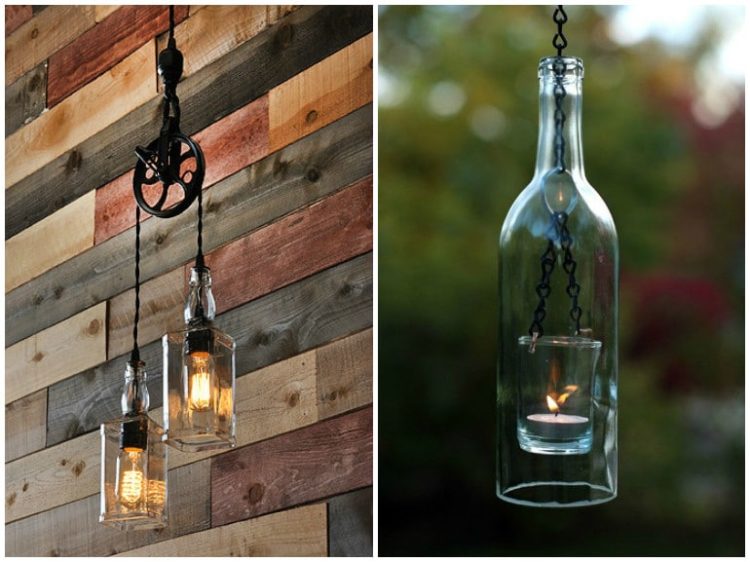
3.3 Using A Wine Cork Lamp Kit
If you have a wine bottle and want to repurpose it into a lamp, using a wine cork lamp kit is a fantastic option. Follow these steps to make a bottle lamp without drilling using a wine cork lamp kit:
- Select a wine bottle that you want to transform into a lamp.
- Ensure that the bottle is clean and free of any residue.
- Insert the wine cork lamp kit into the opening of the bottle.
- Thread the electrical cord through the wine cork and connect it to the lamp socket.
- Attach a light bulb to the lamp socket.
- Place a lampshade on the lamp socket to complete the look.
- Your beautiful wine bottle lamp is now ready to light up your space!
These alternative methods provide creative ways to make a bottle lamp without drilling. Whether you choose to use a bottle lamp kit, fairy lights, or a wine cork lamp kit, you can easily transform your bottle into a stylish and functional table lamp.
4. Creative Ideas For Decorating Your Bottle Lamp
Make your own table lamp from a bottle with these creative ideas for decorating. Transform an old bottle into a unique and personalized lamp that adds a touch of style to any room.
Once you have successfully transformed a bottle into a table lamp, it’s time to get creative and add your personal touch to make it truly unique.
There are numerous ways you can decorate your bottle lamp to match your style and add a touch of personality to your space. Here are some creative ideas to get you started:
4.1 Painting And Personalizing The Bottle
If you want to add a pop of color or a pattern to your bottle lamp, painting it is a great option. You can use various techniques such as spray painting, stencil painting, or even hand painting intricate designs. Start by cleaning the bottle thoroughly and let it dry completely. Then, apply a primer to ensure the paint adheres well to the surface.
Next, choose your desired paint color and brush on thin, even coats. Let each coat dry before applying the next one to avoid any drips or clumps. Once you achieve the desired color intensity, let the bottle dry completely. To personalize your lamp further, you can add initials, quotes, or decals using stickers or stencils.
4.2 Incorporating Unique Bottle Shapes
Why stick to traditional bottle shapes when you can get creative with unique ones? Explore different bottle shapes and sizes to add a distinct character to your lamp. Look for bottles with interesting curves, textures, or even unusual shapes like hourglasses or flasks. These unconventional bottle shapes will give your lamp a one-of-a-kind appeal and make it a conversation starter in your space.
4.3 Adding Embellishments And Accents
To elevate the aesthetics of your bottle lamp, consider adding embellishments and accents. You can use various materials such as beads, shells, buttons, ribbons, or even feathers to create a custom look. Start by selecting the desired embellishments that complement your overall decor theme.
To attach the embellishments, use a strong adhesive or a hot glue gun. You can create patterns, borders, or even cover the entire lamp base with your chosen materials. Be mindful of the proportions and make sure the embellishments are securely attached to avoid any accidents.
Additionally, you can also wrap decorative strings, ropes, or wires around the neck of the bottle for added visual interest.
By exploring these creative ideas, you can transform your bottle lamp into a true work of art that reflects your personal style and enhances the ambiance of your space. Each unique touch will make your lamp stand out and become a focal point in any room.
Credit: www.idlights.com
5. Conclusion And Final Thoughts
5.1 Recap Of The Lamp-making Process
Creating a table lamp from a bottle is an innovative way to upcycle and add a unique touch to your home decor. In this blog post, we have covered the step-by-step process of converting a bottle into a functional and stylish lamp.
| Steps | Description |
|---|---|
| Step 1 | Choose an empty bottle that you find aesthetically pleasing or has sentimental value. Clean the bottle thoroughly. |
| Step 2 | Using painter’s tape, mark the spot on the bottle where you will drill a hole for the electrical cord. |
| Step 3 | Drill a hole at the designated spot and remove the tape. Clean off any glass dust. |
| Step 4 | Assemble the bottle lamp kit by inserting the electrical cord through the hole and securing it with the provided hardware. |
| Step 5 | Attach the lampshade to the bottle lamp kit, ensuring it fits securely. |
5.2 Tips And Troubleshooting
- Choose a bottle with a wide enough neck to accommodate the lampshade.
- Before drilling, ensure the bottle is stable and won’t roll or move around.
- Use a diamond drill bit for clean and precise holes.
- If the cord doesn’t fit tightly into the hole, apply adhesive or tape to secure it.
- If your bottle lamp kit doesn’t include a lampshade, consider purchasing or crafting one that complements your decor.
- If you encounter any difficulties during the process, consult online tutorials or seek guidance from experts.
5.3 Showcasing Your Diy Bottle Lamp
After successfully creating your table lamp from a bottle, it’s time to display your handmade masterpiece. Place it on a side table, desk, or shelf to add a personalized touch to your living space.
Consider experimenting with different bottle shapes, sizes, and materials to create a collection of unique lamps that reflect your style. Take pride in your sustainable DIY project and inspire others to create their own upcycled masterpieces.
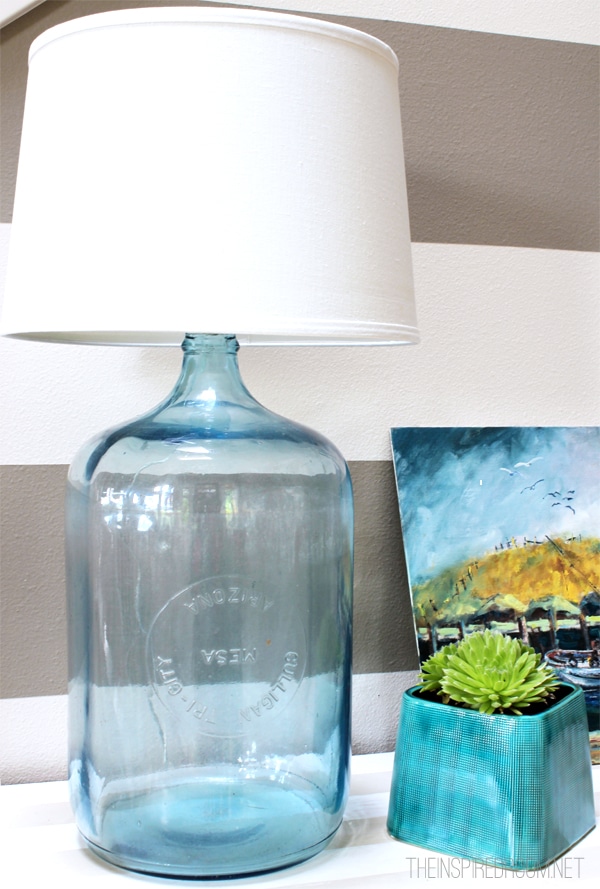
Credit: theinspiredroom.net
Frequently Asked Questions On How To Make A Table Lamp From A Bottle
How Do You Make A Table Bottle Lamp?
To make a table bottle lamp, follow these steps: 1. Drill a hole in the back of the bottle for the electrical cord. 2. Clean off any glass dust. 3. Assemble the bottle lamp. 4. Tighten the lamp kit components. 5.
Attach the lamp shade. That’s it! You now have a table bottle lamp.
Can I Turn A Bottle Into A Lamp?
Yes, you can easily turn a bottle into a lamp. All you need are an empty bottle, a bottle lamp kit, a shade, and a light bulb.
How Do You Make A Lamp Out Of A Plastic Bottle?
To make a lamp out of a plastic bottle, you will need an empty plastic bottle, a lamp kit, a light bulb, and a lampshade. First, drill a hole in the bottle for the electrical cord. Next, assemble the lamp kit and attach it to the bottle.
Finally, screw in the light bulb and attach the lampshade.
How Do You Make A Bottle Lamp Without Drilling?
To make a bottle lamp without drilling, you can use a wine cork lamp kit. Insert the bulb socket, mounted on a cork stopper, into an empty wine bottle, and you have a working lamp. No drilling is required for this DIY project.
Conclusion
Transforming a bottle into a table lamp is a simple and creative DIY project that adds a unique touch to your home decor. With just a few materials, like a bottle lamp kit, a light bulb, and a shade, you can easily create a stunning lamp that reflects your personal style.
Whether you prefer a sleek and modern design or a rustic and vintage look, the possibilities are endless. So, why not give it a try and illuminate your space with a custom-made bottle lamp? Get creative and let your imagination shine!

I’m Emily Johnson, an affiliate marketer and blogger focused on lamps and lighting. I share honest reviews, simple buying guides, and practical tips. My goal is to help readers choose the right lamp for their space, style, and budget with confidence.