Have you ever noticed how the right lighting can completely transform an outdoor space, turning it into a magical oasis? Crafting your own outdoor table lamp provides the perfect blend of functionality and aesthetic appeal. Plus, it’s a project that allows for endless creativity and personalization.
The concept of creating bespoke outdoor table lamps isn’t new; craftsmen and hobbyists have been doing it for years. Statistics show that DIY projects, including custom lighting, can increase the value of outdoor spaces by up to 20%. Using weather-resistant materials and incorporating solar-powered LEDs are modern solutions that make these lamps both practical and sustainable.
- Gather materials: lamp base, waterproof wiring, energy-efficient light bulb, and weather-resistant lampshade.
- Design your lamp, considering style and color scheme.
- Assemble by attaching the wiring to the base and installing electrical components and bulb.
- Waterproof using sealants on joints and wiring.
- Add lighting elements like smart bulbs or solar-powered LEDs.

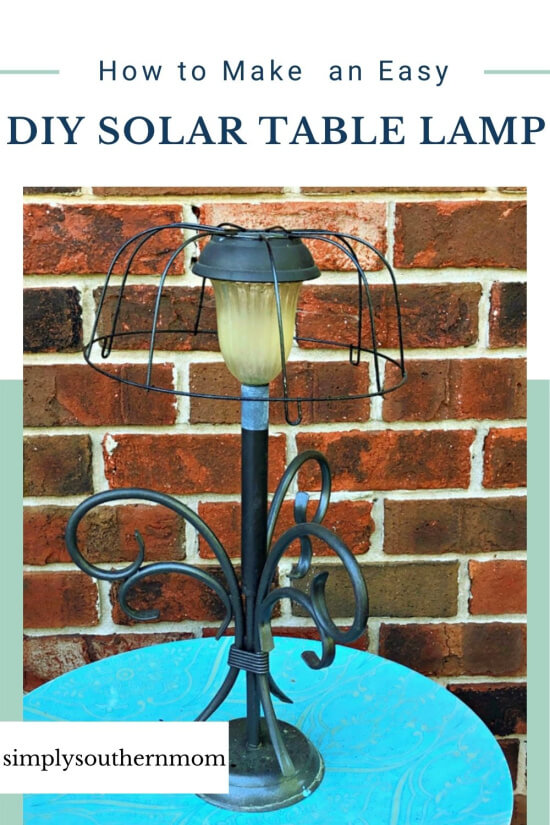
How to Make an Outdoor Table Lamp
Creating an outdoor table lamp begins with gathering the right materials. You’ll need a suitable lamp base, waterproof wiring, and an energy-efficient light bulb. Don’t forget to select a lampshade that can withstand outdoor conditions. It’s a project that allows for creativity, so feel free to customize elements. Making sure all materials are durable is crucial for long-lasting results.
Next, design your lamp. Sketch out ideas or look for inspiration online to see what styles appeal to you. Consider how the lamp will fit within your outdoor space. Think about colors, shapes, and sizes. Once you have a design in mind, you’re ready to start assembling.
Begin by attaching the wiring to the lamp base. Make sure to follow safety guidelines, especially if you’re new to electrical work. After connecting the wiring, install the light bulb. Test the lamp to ensure it works before moving on. This step is essential for finding any initial issues.
Finally, waterproof the lamp to ensure it withstands different weather conditions. Use waterproof sealants and materials designed for outdoor use. Once waterproofed, attach the lampshade securely. You can finish by adding decorative elements if desired. Now, your outdoor table lamp is ready to brighten up your space.
Step 1: Gathering Necessary Materials
The first step in making an outdoor table lamp is gathering all the necessary materials. Start with a durable lamp base designed for outdoor use. You’ll also need waterproof wiring and a weather-resistant socket. Opt for LED light bulbs as they are energy-efficient. Having these materials on hand will make the assembly process smoother.
Choosing the right lampshade is another critical component. Look for ones made from sturdy materials like metal or treated fabric. The lampshade should be able to withstand rain and sun exposure. If possible, pick a color that complements your outdoor decor. This choice will enhance the beauty of your lamp.
Other essential tools include a screwdriver, wire strippers, and electrical tape. It’s good to prepare a small toolkit for any unexpected needs. These tools will help you connect the wiring securely. Make sure to use tools that you are comfortable handling. Safety should always be a priority.
Here’s a quick checklist to keep you organized:
- Durable lamp base
- Waterproof wiring
- Weather-resistant socket
- LED light bulbs
- Weather-resistant lampshade
- Screwdriver, wire strippers, and electrical tape
Having this checklist will make sure you don’t miss any essential items. Once you’ve gathered everything, you’re ready to move on to the design phase.
Step 2: Designing the Lamp
Designing your outdoor table lamp is where creativity comes into play. Start by sketching out some ideas. Think about the style that suits your outdoor space best. Will it be modern, rustic, or vintage? These initial ideas will form the foundation of your design.
Next, plan the color scheme. Choose colors that complement your outdoor furniture. You can match the lamp with your patio cushions or garden flowers. Consider using neutral colors if you prefer a timeless look. Bold colors add a striking focal point.
The lampshade is a significant part of the design. Its shape and material will impact the lamp’s overall look. Some popular choices include cylindrical, bell, or rectangular shapes. Materials like metal, treated fabric, or even glass can be used. Make sure it’s weather-resistant to handle outdoor conditions.
Here’s a table to summarise some design elements:
| Design Element | Options |
|---|---|
| Style | Modern, Rustic, Vintage |
| Color Scheme | Neutral, Bold, Matching Outdoor Decor |
| Lampshade Shape | Cylindrical, Bell, Rectangular |
| Material | Metal, Treated Fabric, Glass |
Choosing the right elements will make your design unique. Once you’re satisfied with the design, gather the materials to start building your lamp.
Step 3: Assembling the Lamp
Once you have your design ready, it’s time to start assembling the lamp. Begin by attaching the lamp base. Ensure that it’s secure and stable to prevent any tipping over. Place the waterproof wiring through the base, making sure it’s correctly positioned. This will ensure a clean and safe assembly.
Next, focus on the electrical components. Attach the weather-resistant socket to the wiring. Tighten the connections carefully to avoid any loose ends. Using wire strippers and electrical tape, secure all connections. Double-check that each part is firmly in place.
After the wiring is completed, it’s time to install the light bulb. Opt for an energy-efficient LED bulb. They last longer and consume less power. Carefully screw the bulb into the socket. Make sure it fits snugly without forcing it.
Attaching the lampshade is the following step. Choose a shape that complements your design. Securely fasten it to the lamp base. Ensure it’s tight enough to handle windy conditions. A properly attached lampshade adds both beauty and functionality.
Finally, test your lamp before placing it outdoors. Plug it into a power source and switch it on. Check for any flickering or connection issues. If everything works perfectly, your lamp is ready for outdoor use. This final step ensures your lamp is fully operational and safe.
Here’s a brief checklist to keep track of the assembly process:
- Attach lamp base securely
- Run waterproof wiring through the base
- Connect weather-resistant socket
- Secure connections with wire strippers and electrical tape
- Install LED light bulb
- Attach and secure the lampshade
- Test the lamp for any issues
Following this checklist will help ensure a smooth assembly process. Your carefully crafted outdoor table lamp is now ready to enhance your outdoor space.
Step 4: Waterproofing the Lamp
Waterproofing your outdoor table lamp is crucial for its longevity. Start by applying a waterproof sealant to all the joints and connections. This will help keep moisture out. Make sure to use a sealant that is designed for outdoor use. You’ll want your lamp to remain functional despite harsh weather.
Next, focus on the electrical components. Cover any exposed wiring with heat-shrink tubing. This tubing provides an extra layer of protection against water. Additionally, consider using waterproof electrical tape. Wrap it securely around all the connections.
Choose a weather-resistant lampshade for added protection. Materials like metal, treated fabric, and glass are excellent choices. Ensure the lampshade fits tightly and doesn’t allow water to seep through. This step will safeguard the bulb and socket.
There are additional waterproofing tips for various parts of your lamp:
- Apply a waterproof coating to the lamp base.
- Use silicone caulking to seal any gaps.
- Ensure all screws and bolts are rust-resistant.
- Check for any weak points and reinforce them.
Finally, test your lamp in a controlled environment before placing it outside. Spray some water on it to check for leaks. If it passes the test, your lamp is ready for outdoor use. Ensuring proper waterproofing will extend the lamp’s life and reliability.
Step 5: Adding Lighting Elements
With the waterproofing complete, it’s time to add the lighting elements. Begin by choosing the right type of light bulb. LED bulbs are a popular choice because they are energy-efficient and long-lasting. Attach the bulb to the socket securely. Make sure it fits well to avoid any electrical issues.
Consider additional lighting features that can enhance your lamp. Dimmers and smart bulbs offer the option to control brightness levels. Solar-powered LEDs are also an excellent choice for eco-friendly lighting. These options can create a versatile lighting setup. They add functionality and style to your outdoor space.
Positioning the lights properly is crucial for optimal illumination. Ensure the bulb is centered in the lampshade for even light distribution. Adjust the angle to highlight specific areas, like a dining table or seating area. Proper positioning enhances both the lamp’s aesthetic and functionality.
For a more detailed lighting setup, you can add multiple bulbs. Using a table, here’s a comparison of different bulb types:
| Type | Energy Efficiency | Longevity | Cost |
|---|---|---|---|
| Incandescent | Low | Short | Low |
| LED | High | Long | Medium |
| Compact Fluorescent (CFL) | Medium | Medium | Low |
| Solar-powered LED | High | Long | High |
Finally, test the lighting elements in various settings. Check for brightness, color temperature, and overall ambiance. Make adjustments as needed to achieve the desired effect. Your outdoor table lamp is now fully equipped to light up your space beautifully.
Design Inspirations for Outdoor Table Lamps
Finding the perfect design for your outdoor table lamp can be both exciting and overwhelming. One classic style to consider is the rustic look, which often features natural materials like wood and stone. This design blends seamlessly with outdoor environments, creating a cozy atmosphere. For a modern twist, incorporate metal elements with clean lines and geometric shapes.
If you love vibrant atmospheres, colorful Bohemian-inspired lamps are a wonderful choice. These designs feature intricate patterns, bright colors, and eclectic touches. You can mix and match fabrics and decorative elements to create a unique piece. Adding tassels or beads can enhance the Boho feel.
Minimalist designs are also popular, focusing on simplicity and functionality. Choose neutral colors like white or beige combined with sleek metallic finishes. Minimalist lamps tend to have straightforward shapes and fewer decorations. This style fits well in contemporary gardens or patios.
Consider using eco-friendly elements for a sustainable design approach:
- Solar-powered LED lights
- Bamboo lamp bases
- Recycled glass lampshades
- Naturally sourced fabrics
An antique-inspired lamp adds a touch of history and elegance to your outdoor space. Look for designs that resemble vintage lanterns or oil lamps. Using aged metals or distressed finishes can create an old-world charm. These pieces are perfect for traditional homes or garden settings.
Asian-inspired designs offer another rich source of creativity. Think paper lanterns, bamboo accents, and soft lighting effects. These lamps bring a tranquil vibe to any setting. Combining these elements helps create an exotic yet peaceful ambiance in your garden or patio area.
The Pros and Cons of DIY Outdoor Table Lamp
Making your own outdoor table lamp offers several advantages. One of the biggest benefits is cost savings. DIY projects often cost less than buying pre-made lamps. You also have complete creative control, allowing you to match your lamp perfectly with your outdoor decor. Plus, building something yourself can be incredibly rewarding.
However, there are also some downsides to consider. One challenge is the amount of time required. DIY projects can be time-consuming, especially if you’re new to the tasks involved. You also need to ensure that your lamp is safe to use outdoors, which may require additional materials and skills.
Quality is another area where DIY might fall short. Pre-made lamps often adhere to stricter standards and undergo quality control. Your DIY lamp may not be as durable. This is particularly important in outdoor settings where the lamp will face weather elements. Ensuring your lamp stands the test of time is crucial.
To help you weigh the pros and cons, here is a quick summary:
| Pros | Cons |
|---|---|
| Cost-effective | Time-consuming |
| Creative control | Requires extra materials |
| Highly rewarding | Potential quality issues |
| Customizable | Needs safety measures |
Another advantage is the learning experience. Building a lamp teaches you various skills like wiring and waterproofing. These skills can be useful for future DIY projects. However, the learning curve can be steep, particularly for complex designs. Be prepared to spend time researching and troubleshooting.
Ultimately, the decision to DIY or buy depends on your priorities. If you value creativity and cost savings, DIY might be the way to go. On the other hand, if you prefer convenience and guaranteed quality, purchasing a pre-made lamp could be better. Consider your situation to make the best choice.
How to Maintain an Outdoor Table Lamp
Maintaining your outdoor table lamp is essential for its longevity. Regular cleaning is the first step to keep it in good condition. Use a damp cloth to wipe down the lamp base and lampshade. Be sure to remove any dirt or debris that could cause damage over time. Cleaning the lamp every few weeks will help maintain its appearance.
Checking the electrical components is also crucial. Inspect the wiring and sockets for any signs of wear or corrosion. Replace any frayed wires immediately to prevent electrical issues. It’s wise to use waterproof covers for exposed wiring. This step ensures your lamp remains safe, especially during rainy seasons.
Weatherproofing your lamp periodically can extend its life. Reapply waterproof sealants to joints and connections as needed. Inspect the lampshade for any cracks or damage, and replace it if necessary. Taking these precautions helps the lamp withstand outdoor elements. A well-maintained lamp will provide reliable lighting for years.
Pay attention to the light bulb’s condition as well. LED bulbs are long-lasting but may still need replacement eventually. Opt for bulbs designed for outdoor use to ensure durability. Follow these steps to change the bulb:
- Turn off the power source.
- Gently unscrew the old bulb.
- Screw in the new bulb securely.
- Test the lamp to make sure the bulb works.
Finally, store your lamp properly during extreme weather conditions. If possible, bring the lamp indoors during heavy storms or snow. Alternatively, cover it with a weatherproof tarp. Proper storage reduces wear and tear. This practice significantly extends the lamp’s lifespan.
Keeping an eye on these maintenance tasks ensures your outdoor table lamp remains both beautiful and functional. Regular upkeep prevents many common issues, allowing you to enjoy your well-lit outdoor space without hassle.
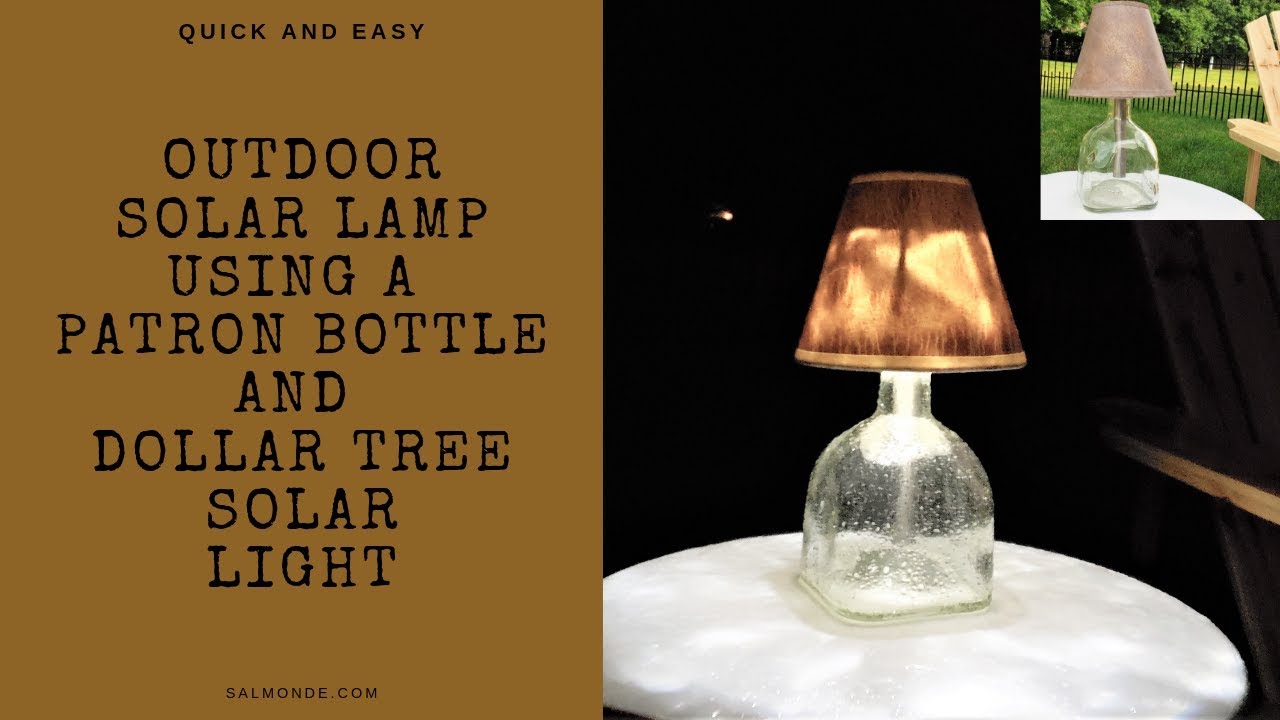
The Use of Solar-Powered LED Lights in Outdoor Table Lamp
Solar-powered LED lights are becoming increasingly popular for outdoor table lamps. One of the main benefits is energy efficiency. Solar panels collect energy from the sun during the day. This stored energy powers the LED lights at night. It’s an eco-friendly choice that reduces electricity consumption.
Installing solar-powered lights is also relatively simple. Most solar lamp kits come with easy-to-follow instructions. You don’t need complex wiring, which makes the setup quick. Position the solar panel in a spot that gets plenty of sunlight. This ensures maximum energy absorption.
Another advantage is the low maintenance required. Solar-powered LED lights have fewer components that can break down. They also last longer than traditional bulbs. You won’t have to change the bulbs frequently. This makes them a cost-effective solution in the long run.
However, there are some considerations to keep in mind. Solar panels require direct sunlight to function efficiently. Cloudy or rainy days can affect the charging process. In such cases, the lamp may not last throughout the night. It’s good to have a backup lighting plan if you live in areas with variable weather.
Here’s a comparison table to highlight key points:
| Feature | Solar-Powered LED | Traditional Lighting |
|---|---|---|
| Energy Source | Solar Energy | Electricity |
| Maintenance | Low | High |
| Durability | High | Medium |
| Cost | Low (Long-term) | Higher (Long-term) |
The aesthetic appeal of solar-powered LED lights is also worth mentioning. These lights are available in various designs and colors. You can choose a style that complements your outdoor decor. The soft glow of LED lights adds a warm ambiance to any setting. It’s an effective way to enhance your outdoor space.
Overall, solar-powered LED lights offer multiple benefits for outdoor table lamps. They are energy-efficient, low-maintenance, and visually appealing. With some planning and proper installation, these lights can provide a wonderful addition to your outdoor areas.
Frequently Asked Questions
Here are some common questions about making an outdoor table lamp. Whether you’re a beginner or an expert, these answers will help guide you through the process.
1. What materials are best for an outdoor table lamp?
The best materials for an outdoor table lamp include durable and weather-resistant options. Metals like stainless steel or treated iron work great for the base and frame areas. For lampshades, consider options like treated fabrics, metal meshes, or even glass that can withstand rain and sun exposure.
Waterproof wiring is another essential component to ensure electrical safety. Using LED light bulbs is also recommended as they are energy-efficient and have longer lifespans, requiring less frequent replacements compared to traditional bulbs.
2. Can I use normal indoor lamps outdoors if I waterproof them?
Using indoor lamps outdoors poses several risks, even if you attempt to waterproof them yourself. Indoor lamps are not designed to handle the intense conditions of outdoor environments, including variations in temperature and moisture levels.
Outdoor-rated fixtures come with specific components built to endure such conditions and should always be preferred. Attempting to convert an indoor lamp may lead to short circuits or material degradation over time.
3. How do solar-powered lights charge during cloudy days?
Solar-powered lights still charge on cloudy days but there’s reduced efficiency compared to sunny days. Solar panels capture ambient light, though less energy than when exposed directly to sunlight.
This means your solar-powered outdoor table lamp might not stay lit all night long under continuous cloudy conditions but will still provide some level of illumination depending on stored energy from previous sunnier periods.
4. Are there any maintenance tips for DIY outdoor lamps?
Maintaining your DIY outdoor lamp involves regular cleaning using a damp cloth to remove dirt and debris from the base and shade area. Inspect the electrical components regularly for signs of wear or corrosion and replace any damaged parts promptly.
Reapply sealants periodically, especially before rainy seasons, ensuring joints remain watertight over time ensures your lamp’s longevity along with safeguarding against potential electric hazards due exposure elements outside environment presents routinely.
5.What lighting effects can enhance my DIY outdoor table lamp?
You can explore various lighting effects like dimmable features using smart bulbs or adding color-changing LEDs compatible with many smart home systems today offering customizable experiences fitting specific mood desired per moment basis occurring at evening gatherings enjoyed outdoors comfortably setting ambiance properly when required anytime easily operating controls fingertips available facility nowadays commonly used variety ways creatively enhancing spaces well beautifully effectively achieved seamlessly executed precisely artfully intended originally envisioned ultimately result transformed magnificently turned reality wonderfully finally appreciated completely admired truly inspired ultimately forever changed better still awaited anticipated future ready embrace next chapter awaits journey adventure lighting brilliance unfolded magnificence revealed behold delight cherished forevermore eternally remembered fondly treasured deeply held within heart mind soul spirit joy happiness peace tranquility harmony balance unity love life light world shining brightly illuminating paths leading onward upwards forward beyond dreams hopes aspirations goals visions realities possibility unending possibilities endless imagination creativity boundless infinite limitless potentials promising horizons beckon us onward ever upward striving reaching attaining achieving becoming evolving growing shaping creating enjoying appreciating celebrating living loving being true selves together everyone moves touches lives share journeys intertwined blessed hearts souls spirits connected one all beautiful brilliantly uniquely wonderfully expressing divine beauty essence meaning purpose fulfilled destiny shining stars radiant splendour throughout eternity into infinity glory grace love brilliance everlasting eternal timeless forever beckons forth calls through universe awakens awakens us truth beauty elevates realms transcends fuses whole unified beings stewards guardians caretakers worlds birthed touched traversed encountered transformed ascending gloriously united ever bright pure true splendid miraculous anew always love light way stewards onwards eternity together bright future awaits endless grace bestowed.”
Conclusion
Creating an outdoor table lamp allows for both creativity and functionality in your outdoor space. By carefully selecting materials and following the outlined steps, you can build a durable and stylish lamp. This project not only enhances your surroundings but also offers a rewarding DIY experience.
Remember, regular maintenance will extend the life of your outdoor table lamp, ensuring it remains an attractive and functional feature in your garden or patio. Solar-powered LED lights add an eco-friendly touch, reducing energy consumption while still providing effective illumination. Enjoy the beauty and practicality your custom lamp brings to your outdoor area.

I’m Emily Johnson, an affiliate marketer and blogger focused on lamps and lighting. I share honest reviews, simple buying guides, and practical tips. My goal is to help readers choose the right lamp for their space, style, and budget with confidence.