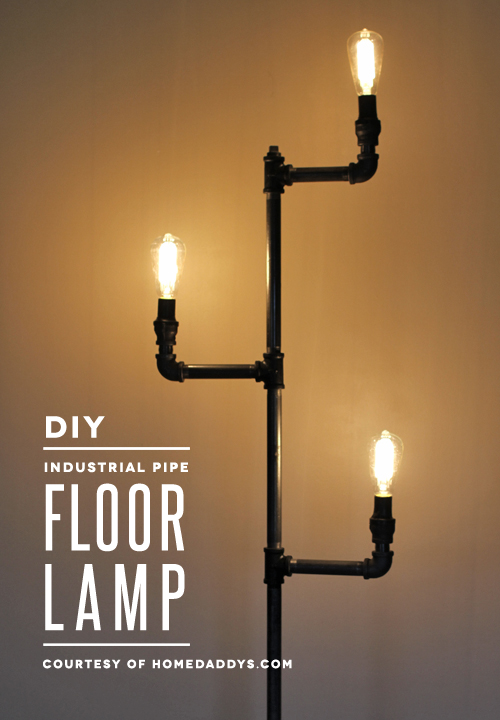
To make a pipe floor lamp, gather pipe fittings, wire, a light socket, and a bulb. Assemble the pipes and fittings, attach the socket, wire it, and screw in the bulb.
Creating a unique and industrial-style lamp using pipes is a fun and creative project. It’s a perfect way to add a personalized touch to your home decor. By following a few simple steps, you can easily craft a stylish and functional pipe floor lamp that will brighten up any room.
With the right materials and a little bit of effort, you can enjoy the satisfaction of creating a beautiful and one-of-a-kind lighting fixture for your home. Whether you’re a seasoned DIY enthusiast or just looking to start a new hobby, making a pipe floor lamp can be an enjoyable and rewarding experience.
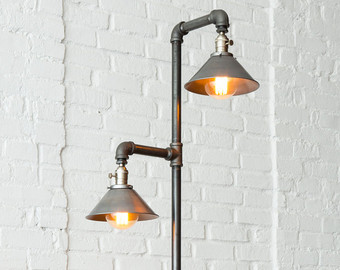
Credit: www.detroitnippleworks.com
Benefits of making your own pipe floor lamp
Making your own pipe floor lamp has several advantages. First and foremost, it allows you to have complete control over the design and aesthetics of the lamp. You can choose the shape, size, and color of the pipes, as well as the type of bulb and shade that best suits your taste and the decor of your room.
Additionally, by making it yourself, you can save money compared to buying a ready-made lamp from a store. DIY projects are often more cost-effective, and you can repurpose materials or use affordable alternatives to achieve the desired look. Lastly, the satisfaction and sense of accomplishment that comes from creating your own unique piece of functional art are truly rewarding.
Tools and materials needed for a pipe floor lamp project
Before you embark on your pipe floor lamp project, it’s important to gather all the necessary tools and materials to ensure a smooth and efficient process. Here are the key items you will need:
-
Pipes: Select sturdy and durable metal pipes of your choice. You can find them at your local hardware store or salvage them from old furniture or plumbing fixtures.
-
Lamp socket and cord set: Choose a socket and cord set that fits your design and electrical requirements. Make sure it is compatible with the bulb wattage you plan to use.
-
Bulb: Select a bulb that suits your lighting needs and complements the overall design of your lamp.
-
Lampshade: Pick a lampshade that enhances the aesthetic appeal of your lamp while diffusing the light in a pleasing manner.
-
Tools: You will need a pipe cutter, a wrench, a screwdriver, and a wire stripper. These tools will help you cut and assemble the pipes, attach the socket and cord, and connect the electrical components safely.
How to Make a Pipe Floor Lamp? DIY Lighting Guide for You
Embarking on a do-it-yourself (DIY) project to create a pipe floor lamp can be a rewarding and creative endeavor. Crafting your own lighting fixture allows for personalization and the satisfaction of building something functional.
In this guide, we’ll walk you through the steps of making a stylish and unique pipe floor lamp, adding a touch of handmade charm to your living space. Let’s illuminate the path to your DIY lighting project with this step-by-step guide.
1. Design and plan:
Start by sketching out your lamp design and taking measurements. Determine the desired height and shape of your lamp, as well as the placement of the socket and lampshade. This will serve as a blueprint for your project.
2. Prepare the pipes:
Using a pipe cutter, cut the metal pipes to the desired lengths according to your design. Make sure to wear safety goggles and work in a well-ventilated area. Smooth the edges of the cut pipes using sandpaper to avoid any sharp edges.
3. Assemble the pipes:
Begin by connecting the pipes using pipe fittings and connectors. Use a wrench to tighten the joints securely. Follow your design plan to assemble the pipes in the desired configuration.
4. Install the socket:
Attach the socket to the top of the lamp using a wrench. Ensure that it is securely fastened and positioned correctly. Follow the manufacturer’s instructions for wiring and connecting the socket.
5. Wire the lamp:
Strip the insulation from the ends of the lamp cord using a wire stripper. Connect the wires to the corresponding terminals on the socket, following the color-coding or wiring diagram provided with the socket. Use wire nuts to secure the connections and electrical tape to insulate them.
6. Add the bulb and lampshade:
Screw in the bulb of your choice into the socket. Then, carefully attach the lampshade to the top of the lamp. Make sure it is centered and secure.
7. Test and adjust:
Before plugging in your lamp, double-check all the connections and ensure that everything is properly assembled. Once you are confident in the safety and functionality of your lamp, plug it in and test it. Adjust the lampshade and the position of the pipes if needed to achieve the desired lighting effect.
Tips and tricks for achieving a professional-looking pipe floor lamp
While making a pipe floor lamp can be a fun and rewarding project, it’s important to pay attention to the details to achieve a professional-looking result. Here are some tips and tricks to help you along the way:
-
Plan ahead: Take the time to sketch out your design, measure accurately, and gather all the necessary materials before starting the project. This will ensure a smoother and more efficient process.
-
Choose the right pipes: Select pipes that are sturdy, durable, and aesthetically pleasing. Consider the thickness, color, and finish of the pipes to match your desired look.
-
Pay attention to proportions: Consider the height, width, and overall balance of your lamp. Make sure it is proportionate to the space it will occupy and the furniture around it.
-
Experiment with different finishes: You can paint or apply a protective coating to the pipes to achieve different finishes. This can add visual interest and help the lamp blend seamlessly with your decor.
-
Add decorative elements: Consider incorporating additional elements such as decorative knobs, brass accents, or unique lampshade designs to personalize your lamp and make it truly stand out.
-
Ensure proper electrical connections: Take extra care when wiring the lamp to ensure the connections are secure and the electrical components are properly insulated. If you are unsure about electrical work, it’s best to consult a professional.
By following these tips and tricks, you can create a pipe floor lamp that looks polished and sophisticated, adding a touch of elegance to your space.
Creative ideas for customizing your pipe floor lamp
One of the greatest advantages of making your own pipe floor lamp is the ability to unleash your creativity and customize it to suit your personal style. Here are some creative ideas to inspire you:
-
Industrial chic: Embrace the raw and rugged aesthetic of industrial design by using black iron pipes and Edison bulbs. This combination creates a vintage-inspired look that adds character to any space.
-
Minimalist elegance: For a sleek and modern look, opt for slim and clean-lined pipes in a metallic finish. Pair them with a simple, cylindrical lampshade in a neutral color for an understated yet elegant vibe.
-
Colorful statement: Make a bold statement by painting the pipes in vibrant colors that complement your room’s color scheme. Pair them with a contrasting lampshade to create a visually striking piece.
-
Rustic charm: If you prefer a more rustic and natural look, consider using copper pipes or repurposing old wooden boards as the base for your lamp. This adds warmth and character to your space.
-
Nautical theme: Create a lamp with a nautical flair by incorporating rope accents or using galvanized pipes for a boat-inspired look. Pair it with a lampshade made from natural materials like burlap or linen.
Remember, the possibilities are endless when it comes to customizing your pipe floor lamp. Let your imagination run wild and create a lamp that reflects your unique style and personality.
Safety precautions to consider when working with electrical components
Working with electrical components requires caution and adherence to safety guidelines. Here are some important safety precautions to keep in mind when making a pipe floor lamp:
-
Turn off the power: Before starting any electrical work, make sure to turn off the power at the circuit breaker to avoid the risk of electric shock.
-
Handle with care: Always handle electrical components with dry hands and avoid touching exposed wires or terminals while the power is on.
-
Insulate connections: Use appropriate wire nuts and electrical tape to insulate and secure the electrical connections. This will prevent short circuits and potential hazards.
-
Avoid overloading circuits: Ensure that the total wattage of the bulbs used in your lamp does not exceed the capacity of the circuit you are connecting it to. Overloading can cause fires or damage to the electrical system.
-
Consult a professional: If you are unsure about any aspect of electrical work, it’s best to consult a qualified electrician to ensure your safety and the proper functioning of your lamp.
By following these safety precautions, you can enjoy the process of creating your pipe floor lamp while prioritizing your well-being.
Inspiration and examples of stunning pipe floor lamp designs
To further ignite your creativity and provide inspiration for your pipe floor lamp project, here are some examples of stunning designs:
-
The Industrial Loft: This design features a combination of black iron pipes, exposed Edison bulbs, and a wire cage lampshade. It exudes a vintage and industrial charm, perfect for loft-style apartments.
-
The Mid-Century Modern: With sleek brass pipes, a white globe shade, and a tripod base, this design embodies the elegance and simplicity of mid-century modern aesthetics.
-
The Steampunk Masterpiece: This design incorporates brass pipes, vintage pressure gauges, and a unique, handcrafted lampshade made from salvaged materials. It captures the essence of the steampunk genre and adds a touch of whimsy to any room.
-
The Minimalist Beauty: Featuring slim black pipes, a geometric lampshade, and a marble base, this design is minimalistic yet striking. It complements contemporary interiors and adds a touch of sophistication.
By exploring different designs and styles, you can find inspiration for your own pipe floor lamp and create a statement piece that truly reflects your taste.
Where to find additional resources and tutorials for pipe floor lamp projects
If you’re looking for more guidance and detailed tutorials on how to make a pipe floor lamp, there are several resources available online. Here are some popular websites and platforms where you can find additional information:
-
YouTube: Search for DIY pipe floor lamp tutorials on YouTube. Many creators share their projects, step-by-step instructions, and valuable tips to help you along the way.
-
Pinterest: Explore Pinterest for a plethora of design ideas, tutorials, and inspiration for pipe floor lamps. Pin your favorite designs to create a mood board and visualize your project.
-
DIY blogs and websites: Visit DIY blogs and websites dedicated to home decor and lighting projects. They often provide comprehensive guides, material lists, and detailed instructions for making your own pipe floor lamps.
By utilizing these resources, you can gather more knowledge and inspiration to enhance your pipe floor lamp project and make it truly exceptional.
Frequently Asked Questions For How To Make A Pipe Floor Lamp
What Materials Are Needed To Make A Pipe Floor Lamp?
To make a pipe floor lamp, you’ll need a pipe kit, lamp socket kit, electrical cord, light bulb, and some basic tools like a screwdriver and pipe wrench. These materials are readily available at hardware stores and online retailers.
How To Assemble A Pipe Floor Lamp?
Start by laying out the pipe pieces and fittings, then follow the assembly instructions provided with the pipe kit. Use the pipe wrench to securely tighten the fittings, and ensure the electrical components are correctly installed. Finally, attach the lampshade and insert the light bulb.
Can A Pipe Floor Lamp Be Customized To Fit My Decor?
Yes, a pipe floor lamp can be customized to fit your decor. You can choose different pipe finishes, such as black or galvanized, and select a lampshade that complements your interior design. Additionally, you can adjust the height and width of the lamp to suit your space.
Conclusion
In conclusion, making your own pipe floor lamp is a rewarding and creative endeavor that allows you to illuminate your space with a touch of personal style. By following the step-by-step guide, tips, and safety precautions provided in this article, you can create a professional-looking lamp that fits your vision and complements your decor.
Remember to let your imagination run wild and experiment with different designs, finishes, and customization options to make your pipe floor lamp a unique and stunning centerpiece in your home. So, don’t wait any longer – get started on your pipe floor lamp project and illuminate your space like a pro!

I’m Emily Johnson, an affiliate marketer and blogger focused on lamps and lighting. I share honest reviews, simple buying guides, and practical tips. My goal is to help readers choose the right lamp for their space, style, and budget with confidence.