Every year, countless table lamps are discarded due to faulty sockets, despite these issues being relatively simple to fix. This common problem is not only wasteful but also unnecessary, considering that replacing a table lamp socket requires minimal tools and expertise. It’s surprising how straightforward the process can be, yet it saves money and conserves resources.
The origins of the table lamp socket replacement have a practical backdrop; homeowners long sought to extend their lamp’s lifespan without professional help. According to recent studies, performing minor electrical repairs at home can cut household maintenance costs by up to 25%. By mastering socket replacement, you ensure not only your lamps’ longevity but also demonstrate a skill that aligns with sustainable living practices.
- Unplug the lamp and remove the shade and bulb.
- Unscrew and disassemble the old socket, noting wire connections.
- Reattach wires to the new socket, matching previous configurations.
- Screw the new socket into place.
- Replace the bulb and shade, then plug in and test the lamp.

How to Replace a Table Lamp Socket
Replacing a table lamp socket begins with gathering the right tools. You will need a screwdriver, pliers, and a new socket. First, ensure the lamp is unplugged to prevent any electrical accidents. Then, remove the bulb and the lamp shade carefully. This will give you clear access to the socket and wiring inside the lamp.
Next, use the screwdriver to loosen the screws holding the socket in place. Once the screws are removed, gently pull out the socket from the lamp base. This will expose the wires connected to the socket. Use the pliers to carefully disconnect the wires, making note of their arrangement if needed. It’s vital to keep track of which wire goes where.
Now, take the new socket and attach the wires in the same arrangement. Typically, the black wire connects to the brass screw, and the white wire attaches to the silver screw. Tighten the screws to ensure a secure connection. Once the wiring is in place, slide the new socket back into the lamp base. Secure it with the screws you removed earlier.
After securing the new socket, reattach the lamp shade and screw in the bulb. Plug the lamp back in and test it to ensure it works correctly. If the light doesn’t turn on, double-check your connections and make sure everything is tight. Replacing a table lamp socket is a straightforward task that can revive your lamp and save you money.
Step 1: Gathering Necessary Tools
Before starting the replacement process, it’s essential to gather all the necessary tools. These tools will ensure a smooth and safe experience. You will need a screwdriver, which is crucial for loosening and tightening screws. Pliers are also essential for handling wires. Lastly, a new socket is required to replace the old one.
Having the right tools on hand will make the job much easier. Using the correct screwdriver prevents stripping screws and ensures a tighter fit. Pliers help you handle the wires safely, avoiding potential electrical hazards. Ensuring you have a compatible socket is important to avoid any mismatch issues. These precautions ensure a successful replacement.
Here is a list of tools you will need:
- Screwdriver
- Pliers
- New socket
- Wire connectors (if needed)
Being prepared saves time and makes the replacement more efficient.
Gathering these tools not only makes the process straightforward but also ensures safety. Having everything ready before you start will help you focus on the task. It prevents frequent interruptions to find missing tools. With the right equipment, replacing a table lamp socket becomes a manageable DIY project.
Step 2: Switching Off the Power
One of the most crucial steps in replacing a table lamp socket is switching off the power. This ensures your safety and prevents any electrical accidents. First, unplug the lamp from the wall outlet. Double-check to make sure there is no power going to the lamp. This simple step can prevent serious injuries.
For added safety, you can turn off the circuit breaker that controls the power to the room where you’ll be working. While this might seem like an extra step, it’s worthwhile. Ensuring no power is running anywhere in the vicinity adds an extra layer of protection. Confirm that the lamp is not receiving electricity before you continue. Always prioritize safety when working with electrical components.
Here’s a quick checklist to ensure the power is off:
- Unplug the lamp from the outlet.
- Turn off the circuit breaker (optional but recommended).
- Double-check that the lamp is not receiving power.
Following these steps ensures no electrical current is present.
Switching off the power takes only a few moments but is essential for a safe process. Once you are certain that there is no power, you can move on to removing the bulb and shade. Ensuring there is no live electricity prevents shocks or other dangers. Remember, this is always the safest way to begin any electrical repair.
Step 3: Removing the Bulb and Shade
Once the power is off, the next step is to remove the bulb and shade from your table lamp. Carefully unscrew the light bulb in a counterclockwise direction. If the bulb is stuck, you might need to gently wiggle it to free it. Always handle the bulb with care to avoid breakage. Place the bulb in a safe location.
After removing the bulb, it’s time to take off the lamp shade. Many shades are held in place by finials or clips. Unscrew the finial at the top of the shade or unclip the shade from the lamp. Ensure you keep all components, such as screws and finials, in one place to avoid losing them. This will make reassembly much easier later.
Here are the necessary steps in summary:
- Unscrew the bulb in a counterclockwise direction.
- Gently remove the bulb and place it in a safe location.
- Unscrew the finial or release the clips holding the lamp shade.
- Carefully remove the lamp shade.
This checklist ensures you won’t miss any key steps.
It’s essential to be gentle during this process, as both the bulb and shade can be delicate. Using too much force can result in breaking either component. Avoid rushing, and handle each part with care. By doing so, you set yourself up for a smooth and safe lamp repair.
With the bulb and shade removed, you’ll have clear access to the socket and the wiring inside the lamp. This will make it easier to proceed to the next step of disassembling the socket. Keep your workspace organized, and ensure every part is securely placed to avoid any mix-ups. Having everything laid out will help streamline the rest of the repair process.
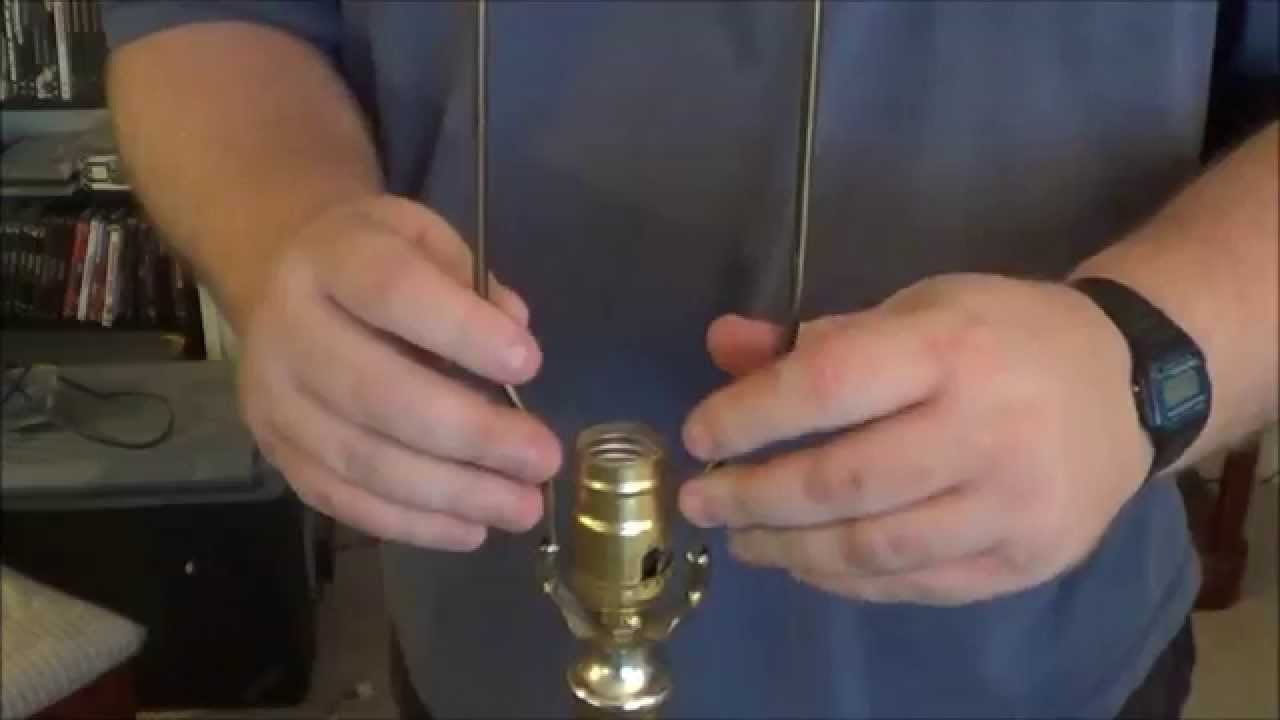
Step 4: Disassembling The Socket
With the bulb and shade removed, the next step is to disassemble the socket. Begin by unscrewing the socket shell from the base. Most socket shells can be removed by turning them counterclockwise. If it feels stuck, gently wiggle it to loosen. Once removed, set it aside.
After removing the socket shell, you will see the wires connected to the socket. Take note of how the wires are connected. Typically, there will be two wires: a black wire connected to a brass screw and a white wire connected to a silver screw. This arrangement is important for reassembly.
Use a screwdriver to carefully loosen the screws holding the wires in place. Once the screws are loose, gently disconnect the wires from the socket. Here are the steps for this process:
- Unscrew the socket shell.
- Take note of the wire connections.
- Loosen the screws holding the wires.
- Disconnect the wires from the socket.
This checklist makes sure you follow the steps correctly.
With the wires disconnected, you can completely remove the old socket from the lamp. Set the old socket and any small parts aside, keeping them organized. This ensures you won’t misplace anything needed for the new socket installation. Make sure the lamp’s internal wiring remains intact and undamaged.
Now that the old socket is disassembled, you’re ready for the next step. Having a clear and organized workspace will make installing the new socket easier. Double-check that all components are accounted for and in good condition before proceeding. This will prepare you for a smooth transition to the next step.
Step 5: Attaching A New Socket
Attaching a new socket starts by connecting the wires to the new socket. Firstly, make sure the wires are exposed and in good condition. Carefully twist the end of each wire to ensure a secure connection. Refer to your notes from before to connect the black wire to the brass screw and the white wire to the silver screw. Tighten the screws to secure the wires firmly.
Double-check that the connections are tight to avoid any loose wires, which can cause electrical issues. Once the wires are connected, fit the new socket shell over the base. Ensure it aligns properly and twist it clockwise to secure it in place. Testing the fit will help confirm the socket is securely in place.
Here’s a quick guide for attaching the new socket:
- Twist black wire to brass screw and white wire to silver screw.
- Tighten screws to secure wires.
- Fit socket shell over the base and twist clockwise.
These steps help in securely attaching the new socket.
After attaching the new socket, carefully place the bulb back in and screw it in. Reattach the lamp shade using the finial or clips you set aside earlier. Plug the lamp back into the outlet and turn it on to check if it’s working properly. Ensure the light turns on without any flickering.
If everything is working correctly, you’ve successfully replaced a table lamp socket. This simple repair can save money and extend the life of your lamp. Keeping your tools organized and following each step methodically will ensure a smooth process. Replacing a socket is a practical skill that combines safety and efficiency.
Benefits of Replacing Your Own Table Lamp Socket
Replacing your own table lamp socket offers multiple benefits, starting with cost savings. Hiring a professional for even minor repairs can be expensive. By handling the repair yourself, you eliminate labor costs and only spend on the necessary parts. This affordable approach makes financial sense for many households. Additionally, it allows you to allocate funds to other important needs.
Another significant advantage is the satisfaction and confidence gained from completing the task yourself. Accomplishing this repair boosts your DIY skills and empowers you to tackle other home projects. You develop a better understanding of how household items work. Gaining this knowledge can be very fulfilling and useful in future tasks.
The environmental impact is another crucial benefit. Every year, millions of lamps are discarded into landfills due to small issues like faulty sockets. By repairing instead of replacing, you contribute to reducing electronic waste. This sustainable practice aligns with eco-friendly living standards and promotes responsible consumption.
Additionally, replacing a socket ensures that your lamp operates safely and efficiently. Over time, worn-out sockets can become fire hazards if not addressed properly. Conducting regular repairs keeps your home environment safe from potential electrical malfunctions. Safe operations promote peace of mind among household members.
Finally, this skill enhances adaptability in maintaining various electronics around the house. Knowing how to fix a table lamp socket also equips you to handle similar issues in other devices like ceiling lights or floor lamps. Versatile problem-solving skills bring long-term advantages to homeowners seeking self-reliance.
Mistakes to Avoid When Replacing a Table Lamp Socket
When replacing a table lamp socket, there are common mistakes you should avoid. One major error is forgetting to switch off the power. Working on an energized lamp can lead to electric shocks and severe injuries. Always unplug the lamp and, for extra safety, turn off the circuit breaker. Ensuring no power is running prevents accidents.
Another common mistake is using the wrong tools. A mismatched screwdriver or damaged pliers can cause more harm than good. Using inappropriate tools can strip screws or damage the wiring. Ensure you have the correct tools for the job, such as a fitting screwdriver and quality pliers. Using the right tools makes the process smoother and safer.
It’s also crucial to take note of the wire connections before disassembling the old socket. Failing to remember which wire connects to which screw can lead to incorrect connections. This mistake can cause the lamp to malfunction or become a safety hazard. You can take a photo or write down the connections to help with reassembly. Proper wire reconnection is essential for safe operation.
Avoid rushing through the process. Hasty work can result in incomplete connections or broken components. Taking your time ensures that each step is followed accurately and reduces the likelihood of errors. Patience and attention to detail are vital when replacing a socket. These qualities ensure a successful repair.
Finally, don’t overlook testing the lamp after reassembly. Some people assume everything is fine and skip this step. Always plug in the lamp and test it to ensure connections are secure and the lamp functions properly. Skipping this test can leave unnoticed issues unresolved. Ensuring everything works correctly provides peace of mind.
Safety Measures to Consider When Replacing a Table Lamp Socket
When replacing a table lamp socket, safety should be your main priority. The first step is to ensure the power is completely off. Unplug the lamp from the outlet and, if possible, switch off the circuit breaker to the room. Double-check that there is no electricity flowing to the lamp. This helps prevent electrical shocks.
Using the right tools is another crucial safety measure. High-quality tools reduce the risk of accidents and ensure a secure fit. Avoid using damaged or inappropriate tools which can slip and cause injury. Ensure the screwdriver and pliers are in good working condition. This guarantees both efficiency and safety during the repair.
Proper lighting and workspace organization are also essential. Make sure your workspace is well-lit, allowing you to clearly see what you’re doing. Keep your work area free from clutter to avoid tripping and accidental contact with other electrical devices. A tidy and well-lit workspace minimizes the risk of mistakes. Good organization leads to a smoother repair process.
Wearing protective gear can provide an extra layer of safety. Consider using gloves to protect your hands from sharp components and potential electrical hazards. Additionally, safety glasses can shield your eyes from any debris that might fall during disassembly. Protective gear is especially useful in preventing minor injuries. It allows you to work with added confidence.
Here are some key safety measures to follow:
- Unplug the lamp and switch off the circuit breaker.
- Use high-quality, appropriate tools.
- Ensure your workspace is well-lit and organized.
- Wear protective gloves and safety glasses.
These steps help maintain a safe working environment.
Mistakes can lead to electrical outages or damage to the lamp. By focusing on safety, you not only protect yourself but also ensure the job is done correctly. Following these precautions leads to a successful and worry-free lamp socket replacement. Safety is always the best practice in any DIY project.
The Cost-Effectiveness of Replacing Table Lamp Socket
Replacing your own table lamp socket is highly cost-effective compared to hiring professionals. The parts required, such as a socket and basic tools, are inexpensive and readily available. On average, a new socket costs only a few dollars. This is significantly lower than the cost of a new lamp or a repair service. Saving money on labor fees makes DIY socket replacement a budget-friendly option.
One of the biggest financial benefits is prolonging the life of your lamp. Instead of buying a new lamp when the socket fails, you can replace the faulty part and keep using your old lamp. This not only saves money but also allows you to keep a lamp that you might be attached to. Maintaining and repairing items you already own makes financial sense. It is a smart way to manage household expenses.
Here is a cost comparison:
| Item | Estimated Cost |
|---|---|
| New Lamp Socket | $5 – $15 |
| New Table Lamp | $30 – $100+ |
| Professional Repair Service | $50 – $100+ |
These numbers highlight the cost savings of DIY repairs.
Moreover, DIY repairs offer the advantage of being flexible with your time. You can complete the replacement at your own pace, without needing to schedule and wait for a repair technician. This saves both time and money, making the repair process more efficient. Time flexibility adds another level of cost-effectiveness.
Replacing your own table lamp socket also provides a sense of accomplishment and skill development. Learning and applying these skills can be beneficial for future repairs around the house. This continues to save money on different household repairs. Adding practical skills to your toolkit increases long-term value.

Frequently Asked Questions
Replacing a table lamp socket is a practical skill that can save money and extend the life of your lamp. Below are common questions and answers related to this topic.
1. What tools do I need to replace a table lamp socket?
You will need basic tools like a screwdriver, pliers, and possibly wire strippers. These tools help in loosening screws, handling wires, and installing the new socket securely. Having these tools on hand makes the task much easier.
Additionally, it’s important to have a compatible new socket ready for installation. Ensure you also have wire connectors if needed. With these tools and parts, you’re prepared for a safe and efficient repair process.
2. Why should I turn off the power when replacing a table lamp socket?
Turning off the power is crucial for preventing electrical shocks or injuries. Unplugging the lamp ensures that no electricity flows through it while you work. To be extra safe, you can switch off the circuit breaker handling that outlet or room.
This step not only protects you but also prevents damage to the lamp’s internal wiring. Safety should always be your top priority when working with electrical components. This small precaution can make a big difference.
3. How can I tell if my table lamp socket needs replacement?
If your lamp flickers or doesn’t turn on despite having a good bulb, it might need a new socket. Other signs include visible wear or burnt marks around the socket area. These are indicators that replacement is necessary for safe operation.
A faulty socket can be dangerous and should not be ignored. Regular checks of your lamps can help identify problems early on. Replacing it promptly ensures continued functionality and safety of your lamp.
4.How long does it take to replace a table lamp socket?
The time required depends on your experience level but generally takes about 15-30 minutes. For beginners, taking extra caution could mean spending more time ensuring everything is correctly installed. It’s better to take your time rather than rush through it.
This includes gathering your tools, disconnecting old parts, reassembling new ones, and testing functionality afterward.You achieve better results by being thorough rather than fast during this repair task
5.What are the benefits of replacing my own table lamp socket?
By replacing your own table-lamp-socket saves money & enhances DIY skills-allows understanding basic electrical work . Self-repair keeps costs down since hiring professionals extra expense avoided.
Additionally , experience from tasks like this builds confidence tackling other household projects-request
/>. environmentally-friendly : repairing extends product lifespan reducing waste . equipping-yourself with such practical abilities proves advantageous both short-& long-term.
Conclusion
Replacing a table lamp socket is a simple yet rewarding task that offers numerous benefits. It not only saves money but also extends the life of your lamp. Additionally, mastering this skill provides a sense of accomplishment and boosts your DIY capabilities.
By following safety measures and using the right tools, you can efficiently handle the replacement process. This practical knowledge enhances your self-reliance and promotes sustainable living. Taking small steps like these contributes to a safer and more resourceful home environment.

I’m Emily Johnson, an affiliate marketer and blogger focused on lamps and lighting. I share honest reviews, simple buying guides, and practical tips. My goal is to help readers choose the right lamp for their space, style, and budget with confidence.