When was the last time you thought about how pivotal a floor lamp switch is to your daily routine? Surprisingly, a faulty switch can be one of the most common electrical issues in homes. Yet, it often garners little attention until that annoying flicker starts disrupting your evening read.
Understanding how to fix a floor lamp switch requires a blend of patience and technical know-how. Historically, these switches have evolved, but the underlying mechanics remain surprisingly simple. Interestingly, a 2021 study found that over 60% of household electrical repairs involve light fixtures, making this a valuable skill set for any professional.
- Unplug the lamp to ensure safety.
- Remove the lamp’s base or cover to access the switch.
- Use a screwdriver to loosen and remove the old switch.
- Connect new wires to the replacement switch, matching previous connections.
- Screw in and secure the new switch, then reassemble the lamp.
- Plug in and test the functionality of the new switch.

How to Fix a Floor Lamp Switch
Fixing a floor lamp switch might seem challenging, but it can be quite simple. First, ensure the lamp is unplugged to avoid any electrical mishaps. Next, inspect the switch to identify the problem. Sometimes, it could be a loose connection or worn-out internal parts. Use a screwdriver to carefully open the switch housing and examine its condition.
Before attempting repairs, gather necessary tools like a screwdriver, pliers, and a replacement switch if needed. If you find a loose wire, use pliers to secure it back in place. For a worn-out switch, replace it with a new one, ensuring it’s compatible with your lamp model. According to this post, understanding how everyday items work can make troubleshooting easier.
Once you’ve addressed the issue, reassemble the switch housing. Plug the lamp back in and test the switch to see if it works properly. If the problem persists, there could be an issue with the wiring or the lamp itself. You may want to get a professional’s opinion to rule out any deeper electrical problems.
Regular maintenance can prevent many problems with floor lamp switches. Clean and inspect your switch occasionally to catch issues early. Proper care not only extends the life of your lamp but ensures safety. You can find more useful tips in articles like here is the article.
Step 1: Safety Measures Before Repair
Safety is the first priority before beginning any lamp switch repair. Always start by unplugging the lamp to ensure there’s no electrical current. You don’t want to risk getting shocked while working. Make sure your hands are dry and wear rubber gloves for added protection. If you’re unsure about any step, it’s wise to consult a professional.
Next, inspect your workspace. Clear away any clutter that could obstruct you while you work. A clean, well-lit area will make the process easier and safer. Keep tools within reach to avoid unnecessary movements. According to the this post, having a tidy workspace can significantly reduce the risk of accidents.
Create a checklist of required tools. This might include pliers, a screwdriver, and a replacement switch. Having everything ready before you start can save time and prevent disruptions. Here’s a list of items to consider:
- Screwdriver
- Pliers
- Replacement switch
- Rubber gloves
- Electrical tape
Lastly, make sure that you have a basic understanding of electrical systems. If you’re uncertain, do some reading or watch tutorial videos. Resources and tutorials can offer valuable tips. It’s always better to be over-prepared than under-prepared when dealing with electrical repairs.
Step 2: Diagnosing the Switch Problem
Before you can fix a floor lamp switch, accurately diagnosing the problem is crucial. First, check if the bulb is working by trying it in another lamp. If the bulb works fine, the issue is likely with the switch or wiring. Sometimes, the switch might feel loose or wobbly, indicating internal damage. An audible click when toggling the switch can also signal it’s working mechanically.
Remove the switch cover carefully. This will allow you to inspect the wiring inside the switch housing. Look for any visible signs of damage like frayed wires or burnt components. If the wires appear intact but the switch still doesn’t work, it might be an internal issue requiring a detailed inspection. Here’s a list of common signs of a faulty switch:
- No audible click when toggling
- Loose or wobbly switch
- Frayed or damaged wires
- Burnt or discolored switch components
Sometimes, the problem could be as simple as a loose wire. Use a multimeter to check the electrical continuity. Place the multimeter probes on the switch terminals to see if electricity flows through. If the meter shows no reading, the switch may need replacing. Understanding basic electrical principles can make this task easier.
If you’re still unsure about diagnosing the problem, consider consulting additional resources or tutorials. Many how-to articles and guides are available online. These can provide step-by-step instructions and tips. Gain confidence by learning from others who have successfully fixed similar issues.
Step 3: Gathering Required Tools
Collecting the right tools before you start fixing a floor lamp switch will save you time and frustration. Essential items include a screwdriver, pliers, and electrical tape. A multimeter can also be very useful for checking electrical continuity. Ensure all tools are in good condition before use. This helps avoid sudden interruptions during the repair process.
You might need to purchase a new switch, which can be found at local hardware stores or online. Compare features and specifications to make sure the switch is compatible with your floor lamp. Many switches are designed for specific types of lamps and won’t fit all models. Reading customer reviews can help you choose a reliable product. Also, check the warranty and return policy, just in case.
Here’s a basic list of tools and materials you will need for the repair:
- Screwdriver
- Pliers
- Electrical tape
- Multimeter
- Replacement switch
Additionally, keep a small container handy to hold screws and small parts. Losing these can cause unnecessary delays and complications. Organize your tools and materials in a neat manner before starting the repair. An organized workspace increases efficiency and reduces the risk of losing any components.
For those who are unfamiliar with using a multimeter, online tutorials can be valuable. Learning how to measure electrical continuity can help you diagnose the problem accurately. Practicing on a multimeter before the actual repair can boost your confidence. This will make the entire process smoother and more efficient.
Lastly, consider safety gear such as rubber gloves and safety glasses. These items provide an extra layer of protection when working with electrical components. Safety should never be compromised, no matter how simple the repair seems. Preparing all these tools beforehand will streamline your repair process.
Step 4: Removing the Old Switch
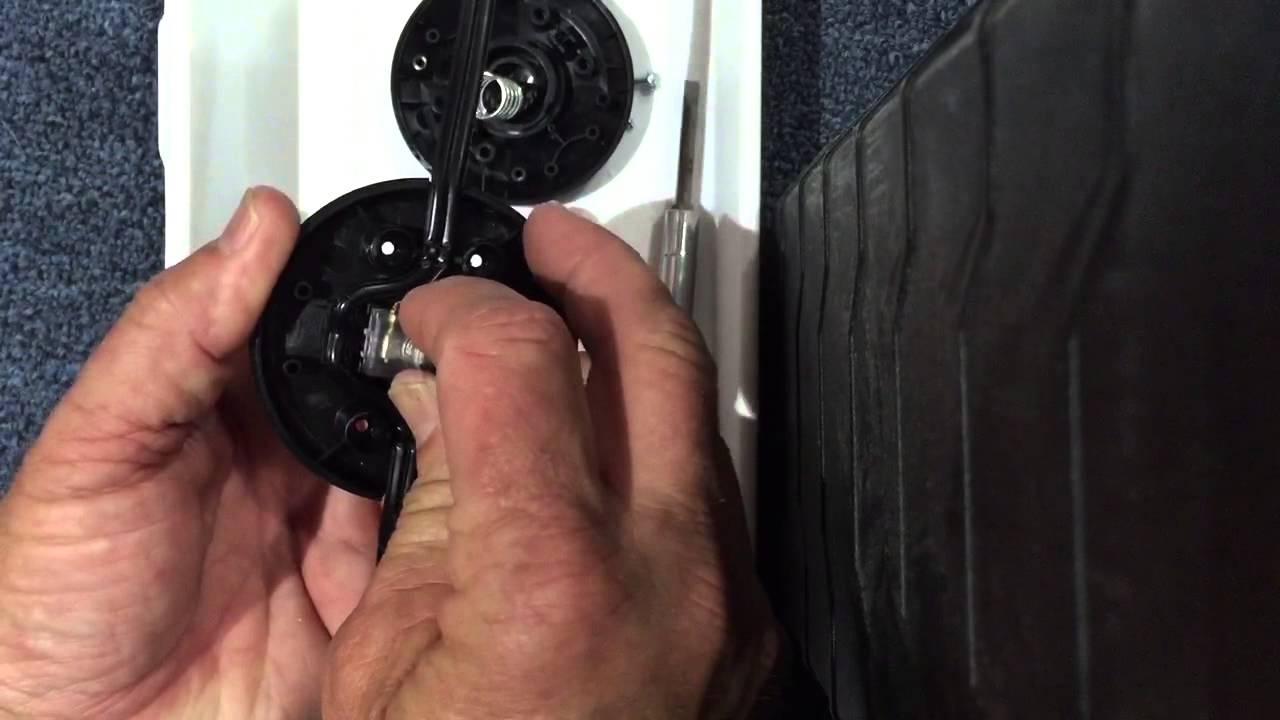
Start by ensuring your floor lamp is unplugged to avoid any electric shock. Carefully remove the lamp’s base or unscrew the cover to access the switch. Use a screwdriver to loosen any screws holding the switch in place. Once the cover is removed, you will see the switch and its wiring. Take note of the wire connections for reassembly later.
Next, disconnect the wires attached to the old switch. Use pliers to gently pull the wire connectors apart. Some switches might have screws holding the wires in place—make sure to loosen these as well. Be gentle to avoid damaging the wires, as you will need them for the new switch. Place any removed screws or small parts in a container to avoid losing them.
After disconnecting the wires, carefully pull the old switch out. If the switch is stuck, wiggle it gently to loosen it. Inspect the area for any remaining debris or damage that might interfere with installing the new switch. Clean the area if needed to prepare it for the new component. This ensures a smooth installation process later on.
Here’s a simple list of steps to remove the old switch:
- Unplug the lamp
- Remove the lamp’s base or cover
- Loosen screws holding the switch
- Disconnect the wires
- Pull out the old switch
If you’re unsure about any part of this process, consult additional resources or how-to guides. Many online tutorials can provide visual step-by-step instructions. This can be especially helpful if you’re a visual learner. Take your time to ensure each step is done carefully and correctly.
Once the old switch is removed, you’re ready for the next step. Keep your tools and components organized to make the installation of the new switch easier. Being methodical in your approach ensures a successful repair. You’ll soon have your floor lamp working like new.
Step 5: Installing the New Switch
After removing the old switch, the next step is installing the new one. Start by connecting the wires to the new switch. Ensure the wire connections match those of the old switch. Use a screwdriver to tighten any screws holding the wires in place. Double-check the connections to make sure they are secure.
Carefully insert the new switch into the designated slot. Once it’s in position, secure it with screws if necessary. Make sure the switch is stable and doesn’t move around. A loose switch can cause operational issues later. Here’s a quick checklist to follow:
- Connect wires to the new switch
- Tighten screws securely
- Insert the new switch
- Secure the switch in place
- Ensure stability
Next, replace the lamp’s base or cover to close everything up. Make sure all components fit snugly together. Plug the lamp back into the outlet. Test the switch to verify that the lamp turns on and off properly. This will confirm that the installation was successful.
If you encounter any issues, double-check the wire connections and the stability of the switch. Consult online guides or resources if needed. Tutorials can offer step-by-step visual instructions. Take your time to make sure everything is in place before finalizing the repair.
With the new switch installed and tested, your floor lamp should be back in working order. Enjoy the renewed functionality of your lamp! Keeping the tools handy can help if you need to make any adjustments. Your thorough preparation has paid off, ensuring a smooth repair process.
Tips to Maintain a Floor Lamp Switch
Regular maintenance of your floor lamp switch can extend its lifespan. Start by periodically checking the switch for any signs of wear or damage. Dust and debris can accumulate inside the switch, leading to operational issues. Use a soft cloth or compressed air to gently clean it. Keeping the switch clean will ensure smooth functionality.
Avoid using excessive force when turning the switch on and off. Rough handling can loosen internal components, causing the switch to fail over time. If you notice any resistance while toggling the switch, it’s best to inspect it immediately. Timely checks can prevent more significant issues down the line.
Over time, electrical connections inside the lamp might become loose. Inspect these connections at least once a year and tighten them if needed. Here’s a basic checklist for maintaining your floor lamp switch:
- Clean with a soft cloth or compressed air
- Avoid excessive force
- Inspect for wear or damage
- Tighten electrical connections annually
Apart from this, consider upgrading outdated switches with modern designs that have better durability. Modern switches often come with added safety features, making them less prone to failures. Investing in quality replacement parts minimizes long-term maintenance needs.
Lastly, keep an eye out for any unusual noises or flickering lights when using your lamp. These are often early signs of potential problems. Acting quickly on these signals can save you from more extensive repairs later on. Regular care and attention will ensure your floor lamp serves you well for years.
Why Regular Maintenance is Essential
Regular maintenance of your floor lamp switch is crucial for several reasons. First, it helps identify minor issues before they become major problems. Catching problems early can save you from costly repairs or replacements. A well-maintained switch also ensures consistent performance, reducing the chances of unexpected failures. It’s a simple practice that can prolong the life of your lamp.
Safety is another key reason for regular maintenance. Electrical components can degrade over time, increasing the risk of shorts or sparks. Regular inspections can identify frayed wires or loose connections, preventing potential fire hazards. Keeping your lamp in good working order protects your home and loved ones. Regular checks provide peace of mind.
Maintenance also improves the user experience. A switch that operates smoothly enhances the convenience of using your floor lamp. No one enjoys dealing with a flickering light or an unresponsive switch. Consistent maintenance ensures your lamp functions reliably, making your daily routines more enjoyable. A well-functioning lamp adds to the ambiance of your space.
Lastly, regular maintenance is economically beneficial. Replacing a lamp or its components can be expensive. By taking care of your floor lamp switch, you reduce the need for frequent replacements. This saves you money in the long run. An ounce of prevention is worth a pound of cure.
Here are some quick tips for regular maintenance:
- Inspect and clean the switch monthly
- Check for loose connections annually
- Listen for unusual noises
- Replace frayed wires promptly
- Use the switch gently
Incorporating these simple steps into your routine can make a significant difference. Regular maintenance allows you to enjoy your floor lamp for many years. It’s a small investment of time that yields great benefits. Overall, it ensures safety, reliability, and longevity for your lamp.
Professional vs. DIY Lamp Switch Repair
Deciding between professional and DIY floor lamp switch repair depends on several factors. If you’re comfortable with basic electrical work, DIY can be a rewarding option. It allows you to save money and learn a new skill. However, if you’re inexperienced, attempting a repair yourself can be risky. Incorrect repairs can lead to further damage or even dangerous electrical hazards.
Professional repair services offer expertise and safety. A certified technician will have the proper tools and knowledge to fix the switch correctly. This can be particularly beneficial if the lamp has a complex design or high value. Hiring a professional also includes warranty protection, ensuring that the repair is guaranteed. This can provide peace of mind, knowing the job is done right.
Cost is a significant factor in deciding between professional and DIY repair. DIY repair tends to be cheaper since you only pay for parts and your own time. Here’s a table comparing costs:
| Repair Method | Approximate Cost |
|---|---|
| DIY Repair | $5 – $20 (for parts) |
| Professional Repair | $50 – $100 (service fee) |
Time is another essential consideration. DIY repair might take longer, especially if you’re learning as you go. A professional can usually complete the job quickly and efficiently. If you need the lamp fixed urgently, professional repair is likely the faster option. Weighing the importance of time versus cost can help you make an informed decision.
Lastly, consider the complexity of the issue. Simple problems like loose wires might be easy to fix on your own. However, for more complicated problems, professional help is advisable. Assessing your own comfort level and the specific issue will guide you in making the best choice. Both options have their merits, and the right one depends on your individual circumstances.
Preventative Measures to Avoid Lamp Switch Failures
Preventative measures can significantly extend the life of your lamp switch. One simple habit is to avoid using excessive force when turning the switch on or off. Gentle handling reduces wear and tear on internal components. Regularly cleaning the switch area to remove dust and debris can also help. Dust buildup can sometimes interfere with the switch mechanism.
Inspecting the electrical cord and plug for any signs of damage is crucial. A frayed cord can lead to electrical shorts and switch malfunctions. If you find any damage, replace the cord immediately. Here are a few quick inspection tips:
- Check for frayed or bent wires
- Look for scorch marks or melting
- Ensure the plug fits snugly into the outlet
Maintaining a stable environment for your lamp can also make a difference. Keep the lamp away from areas where it might be frequently knocked over. Consistent instability can loosen internal components over time. Make sure the lamp is placed on a steady, flat surface to minimize movement.
Using quality bulbs is another preventive measure. High-wattage bulbs can generate excessive heat, which may compromise the switch. Always use bulbs that match the lamp’s specifications. This ensures you aren’t putting unnecessary strain on the electrical components.
Lastly, consider occasional professional inspections, especially if your lamp is valuable or complex. A technician can identify and fix small problems before they escalate. Professional maintenance can give you added peace of mind, ensuring your lamp operates smoothly. Combining these measures will help you avoid common switch failures.
Frequently Asked Questions
Discover answers to common questions about fixing and maintaining floor lamp switches. These insights will help you troubleshoot and care for your lighting fixtures effectively.
1. What tools are needed to fix a floor lamp switch?
To fix a floor lamp switch, you’ll need basic tools like a screwdriver, pliers, and electrical tape. Ensuring all tools are in good condition before beginning the repair is essential for a smooth process.
A multimeter can also be very helpful for checking electrical continuity. Having these tools handy ensures you can tackle any issues quickly and efficiently.
2. How can I tell if my floor lamp switch needs replacement?
If your floor lamp flickers or doesn’t turn on consistently, the switch may be faulty. Another sign is if there’s no audible click when toggling the switch or if it feels loose or wobbly.
Inspecting the internal components by removing the switch cover can help confirm whether it’s time for a replacement. Any visible damage like frayed wires or burnt parts indicates it’s time to replace the switch.
3. Are there different types of floor lamp switches?
Yes, there are several types of floor lamp switches including rotary, push-button, pull-chain, and touch-sensitive switches. Each type serves a specific function and suits different styles of lamps.
Selecting the right type can make using your lamp more convenient. It’s important to choose one that fits well with your existing setup for seamless integration.
4. Can I use any bulb with my floor lamp after repairing its switch?
No, it’s important to use bulbs that match the wattage specifications of your floor lamp. Using high-wattage bulbs inappropriately can generate excessive heat and damage both the bulb and switch.
This could lead to potential fire hazards over time. Always check your lamp’s user manual for recommended bulb types to ensure safe usage post-repair.
5. How often should I maintain my floor lamp switch?
Regular maintenance every few months can prevent many problems with your floor lamp switch. This includes cleaning dust off the switch area and inspecting electrical connections periodically.
Tighten loose wires and check for signs of wear or damage frequently to keep everything in working order. Consistent upkeep will extend the lifespan of your lamp significantly.
Conclusion
Fixing a floor lamp switch requires some basic tools and a bit of patience. Whether it’s a DIY project or a task for a professional, understanding the steps involved can make the process smoother. Regular maintenance can extend the life of your floor lamp and ensure safety in your home.
From diagnosing issues to making repairs, every step is essential for optimal performance. Following the preventative measures can help you avoid common problems. With the right knowledge and tools, keeping your floor lamp in excellent working condition becomes an achievable goal.

I’m Emily Johnson, an affiliate marketer and blogger focused on lamps and lighting. I share honest reviews, simple buying guides, and practical tips. My goal is to help readers choose the right lamp for their space, style, and budget with confidence.