Repairing a floor lamp foot switch might feel like a daunting task, but a surprising number of people have successfully tackled this common household issue. Many floor lamp failures trace back to a simple malfunction within the foot switch. Understanding the core problem often demystifies the repair process.
Foot switches have been around for decades and remain one of the most efficient ways to control a lamp without using hands. Remarkably, about 60% of floor lamp issues are due to foot switch malfunctions, often involving loose connections or worn-out contacts. By familiarizing yourself with the internal workings and basic troubleshooting techniques, you can save both time and money while enhancing your DIY skills.
- Unplug the lamp to ensure safety.
- Identify and remove the screws or clips securing the old foot switch.
- Document or note the wiring configuration before detaching wires from the old switch.
- Connect wires to the new foot switch, ensuring firm connections.
- Secure the new switch in place using screws or clips.
- Test the lamp by plugging it back in and pressing the foot switch to ensure proper function.

How to Fix Floor Lamp Foot Switch
Fixing a floor lamp foot switch starts with identifying the problem. Sometimes, the switch may feel loose or not click correctly. Turn off and unplug the lamp before beginning any repairs. Safety should always be your first concern. Checking the lamp thoroughly can help you spot the exact issue.
To repair the switch, you’ll need a few tools and materials. These usually include a screwdriver, a replacement foot switch, and electrical tape. Gather everything you’ll need before starting the repair. Having all tools on hand makes the process smoother. You can find the necessary items at most hardware stores.
Once you have your tools, remove the old foot switch. Loosen any screws and carefully disconnect the wiring. Install the new switch by connecting the wires, following this guide for exact instructions. Secure it with screws and make sure it’s properly in place. According to this post, understanding how lamp switches work can also provide some useful insights.
After installing the new switch, test the lamp to ensure it works correctly. Plug it back in and press the foot switch to turn on the lamp. If the lamp doesn’t turn on, recheck the connections. Check out here is the article to make sure your repairs align with the lamp’s power requirements. Regular maintenance can help extend the life of your lamp.
Step 1: Identify the Problem
The first step in fixing a floor lamp foot switch is to identify the problem. Begin by pressing the switch and observing its behavior. Does it click and stay in place, or is it loose? A faulty switch might not complete the circuit, causing the lamp to remain off. Pay close attention to any unusual noises or resistance.
Check the cord and plug for any visible damage. Frayed wires or a loose plug can also cause the lamp to malfunction. Unplug the lamp before examining these parts closely. If you notice any wear and tear, this could be part of the problem. Sometimes, the issue might not be with the switch itself.
Using a multimeter can help you determine if the switch is broken. Set the multimeter to measure resistance and touch the prongs to the switch terminals. If the reading doesn’t change when the switch is pressed, it’s likely defective. This tool provides a clear indication of the electrical flow. According to this post, a quick test can help pinpoint the problem.
Once you identify the issue, decide on the next steps. If the foot switch is faulty, you will need to replace it. Gather the necessary tools and materials for the job. If other parts of the lamp are damaged, consider fixing those as well. Proper diagnosis ensures efficient and effective repairs.
Step 2: Gather Tools and Materials
Before you start fixing the foot switch, gather all the necessary tools and materials. Having everything ready will save you time and frustration. You will typically need a screwdriver, electrical tape, a replacement foot switch, and a multimeter. Gather these items from your toolbox or purchase them at a local hardware store. Preparedness is key for efficient repair.
Make sure your work area is clean and well-lit. A clutter-free space will help you focus better on the task at hand. Lay out all the tools and materials within easy reach. This will reduce the chance of losing small parts or tools. A good workspace enhances productivity.
Double-check the specifications of your replacement foot switch. Ensure it matches the type and voltage requirements of your floor lamp. Using the wrong type of switch can cause more issues. Compare the new switch with the old one to make sure it’s compatible. This small step can prevent big problems later.
Having a checklist can be helpful. Here’s a simple list to guide you:
- Screwdriver
- Electrical tape
- Replacement foot switch
- Multimeter
Double-checking this list will ensure you have everything you need before starting the repair.
Step 3: Remove the Old Foot Switch
Start by unplugging the lamp to ensure safety. Never work on electrical components while the lamp is plugged in. Locate the foot switch on the cord and examine how it’s attached. Usually, it will be secured with screws or clips. Gather your screwdriver and get ready to remove these fasteners.
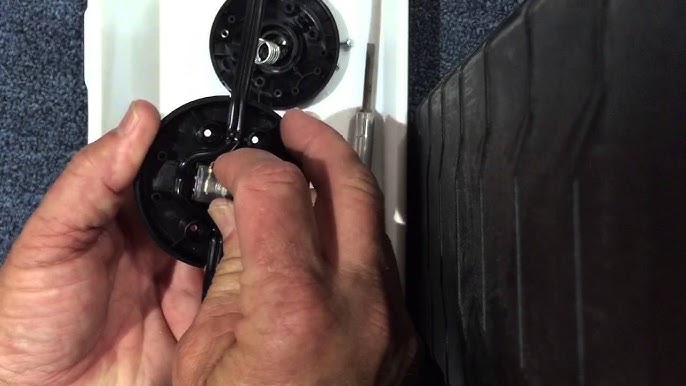
Remove the screws or clips carefully, placing them somewhere safe so they don’t get lost. Once the fasteners are removed, gently open the casing of the foot switch. Be cautious not to force it open, as this could damage the wires inside. Examine the internal components to understand how they are connected. Taking a photo can help you remember the wiring configuration.
With the casing open, identify the wires attached to the old foot switch. Typically, there will be two or three wires to disconnect. Use a screwdriver or pliers to loosen the wire connectors. Carefully detach each wire, making a note of their positions. Keeping track of this will make installing the new switch easier.
If the wires are secured with electrical tape, remove it gently. You may need to use a small knife or scissors to cut the tape without damaging the wires. Ensure all the tape is removed so you can access the connectors. After the wires are disconnected, the old foot switch should come free easily. Discard the old switch or save it for parts if applicable.
Here’s a quick summary to help you remember the steps:
- Unplug the lamp.
- Remove screws or clips securing the switch.
- Open the switch casing gently.
- Document the wiring configuration.
- Loosen and detach the wires.
- Remove any electrical tape.
Completing these steps will prepare you for the next stage of the repair. Removing the old foot switch carefully will ensure a smooth transition to installing the new one.
Step 4: Install the New Foot Switch
Begin by matching the new foot switch to the old one’s wiring configuration. Use the photos or notes you took earlier to guide you. Connect the wires to the corresponding terminals on the new switch. Make sure each wire is firmly attached. Check that the wires are not frayed or damaged.
Once the wires are connected, secure them with electrical tape if necessary. Check the connections to ensure they are tight and secure. Place the new foot switch into the casing. If the casing has clips or screws, use them to fasten the switch in place. Double-check that everything fits snugly.
After securing the switch, close the casing and fasten it with the screws or clips you set aside earlier. Make sure the casing is properly secured to prevent any loose connections. Plug the lamp back into the socket. Use the foot switch to test if the lamp turns on and off correctly. A working switch will click and operate smoothly.
Here’s a brief checklist for installing the new foot switch:
- Match the new switch to the old wiring.
- Connect wires securely.
- Secure connections with electrical tape.
- Place switch into the casing and fasten it.
- Test the lamp by plugging it in.
Following these steps will help ensure the new foot switch is installed correctly and safely.
Step 5: Test the Lamp
Once the new foot switch is installed, it’s time to test the lamp. Plug the lamp back into the power outlet. Press the foot switch to see if the lamp turns on and off. Listen for a click from the switch. If the lamp works correctly, the repair was successful.
If the lamp doesn’t turn on, double-check your connections. Ensure that all wires are securely fastened to the switch. Sometimes a loose wire can prevent the lamp from working. Unplug the lamp before making any adjustments. Safety should always come first when dealing with electrical components.
If the lamp still doesn’t work, consider using a multimeter to test the connections. Set the multimeter to measure voltage and check the connections at various points. This tool can help you identify any issues with the new switch or wiring. Make sure to follow the multimeter’s instructions carefully. Correct any detected issues before retesting the lamp.
Here’s a quick checklist for testing the lamp:
- Plug the lamp into the outlet.
- Press the foot switch.
- Check for any issues if the lamp doesn’t turn on.
- Use a multimeter for further testing, if needed.
Following these steps ensures that your new foot switch is working properly and your floor lamp is ready to use safely.
Common Issues with Floor Lamp Foot Switches
One frequent problem with floor lamp foot switches is a lack of responsiveness. Sometimes the switch doesn’t click properly or fails to stay in position. This usually means the internal mechanism is worn out. Dust and dirt can also accumulate inside, affecting performance. Regular cleaning can help mitigate this issue.
Loose wiring is another common issue. Over time, connections inside the switch may become loose or corroded. This leads to intermittent functioning of the lamp or no power at all. It’s essential to periodically check and tighten these connections. Keeping an eye on this can prevent sudden failures.
Sometimes, foot switches get physically damaged due to heavy use or accidental stepping. Cracks in the casing or broken internal parts can render the switch useless. In such cases, a replacement is necessary rather than a simple repair. Using high-quality materials can extend the switch’s life.
If your lamp flickers when you use the foot switch, it could indicate an electrical fault within the switch itself. This might require using a multimeter to diagnose any issues accurately. Consulting professionals for complex problems can also be beneficial.
Here’s a list of common issues:
- Lack of responsiveness
- Loose wiring
- Physical damage
- Lamp flickering
Recognizing these common problems allows you to take timely actions before they escalate into bigger issues.
Safety Precautions When Fixing a Foot Switch
It’s crucial to unplug the lamp before starting any repair work. Working on live electrical components can be very dangerous. Make sure the lamp is completely disconnected from the power source. This precaution minimizes the risk of electrical shock. Always double-check that the plug is out of the socket.
Using the right tools is another important safety measure. Ensure your tools are insulated and in good condition. Damaged tools can pose risks such as short circuits or personal injury. Never use a tool that isn’t designed for electrical work. Proper tools make the repair process safer and more efficient.
Wearing protective gear can further enhance safety. Gloves, safety glasses, and even a face mask can protect you from small debris and electrical sparks. Loose clothing or dangling accessories should be avoided. These can get caught in the lamp’s components, causing harm.
Keep your work area clean and well-organized. A cluttered space increases the likelihood of accidents. Make sure you have ample lighting to see what you’re working on clearly. Ensuring good visibility helps you avoid mistakes. An organized workspace supports effective and safe repairs.
Remember to follow these key safety precautions:
- Unplug the lamp before starting.
- Use proper, insulated tools.
- Wear protective gear like gloves and safety glasses.
- Maintain a clean and well-lit work area.
Sticking to these guidelines will help you safely fix the foot switch on your floor lamp.
When to Seek Professional Help
While many floor lamp foot switch issues can be handled at home, some situations require professional help. If you notice any burning smell or see smoke, immediately stop your repair attempt. These signs indicate a serious electrical issue that needs expert attention. Ignoring such signs can be dangerous. It’s better to err on the side of caution.
Complex wiring problems are another reason to call a professional. If the wiring looks tangled or damaged beyond simple repairs, it’s best to leave it to the experts. Electricians have the proper tools and experience to address complicated issues. They can ensure that the repairs are done safely and correctly. Attempting tricky repairs on your own can make things worse.
If your lamp is still under warranty, it might be smarter to consult a professional. Tampering with the lamp could void the warranty. Many companies offer repair services as part of their customer support. Having a professional handle the repair can save you from additional costs. Always check your warranty terms before proceeding with DIY fixes.
Here are some signs that you should seek professional help:
- Burning smell or smoke
- Complex or tangled wiring
- Lamp is under warranty
- Repeated failure of the foot switch
Paying attention to these indicators can help you decide when it’s time to get expert assistance, ensuring your safety and the longevity of your lamp.
Benefits of DIY Foot Switch Repair
Undertaking a DIY repair on your floor lamp foot switch can be highly rewarding. One of the biggest benefits is cost savings. Hiring an electrician might be expensive, but fixing it yourself only requires inexpensive parts and some basic tools. This allows you to keep more money in your pocket. Plus, the parts needed are usually easy to find at local hardware stores.
Another advantage is the learning experience. Working on your lamp helps you understand its inner workings better. Gaining this knowledge can be useful for future repairs or modifications. Moreover, completing a successful repair can be very satisfying. The sense of achievement boosts your confidence to tackle other DIY projects.
DIY repairs also offer a degree of customization. You can modify the replacement switch to better suit your needs. For instance, selecting a foot switch with features like variable brightness controls adds extra functionality. Customization allows you to tailor the lamp to better fit your lifestyle. This can enhance your overall living space.
Here’s a quick summary of the benefits:
- Cost savings
- Learning new skills
- Satisfaction from completing a task
- Customization options
Embracing DIY repair not only fixes the problem but also brings additional advantages that influence both your skills and your home environment.
Frequently Asked Questions
If you’re troubleshooting or repairing a floor lamp foot switch, the following questions and answers might help clarify your doubts and guide you through the process effectively.
1. What are the common signs of a faulty floor lamp foot switch?
Common signs of a faulty foot switch include flickering lights, inconsistent power, or a lack of response when pressed. If you notice any unusual sounds like clicking or buzzing, these can also indicate a problem with the switch.
Physical damage to the foot switch casing can be another sign it’s time for replacement. Inspect the wiring regularly; loose connections are often culprits in these issues. Addressing these signs early can prevent bigger problems later on.
2. Can I use any type of foot switch as a replacement?
Not all foot switches are created equal, so it’s important to choose one that matches your floor lamp’s specifications. Check for compatibility with the lamp’s voltage and current requirements to ensure optimal functionality and safety.
Using an incompatibly rated switch can lead to electrical hazards or insufficient performance. Consult your lamp’s manual or seek professional advice if you’re unsure which type to purchase. Choosing the right switch is essential for long-term reliability.
3. What tools do I need to fix my floor lamp foot switch?
The basic tools you’ll need include a screwdriver, electrical tape, pliers, and possibly a multimeter for checking connections. You might also require wire strippers if you need to expose more wire during the repair.
A clean workspace is advisable to keep track of small parts like screws and connectors. Having all necessary tools ready before starting will make your repair process smoother and more efficient.
4. How often should I check my floor lamp foot switch for issues?
Regular inspection every three months can help catch problems early before they escalate into bigger issues. During these checks, look for loose connections, physical damage, and signs of wear or corrosion on wires.
If you frequently use your lamp, consider monthly checks to ensure everything remains in good working order. Consistent maintenance extends both the life of your foot switch and your overall safety.
5. Is it safe to perform DIY repairs on electrical components like foot switches?
DIY repairs can be safe if proper precautions are followed such as unplugging the device beforehand and wearing protective gear like gloves and safety glasses. Using insulated tools reduces risks associated with electric shocks.
If at any point you’re unsure about what you’re doing, it’s best to consult an experienced professional. Safety should always take priority over attempting potentially dangerous repairs yourself.
Conclusion
Repairing a floor lamp foot switch can be both rewarding and cost-effective. By following the correct steps and using the right tools, you can handle most issues yourself. Regular maintenance and checks ensure your lamp performs optimally and lasts longer.
However, knowing when to seek professional help is equally important for safety and effectiveness. Addressing common issues early and understanding the benefits of DIY repairs can make the process smoother and more efficient. Prioritize safety and enjoy the satisfaction of a well-functioning lamp.

I’m Emily Johnson, an affiliate marketer and blogger focused on lamps and lighting. I share honest reviews, simple buying guides, and practical tips. My goal is to help readers choose the right lamp for their space, style, and budget with confidence.