Ever considered the physics behind a simple flick of a switch that brings comforting warmth to your patio? Propane heat lamps have been a staple in outdoor heating due to their efficiency and ease of use. But understanding how to light them safely and effectively is paramount for any outdoor aficionado.
Propane heat lamps, often hailed as the evolution of portable heating, combine modern convenience with ancient fire-starting principles. While the mechanics are relatively straightforward, a surprising 25% of users misfire on their first attempt due to overlooked steps. Properly securing the propane tank and ensuring the gas line is unobstructed are crucial first steps to avoid mishaps.
- Ensure the control knob is in the ‘off’ position and check for leaks using soapy water.
- Open the propane valve slowly to allow gas flow.
- Press and turn the control knob to the ‘ignite’ position while holding it for about 30 seconds.
- If your lamp has an automatic igniter, press it; otherwise, use a long lighter or match.
- Once the pilot light ignites, release the control knob and adjust to the desired heat setting.

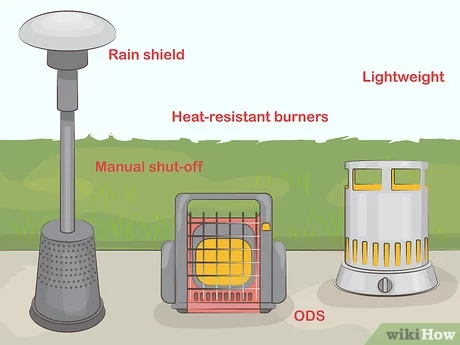
Source: wikihow.com
How to Light a Propane Heat Lamp
Lighting a propane heat lamp starts with some essential safety measures. Always check for leaks before ignition by applying soapy water to the connections and seeing if bubbles form. Make sure the area is well-ventilated to avoid gas build-up. Wear gloves to protect your hands. Most importantly, keep a fire extinguisher nearby just in case.
Next, assemble the propane heat lamp according to the manufacturer’s instructions. This usually involves attaching the heat reflector, control knob, and the gas cylinder. Double-check all connections to ensure they are secure. Assembly is crucial for proper function. If parts are loose, it can lead to inefficient heating or hazards.
Connecting the propane tank is your next step. First, make sure the control knob is in the ‘off’ position. Attach the propane hose securely to the tank. Turn the valve on the propane tank counterclockwise to open it. Here’s where you’ll want to check again for any leaks using soapy water.
With the tank connected and leak-free, it’s time to ignite the lamp. Follow the manufacturer’s instructions for igniting, which often involves pressing and turning the control knob. Hold the knob in the ignite position for about 30 seconds to ensure the pilot light stays lit. According to this post, proper ignition is key to a safely lit lamp. Adjust the flame to your desired heat output and enjoy your warm, cozy space.
Step 1: Safety Considerations When Lighting a Propane Heat Lamp
Safety should always be the first priority when lighting a propane heat lamp. Begin by checking the connections and hoses for any signs of wear and tear. Use soapy water to spot possible gas leaks. If bubbles form, tighten the connections and recheck them. Do not light the lamp if there are still leaks.
Ventilation is another key factor to consider. Make sure the lamp is set up in an open, well-ventilated area. Enclosed spaces can lead to dangerous gas build-up. Open windows or doors if you’re in a semi-enclosed space. This ensures any leaked gas can dissipate safely.
Keep flammable materials away from the propane heat lamp. This includes paper, cloth, and certain types of plastic. Maintaining a safe distance reduces the risk of accidental fires. Always have a fire extinguisher nearby. Quick access to it can prevent a minor incident from becoming serious.
Lastly, wear protective gloves and eyewear. This serves as an extra layer of safety against unexpected flames or gas exposure. According to this expert opinion, even experienced users can benefit from these precautions. Simple steps can make a big difference. Your comfort and safety are worth the extra effort.
Step 2: Assembling the Propane Heat Lamp
Assembling the propane heat lamp is a crucial step to ensure it functions correctly. Begin by gathering all the components laid out in the assembly guide. Often, this includes the main body, heat reflector, and control knob. Having all parts in one place will make the process smoother. Check for any missing or damaged pieces before starting.
Follow the manufacturer’s instructions carefully. Typically, you’ll start by attaching the heat reflector to the main body. Use the screws and tools provided in the kit. Make sure they are tightened securely. Loose parts can affect the stability and performance of the lamp.
Next, focus on attaching the control knob and the ignition system. The control knob usually snaps into place or requires a small screw to secure it. Ensure that the ignition system is connected properly to the knob. A misalignment could lead to lighting issues. This step ensures that the lamp will light up reliably.
Finally, connect other smaller parts like the fuel line and decorative elements. Use the assembly guide to ensure everything is in its rightful place. Double-check all connections. Testing the connections before moving on to the next step can save time. A well-assembled lamp is safe and efficient to use.
Step 3: Connecting the Propane Tank
Connecting the propane tank to your heat lamp is an essential step. Begin by ensuring that the control knob is in the ‘off’ position. Place the propane tank on a stable surface. Attach the regulator hose to the valve on the propane tank. Turn the valve until it’s securely fastened.
It’s crucial to check for leaks after attaching the hose. Apply soapy water to the connection points. Turn on the propane slowly by opening the valve. Look for bubbles forming, as this indicates a leak. If you spot any, tighten the connection and test again until no bubbles appear.
Once you’ve confirmed there are no leaks, you can proceed to connect the hose to the lamp. Make sure the connection is snug. Tug gently on the hose to verify it’s secure. A loose connection can lead to gas leaks, so take extra care with this step.
Ensure the hose is not kinked or twisted. A twisted hose can obstruct gas flow and affect performance. Lay the hose flat and adjust as needed. Proper alignment helps maintain a steady gas supply to the lamp.
After securing the hose, turn the propane valve back off until you’re ready to ignite the lamp. This ensures no gas escapes while you finish setup. According to this post, thorough checks can prevent future problems. Following these steps ensures a safe and effective connection.
Step 4: Igniting the Propane Heat Lamp
Once all the connections are secure, it’s time to ignite the propane heat lamp. Make sure the control knob is still in the ‘off’ position. Slowly turn on the propane valve by twisting it counterclockwise. Allow a few seconds for the gas to flow through the hose.
Next, you’ll need to press and turn the control knob to the ‘ignite’ position. Depending on your model, you may need to hold it for up to 30 seconds. This ensures that the gas fills the burner. Look for a small pilot light to ignite. If it doesn’t light up, wait a minute before trying again.
If your lamp has an automatic ignition button, you can press it while holding the control knob in the ‘ignite’ position. Some lamps may require a manual lighter. For these models, use a long lighter or match. Carefully bring the flame close to the burner while holding the knob.
Once the pilot light ignites, you can release the control knob. Turn the knob to the desired heat setting. You’ll notice the flame growing as you adjust the knob. Keep an eye on the lamp for a few minutes to ensure it’s burning steadily.
Step 5: Adjusting Flame and Heat Output
Once the propane heat lamp is lit, you can adjust the flame to control the heat output. Start by turning the control knob slowly to raise or lower the flame. A higher flame will produce more heat, while a lower flame will create a gentle warmth. Adjust according to your comfort level and the temperature outside.
Observe the flame as you make adjustments. It should be steady and blue, indicating efficient burning. If the flame looks yellow or flickers, it might need more oxygen or there could be an obstruction. Check the air vents and clean them if necessary. Consistent flame quality ensures efficient heating and fuel usage.
Different models may have additional controls for fine-tuning the heat output. Refer to the user manual for specific instructions. These additional settings can help you get the most out of your heat lamp. Adjusting these settings can provide a more customized warmth experience.
Consider the placement of the heat lamp for optimal warmth distribution. Positioning the lamp strategically can help to heat the desired area more effectively. Move the lamp if necessary to cover more space. Proper placement ensures everyone stays cozy and comfortable.
Troubleshooting Common Issues While Lighting a Propane Heat Lamp
If your propane heat lamp isn’t lighting, the first step is to check the gas supply. Ensure the propane tank is full and securely connected. Open the valve slowly and listen for the hiss of gas. If there’s no sound, you might have a blockage in the hose or valve.
A common issue can be with the ignition system. If you’re using an automatic igniter, make sure it’s operational. Sometimes dirt or debris can obstruct it. Clean the ignitor tip gently with a cloth. For manual ignition, ensure your lighter or matchstick reaches close enough to light up.
If you experience weak flames or irregular heating, examine the air vents for obstructions. Dust and debris can accumulate over time, affecting air flow. Cleaning these vents allows better oxygen mix for efficient burning. Occasionally, a weak flame indicates low fuel in the propane tank as well.
- Check connections for leaks using soapy water
- Ensure control knob is functioning correctly
- Look for signs of wear on hoses
Burner issues can also cause problems while lighting your heat lamp. If it’s clogged, clean out any debris that may be blocking it. Additionally, verify that all parts are tightly secured to avoid any gas leaks. Adjusting this may fix inconsistent flame issues.
Benefits of Using a Propane Heat Lamp
Propane heat lamps offer a significant benefit of providing instant heat. Unlike electric heaters that may take time to warm up, propane heat lamps produce warmth immediately upon ignition. This is particularly useful for outdoor events. People can gather around and feel comfortable quickly. It’s an efficient way to combat cold weather.
Another advantage is their portability. Propane heat lamps are typically compact and easy to move. Whether you’re hosting a backyard party or a camping trip, you can bring the warmth with you. Their design allows them to be set up almost anywhere. This flexibility adds to their appeal.
Cost-effectiveness is another strong point. Propane is generally cheaper than electricity, making these lamps more economical in the long run. You don’t have to worry about hiking electricity bills. Plus, propane heat lamps often have a long lifespan, providing value over extended periods.
Finally, propane heat lamps are environmentally friendly. Propane burns cleaner compared to other fossil fuels, releasing fewer pollutants. This makes it a greener option for heating. Choosing propane helps to minimize your carbon footprint.
Safety Tips to Follow When Using a Propane Heat Lamp
When using a propane heat lamp, safety must be your top priority. Begin by placing the lamp on a stable, flat surface to prevent tipping. Ensure the lamp is in an open, well-ventilated area. This allows any gas that may escape to disperse safely. Always use your lamp outdoors or in an area with ample airflow.
Regularly inspect your propane heat lamp for wear and tear. Look for cracks, rust, or any signs of damage on the hose and connections. Testing for leaks can be done with soapy water; bubbles indicate a leak. Tighten connections or replace parts as needed. Keeping the equipment in good condition reduces risk.
- Keep a safe distance from flammable materials
- Always turn off the valve when not in use
- Store propane tanks in a cool, shaded area
Lighting the heat lamp should always be done as per the manufacturer’s guidelines. Use the correct ignition method and avoid makeshift solutions. Stand away while lighting the lamp to avoid any unexpected flare-ups. Following the instructions ensures proper use and safety.
Always have a fire extinguisher nearby as an emergency measure. Familiarize yourself with how to use it. Quick access could prevent an accident from escalating. It’s better to be prepared and cautious. Safety measures are essential for enjoyable and worry-free use of your propane heat lamp.
Frequently Asked Questions
If you’re new to using propane heat lamps, you might have some questions. Below, we’ve covered some common inquiries to help you use your lamp safely and effectively.
1. What are the benefits of using a propane heat lamp?
Propane heat lamps offer instant warmth, making them ideal for outdoor events and gatherings. They heat up quickly, ensuring everyone stays cozy even in chilly weather conditions. Additionally, they are cost-effective and portable, giving you flexibility in where you can use them.
These lamps are also environmentally friendly as propane burns cleaner compared to other fuels. This makes them a greener choice while still providing efficient heating solutions. For more eco-conscious users, this is a key advantage.
2. How long does a propane tank last on a heat lamp?
The longevity of your propane tank depends on the size of the tank and the heat setting used. For example, a standard 20-pound tank typically lasts about 10 hours on high settings. Adjusting the flame to lower settings can extend this duration significantly.
Monitoring your usage habits will give you a clear idea of how long the tank lasts for your specific needs. Remember to always keep an extra tank on hand for uninterrupted warmth during longer events or colder nights.
3. Are propane heat lamps safe to use indoors?
No, it is generally not safe to use propane heat lamps indoors due to ventilation concerns. Propane combustion produces carbon monoxide, which can accumulate indoors and be harmful without proper airflow.
If indoor heating is needed, opt for electric heaters specifically designed for indoor use with built-in safety features like auto shut-off mechanisms and overheat protection.
4. Can I leave my propane heat lamp unattended?
No, it’s not recommended to leave a lit propane heat lamp unattended. Unattended flames pose risks such as potential fuel leaks or unexpected flare-ups that could lead to fires or injuries.
Always ensure someone is present when the lamp is in operation and turn it off when leaving the area or before going to bed. Safety should always come first when using any heating device.
5. What should I do if I smell gas from my propane heat lamp?
If you smell gas around your propane heat lamp, immediately turn off the control knob and close the valve on the propane tank. Move away from the area without creating any sparks or flames that could ignite the gas.
You should then inspect all connections and hoses for leaks using soapy water; bubbles will indicate leakage points that need tightening or replacing before attempting re-ignition.
Conclusion
Lighting a propane heat lamp involves several crucial steps to ensure safety and efficiency. From checking for leaks to properly igniting the lamp, every step plays a significant role. Don’t overlook the importance of each step.
Whether you’re using the lamp for a family gathering or an outdoor event, knowing these safety tips will enhance your experience. Propane heat lamps offer both convenience and comfort. By following these guidelines, you can enjoy their benefits worry-free.

I’m Emily Johnson, an affiliate marketer and blogger focused on lamps and lighting. I share honest reviews, simple buying guides, and practical tips. My goal is to help readers choose the right lamp for their space, style, and budget with confidence.