While acrylic nails have become a mainstay in the beauty industry, there’s often confusion about whether a lamp is necessary for their application. Many might recall the brittle, air-dried nails from earlier days, sparking curiosity about newer methods. Understanding the tools required can lead to better, longer-lasting results.
Acrylic nails typically do not require a curing lamp, unlike gel nails which rely on UV or LED light to harden. The process for acrylics involves mixing a liquid monomer with a powder polymer that air-dries into a solid form. However, for added strength, some professionals may use a UV top coat, but it’s not essential for curing the actual acrylic.

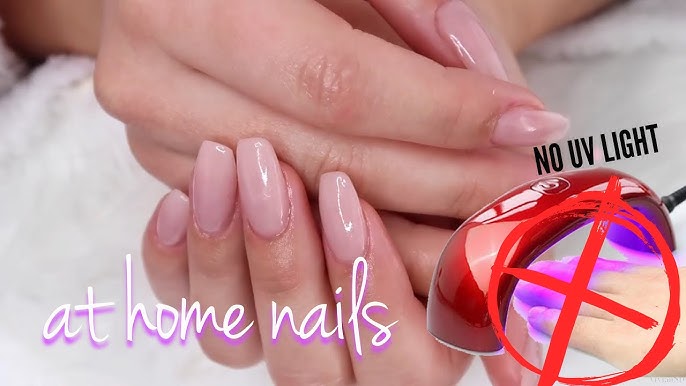
Do I Need a Lamp for Acrylic Nails
The question of whether you need a lamp for acrylic nails often confuses many. Unlike gel nails which require a UV or LED lamp to cure, acrylic nails usually do not. The process of applying acrylic nails involves mixing a liquid monomer with a powdered polymer to create a dough-like substance. This mixture hardens naturally when exposed to air. However, some might use a lamp to cure the topcoat, adding extra shine and durability.
One key point to consider is that the basic acrylic application does not mandate the use of a lamp. Most nail technicians rely on air-drying for the acrylic mixture. Yet, for those desiring a gel-like finish, a lamp might be beneficial. According to this post, using a UV top coat can enhance the overall look and protect the nail better. Therefore, it’s optional and depends on the desired outcome.
It’s also important to differentiate between acrylic and gel nails. Gel nails depend heavily on UV or LED light to achieve the perfect finish. Acrylic nails are more versatile and only need a lamp under specific circumstances. This makes them a popular choice for people who prefer a simpler, more straightforward nail enhancement.
Many products on the market offer different solutions depending on your needs. Nail enthusiasts often debate the necessity of a lamp for topcoats. While some swear by it for that extra shine, others find it unnecessary. If you’re unsure what to use, referring to reputable sources like here is the post can help you make an informed decision tailored to your preferences and needs.
The Process of Applying Acrylic Nails
Applying acrylic nails begins with proper nail preparation. First, the natural nails are cleaned and filed to remove any oils or debris. Next, a dehydrator is applied to the nails to ensure good adhesion. After that, nail tips or forms are placed to create the desired length. Once the forms are secured, the acrylic application starts.
The acrylic mixture is key in this process. It involves combining a liquid monomer with a powdered polymer to create a gooey substance. This mixture is then carefully applied to the nail tips or forms using a brush. The technician shapes the acrylic into a smooth overlay that matches the natural nail shape. According to the this post, the drying time varies without UV light.
Once applied, the acrylic mixture begins to harden as it is exposed to air. This is a crucial step because it determines the final strength of the nails. After the acrylic has hardened, the technician removes the nail forms if they were used. The nails are then buffed and shaped to achieve a clean look.
Finally, polish and decoration complete the process. You can choose from a variety of colors and designs based on personal preference. To add extra shine and durability, a topcoat is applied. Some prefer a UV topcoat for a glossy finish, while others opt for a simple air-dried one. This ensures that your acrylic nails look stunning and last longer.
When you Might Need a Lamp when Dealing with Acrylic Nails
Though acrylic nails typically don’t need a lamp to harden, there are moments where a lamp becomes useful. One such instance is when you want to use a UV top coat for added shine and durability. This top coat can make your nails look more polished. Additionally, it can protect the acrylic from wear and tear. In this context, using a UV or LED lamp to cure the topcoat becomes essential.
Another situation involves combining acrylic and gel. Some nail enthusiasts prefer the strength of acrylic but love the finish of gel polish. After applying acrylic, they use gel polish as a top layer, which does require curing under a lamp. This hybrid approach combines the best of both worlds. It gives you durability and a glossy, long-lasting finish.
Nail technicians might turn to lamps for specific nail art designs. For example, detailed or layered designs can benefit from being cured mid-process. This ensures each layer of paint or gel sets firmly before the next one is applied. In such cases, a lamp can make complex designs more manageable and secure.
Overlays and protective layers sometimes necessitate lamps too. When working with special protective layers over acrylic, curing them under UV light can help seal everything more effectively. This extra step can offer enhanced protection against chipping and cracking. For these reasons, having a lamp on hand can be useful for various advanced nail techniques.
Alternatives to Using a Lamp for Acrylic Nails
If you don’t have a lamp, you can still achieve great results with acrylic nails. One of the most straightforward methods is allowing the acrylic to air dry. Although it takes a bit longer, it can still harden effectively without a lamp. For best results, make sure the room is well-ventilated. This ensures the acrylic dries evenly and thoroughly.
Another alternative is using quick-dry topcoats designed for air drying. These products can speed up the drying process, giving you a similar finish to what you’d get with a lamp. You can find them in many beauty supply stores. The application process remains straightforward. Simply brush on the topcoat and let it set.
Fans and blow dryers can also help speed up the drying time. Set the blow dryer to a low heat setting to avoid melting or warping the acrylic. Hold the blow dryer a few inches away from your nails to ensure even drying. Additionally, small desk fans can circulate air around your nails, aiding in faster drying times. These methods are handy and don’t require extra equipment.
Many people also use drying drops or sprays that are designed to accelerate the drying process. These products are easy to apply and can reduce the waiting time significantly. They usually come in small bottles with droppers or spray nozzles for easy use. These tools are straightforward and can be found in most nail care kits. They’re designed to quickly set your nails without the need for a lamp.
Finally, if you frequently do your own nails, investing in acrylic powders with faster curing times might be worth considering. Some brands offer powders that harden more quickly than others. By choosing these products, you can reduce the overall drying time. This can be especially useful for at-home manicures, as it saves you from waiting around.
Frequently Asked Questions
Here you’ll find answers to some of the most common questions about acrylic nails. These will help clarify various aspects of their application, maintenance, and more.
1. How long do acrylic nails last?
Acrylic nails typically last between two to three weeks before needing a fill or touch-up. The duration depends on your nail growth rate and how well you maintain them. Regular care can extend their lifespan significantly.
After this period, natural nail growth will create a gap at the cuticle area, making a touch-up necessary. Properly applied and maintained acrylics can sometimes last up to four weeks if you’re lucky.
2. Are acrylic nails safe?
Acrylic nails are generally safe when applied and removed properly by a skilled technician. Research different salons to ensure they follow hygiene protocols for safety.
Poor application or removal practices can lead to damaged natural nails or infections. Always opt for reputable salons that use high-quality materials for the best results.
3. Can I paint over my acrylic nails?
You can certainly paint over your acrylic nails with regular nail polish or gel polish. This allows you to change your look without needing new acrylics altogether.
If you’re using regular nail polish, make sure to use a non-acetone remover when taking it off. Acetone can weaken the acrylic and reduce its longevity.
4. How do I remove acrylic nails safely?
The safest way to remove acrylic nails is by soaking them in acetone until they soften enough to be gently removed. Avoid prying or pulling them off as this could damage your natural nails.
If possible, visit a professional salon for removal; they have experience and tools that make the process easier and safer. Always moisturize your hands afterward as acetone can be drying.
5. What should I do if my acrylic nail lifts?
If an acrylic nail starts lifting, it’s important to address the issue promptly to avoid potential infections. Clean the underside with alcohol, then apply nail glue for temporary fixing until you visit a salon.
A lifted nail creates space where moisture and dirt can accumulate, leading to bacterial growth. Quick action helps maintain both the appearance and health of your nails.
Conclusion
In summarizing the essentials, a lamp isn’t a must-have for acrylic nails, although it can enhance the final look in certain cases. Air-drying works perfectly for the basic acrylic application, making it a versatile option. Yet, using a lamp for topcoats or combining acrylic with gel can add an extra layer of sophistication.
By understanding when and how to use a lamp, you can achieve professional-grade results at home or in the salon. Hopefully, this information has clarified your doubts about the necessity of a lamp for acrylic nails. This knowledge empowers you to make informed decisions for durable and stylish nails.

I’m Emily Johnson, an affiliate marketer and blogger focused on lamps and lighting. I share honest reviews, simple buying guides, and practical tips. My goal is to help readers choose the right lamp for their space, style, and budget with confidence.