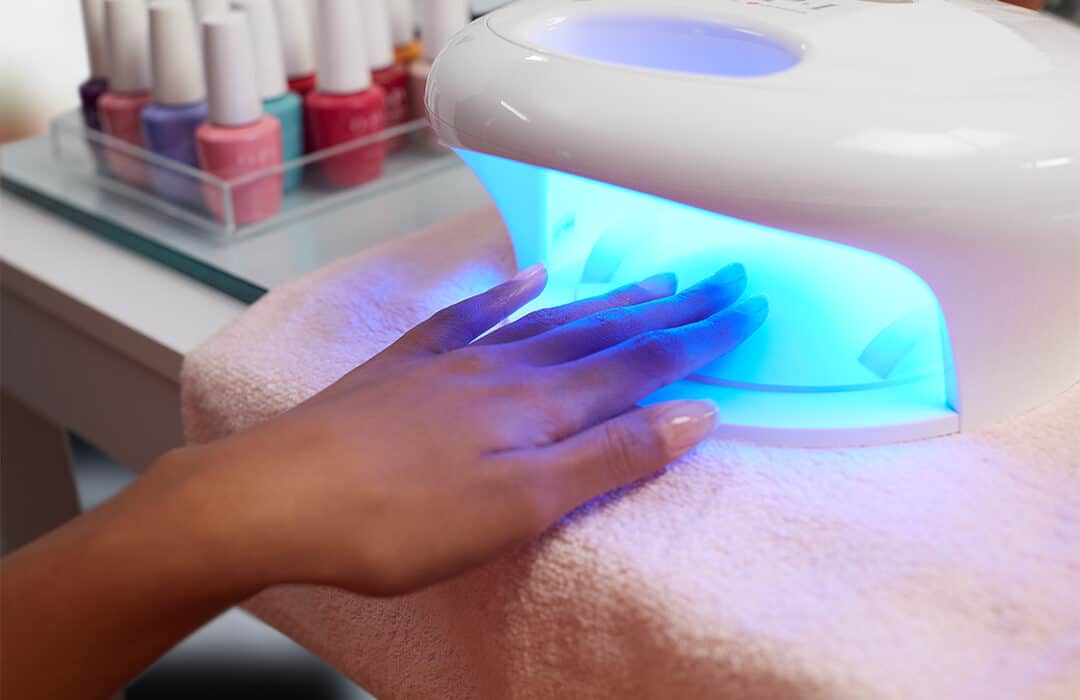
Though it may seem simple, using a gel nail lamp properly can drastically improve the longevity and quality of your manicure. Did you know that uneven curing can be one of the main reasons for premature chipping? Ensuring each layer of gel is perfectly cured is an art in itself, demanding precision and professional techniques.
First, always start with clean, prepped nails to maximize adhesion. Apply a thin layer of gel polish and place your fingers under the lamp, ensuring full coverage by spreading them evenly. According to experts, curing each layer for the recommended time (usually 30-60 seconds) prevents under-curing, which can lead to peeling or damage.
- Prep your nails by cleaning, trimming, and buffing them.
- Apply a thin layer of base coat, avoiding cuticles and skin.
- Cure the base coat under the gel nail lamp for 30-60 seconds.
- Apply a thin layer of colored gel polish and cure under the lamp; repeat for desired opacity.
- Seal with a top coat and cure again for the recommended time.
- Wipe nails with alcohol to remove any sticky residue and achieve a glossy finish.
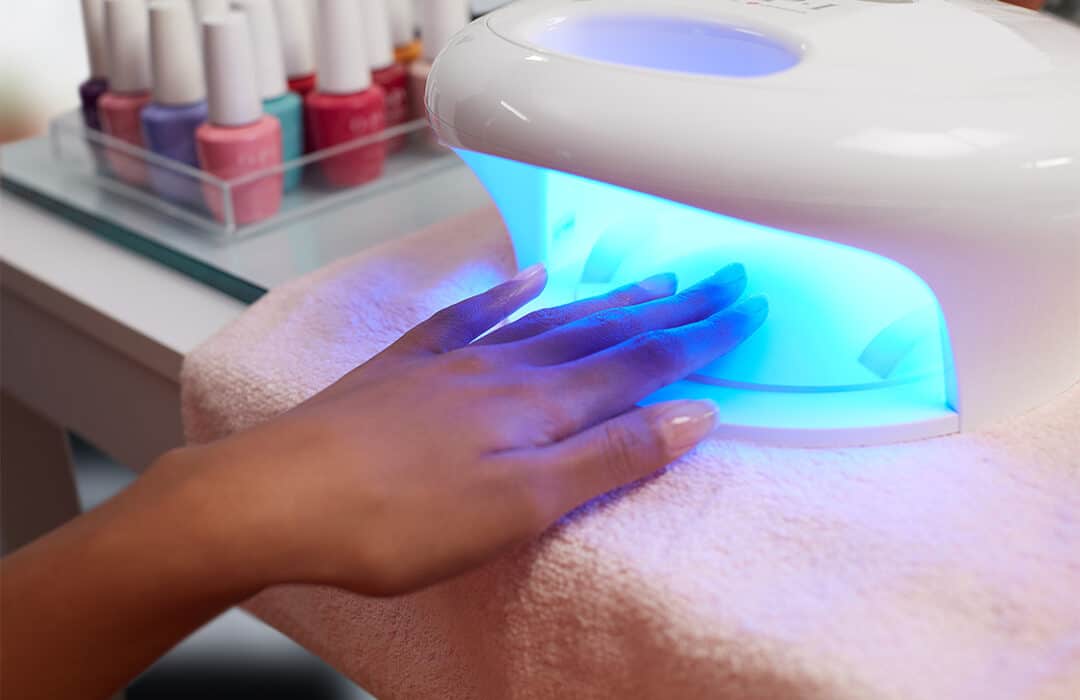
How to Use a Gel Nail Lamp
First, you need to prepare your nails by cleaning and shaping them. Remove any old polish and gently buff the nail surface. This ensures better adhesion of the gel polish. Don’t forget to push back the cuticles to create a clean canvas. Once prepped, wash your hands to remove any dust or oils.
Next, apply a thin layer of base coat. Be careful not to touch the cuticle or skin. Cure this layer under the gel nail lamp for the recommended time, usually between 30 to 60 seconds. The lamp emits UV or LED light that hardens the gel. Make sure your hand is positioned correctly under the lamp for even curing.
After curing the base coat, apply the colored gel polish in thin, even layers. Again, cure each layer under the lamp for the recommended time. According to this post, it’s important to use a gel nail lamp specifically designed for curing gel polish, not an ordinary LED lamp. Continue this process until you achieve your desired opacity.
Finally, apply a top coat to seal and add shine. Cure the top coat under the lamp just like the previous layers. Once cured, wipe your nails with a lint-free cloth soaked in isopropyl alcohol to remove any sticky residue. Your nails should now be hard and glossy. Enjoy your beautiful, long-lasting manicure!
Step 1: Prep Your Nails
To start, clean your nails thoroughly. Use a nail polish remover to eliminate any old polish and natural oils. This ensures that the new gel adheres properly. Next, trim and file your nails to your desired shape. A smooth nail surface makes a big difference in the final look.
Buff your nails lightly to remove any shine. This step can ensure the gel polish sticks better. Be gentle, as aggressive buffing can damage the natural nail. Push back your cuticles using a cuticle pusher. This creates more space for the gel and helps avoid lifting.
Washing your hands to get rid of any dust or residue is essential. You don’t want anything getting trapped under the gel. Some prefer using a lint-free wipe soaked in alcohol at this stage. This can further clean and dehydrate the nail surface, improving adherence.
Applying a primer or dehydrator can also aid in the bonding process. This extra step can help if you have issues with gels lifting or peeling. According to this expert opinion, proper nail prep can make a significant impact on the longevity of your manicure. Now, you’re ready to move on to applying the base coat.
Step 2: Apply Gel Polish
Once your nails are prepped, start by applying a thin layer of base coat. This base layer helps the colored gel adhere better. Avoid getting any base coat on your skin or cuticles. Cure the base coat under the gel nail lamp for 30-60 seconds. Ensure your fingers are properly positioned under the lamp for even curing.
Now, it’s time to apply the colored gel polish. Begin with a thin, even layer. Thinner layers cure more evenly under the lamp. Cure this layer under the lamp for the recommended time. Repeat the process until you achieve the desired color intensity.
When applying gel polish, be mindful to cap the free edge of the nail. This technique helps prevent chipping. Use a steady hand to ensure clean edges. If you accidentally get polish on your skin, clean it before curing. This ensures a neat and professional finish.
After the colored layers are cured, apply a top coat to seal everything. This top layer adds shine and durability. Cure the top coat under the lamp for the final time. Now, your nails should look stunning and last longer! Proper application techniques can make all the difference in your gel manicure’s longevity.
Step 3: Using the Gel Nail Lamp
Once your polish is applied, it’s time to use the gel nail lamp. Place your hand inside the lamp with your fingers spread out. This ensures even exposure to the curing light. Most lamps have a timer function that you can set for 30, 60, or 90 seconds. Follow the recommended curing time for the specific gel polish you’re using.
Ensure each nail is fully exposed to the light. If one finger isn’t fully under the light, it may not cure properly. Some lamps have a reflective interior, which helps distribute the light evenly. Pay close attention to your thumb, as it can easily slip out of the light’s range. Make slight adjustments if needed to ensure full coverage.
After the initial layer is cured, proceed with subsequent layers. It’s important to cure each layer fully before moving to the next one. This prevents under-curing, which can cause the polish to peel or chip. If your lamp has a lower wattage, you may need to extend the curing time slightly. Always follow the instructions provided with your gel polish and lamp.
During the curing process, you might feel a slight warmth. This is normal and indicates that the gel is hardening. If you experience any discomfort, temporarily remove your hand and allow it to cool before continuing. According to most experts, the curing process should be painless and quick.
Finally, once all layers are cured, ensure to clean off any sticky residue. Use a lint-free wipe soaked in isopropyl alcohol for best results. This step gives your nails a smooth and glossy finish. Now your nails are ready and should last beautifully for weeks!
Troubleshooting Common Gel Nail Lamp Issues
One common issue is uneven curing, which can cause the polish to lift or chip. Ensure your fingers are evenly spaced and fully under the light. If your lamp doesn’t have a reflective interior, consider investing in one that does. This helps distribute the light more evenly across all nails. Pay extra attention to your thumbs as they often miss out on full exposure.
Another problem is under-curing, leading to a tacky surface. If your gel polish isn’t fully curing, it might be due to the lamp’s wattage being too low. Check your lamp’s specifications and compare them to the gel polish manufacturer’s recommendations. You might need to extend the curing time slightly if the wattage is on the lower side. Always follow the guidelines provided in the gel polish’s instructions.
Sometimes, the lamp might not turn on at all. This could be due to a power issue or a faulty bulb. Double-check that the lamp is properly plugged in. If it still doesn’t work, consult the user manual. Replacing the bulb or the entire unit might be necessary if it’s an older model.
If your nails feel hot or uncomfortable during curing, it could be due to applying too thick layers of gel polish. Thicker layers can create more heat as they cure. Apply thinner layers and cure each one fully to avoid this problem. Also, if the sensation is too intense, briefly remove your hand from the lamp to let it cool down.
Sticky residue after curing can be resolved by using a lint-free wipe soaked in isopropyl alcohol. This removes the tacky layer and leaves a shiny finish. Sometimes, gel polish may not adhere well if the nails weren’t prepped correctly. Make sure they are clean, dry, and free of oils before starting.
Safety Precautions When Using a Gel Nail Lamp
It’s important to take certain safety precautions when using a gel nail lamp. First and foremost, avoid looking directly into the light. The UV rays can be harmful to your eyes. Wearing UV-protective glasses can add an extra layer of safety. Always keep the lamp out of reach of young children.
Limit your exposure to UV light by using the recommended curing times. Overexposure can lead to skin damage. You can also wear fingerless gloves that cover your hands but leave your nails exposed. This reduces the amount of skin exposed to the UV light. Make sure to follow the instructions provided with your gel nail lamp and polish.
Check the lamp and cables regularly for any signs of wear or damage. A faulty lamp can be a fire hazard. Ensure that the electrical cord is not frayed or damaged. If you notice any issues, stop using the lamp immediately. Have it inspected or replace it to ensure safety.
Be mindful of any skin reactions after using the lamp. If you experience redness or irritation, discontinue use. Consult a dermatologist if necessary. In some cases, an allergy to the gel polish could be the cause. Patch testing on a small area before full application can help identify any potential allergies.
Finally, always store your gel nail lamp in a cool, dry place. Moisture can damage the lamp’s electrical components. Keeping it clean and properly stored will prolong its lifespan. With these precautions, you can enjoy beautiful, long-lasting manicures safely.
Frequently Asked Questions
Here’s a list of frequently asked questions about using a gel nail lamp. These answers aim to clear up any confusion related to this beauty tool.
1. What is the difference between UV and LED nail lamps?
Both UV and LED lamps are used for curing gel nails, but they work differently. UV lamps emit broader wavelengths, curing all types of gel polish. They usually take longer, around two minutes, to fully cure each layer.
LED lamps emit narrow wavelengths, suited for specific gels designed for LED light. They cure faster, usually in 30-60 seconds per layer. The choice depends on your preference and type of gel polish you use.
2. Can regular nail polish be cured under a gel lamp?
No, regular nail polish cannot be cured under a gel nail lamp. Regular polishes are formulated differently and need air to dry properly. Trying to cure them under UV or LED light won’t work and can ruin your manicure.
If you want long-lasting color with quick drying time, stick with gel polishes made for curing under these lamps. Always follow product instructions for best results.
3. How often should I replace the bulbs in my UV nail lamp?
The bulbs in a UV nail lamp usually last between six months to a year with regular use. Over time, their efficiency decreases, affecting the curing process. If you notice your gels aren’t hardening as they should, it may be time for new bulbs.
Check the manufacturer’s guidelines for specifics on maintenance and bulb replacement intervals. Timely replacement ensures optimal performance and better results for your manicures.
4. Is using a gel nail lamp safe during pregnancy?
The safety of using gel nail lamps during pregnancy can vary depending on individual concerns and sensitivities. Generally speaking, limited exposure to UV or LED light is considered low risk by many experts.
If you’re concerned about chemical exposure from gels or prolonged use of the lamp, consult your doctor for advice tailored to your situation. Wearing protective gloves could also reduce skin exposure to UV rays.
5. Why does my gel polish peel off after a few days?
Poor preparation or application techniques often cause peeling of gel polish soon after application. Ensure steps like proper cleaning, buffing, and dehydrating nails before applying the base coat are done meticulously.
Avoid applying thick layers; opt for thin coats instead as they bond better when cured correctly under the lamp. Also double-check that both base coat and topcoat cover edges well since exposed edges can lead to premature lifting or chipping of polished layers over time.
Conclusion
Using a gel nail lamp can significantly enhance the longevity and appearance of your gel manicure. By following the proper steps and troubleshooting common issues, you ensure a flawless and durable finish. Remember, preparation and application techniques play crucial roles in achieving the best results.
Safety should always remain a priority when using these lamps. Adhering to usage guidelines and regularly checking your equipment will keep your manicure process both effective and safe. Armed with this knowledge, you’re well-equipped to enjoy stunning gel nails with confidence.

I’m Emily Johnson, an affiliate marketer and blogger focused on lamps and lighting. I share honest reviews, simple buying guides, and practical tips. My goal is to help readers choose the right lamp for their space, style, and budget with confidence.