To install a Noguchi Ceiling Lamp, attach the mounting plate to the ceiling, connect the wires, and secure the lampshade in place. Installing a Noguchi Ceiling Lamp is a simple process that can enhance the ambiance of any room.
The soft, diffused light and unique design of the Noguchi Ceiling Lamp make it a popular choice for modern and contemporary interiors. Whether you are a DIY enthusiast or a professional, following the straightforward installation steps will ensure that your Noguchi Ceiling Lamp is securely and safely in place.
In this guide, we will provide clear and concise instructions on how to install a Noguchi Ceiling Lamp, allowing you to enjoy the beauty and functionality of this iconic lighting fixture in your home.

Credit: www.dezeen.com
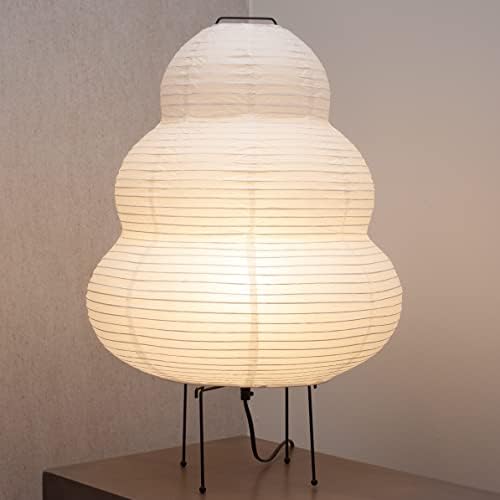
The Noguchi Ceiling Lamp
The Noguchi Ceiling Lamp is a timeless addition to any space. Renowned for its iconic design and unique features, this lamp is a true statement piece. Crafted by the legendary artist Isamu Noguchi, the lamp’s organic structure and soft glow create an inviting ambiance.
As an impressive art piece and functional lighting solution, the Noguchi Ceiling Lamp offers a range of benefits. From providing a warm and serene atmosphere to serving as a focal point in any room, installing this lamp can elevate the aesthetic appeal of your space.
Preparing For Installation
Assessing the installation area: Before beginning the installation of the Noguchi Ceiling Lamp, it is essential to assess the chosen area. Ensure that the chosen space allows for proper ventilation and easy access to the electrical connection. The lamp should be installed in an area where it will not be easily knocked or bumped.
Factors to consider for the installation space: Take into account the size and weight of the lamp and ensure that it fits appropriately in the chosen location. The area should also be free from any obstructions that may interfere with the installation process.
Safety precautions to keep in mind: Prioritize safety by turning off the power supply to the installation area. Clear away any debris or objects that may pose a hazard during installation. Additionally, use appropriate personal protective equipment, such as gloves and safety goggles, while handling the lamp and electrical components.
Gathering the necessary tools and materials: Before beginning the installation, gather the essential tools and materials. These typically include a screwdriver, wire cutter/stripper, electrical tape, wire nuts, and a ladder. Ensure that all tools are in good working condition to facilitate a smooth installation process.
| List of Tools | List of Materials |
|---|---|
| Screwdriver | Wire cutter/stripper |
| Electrical tape | Wire nuts |
| Ladder | – |
Tips for selecting the right tools and materials: When choosing tools and materials, ensure they are suitable for the specific requirements of the Noguchi Ceiling Lamp installation. Opt for high-quality tools to ensure durability and safety during the installation process.
Step-by-step Installation Process
Installing the Noguchi Ceiling Lamp involves several crucial steps. Firstly, understanding the components is essential for a smooth assembly process. Following the assembly instructions meticulously ensures a secure installation.
Next, mounting the lamp accurately is crucial, so positioning and marking the mounting area accurately is imperative. Once the mounting area is determined, securing the lamp in place is the next step. When dealing with the electrical wiring and connection, it is imperative to follow guidelines for electrical connections and observe safety measures throughout the process.
Further Enhancements And Troubleshooting Tips
When installing the Noguchi Ceiling Lamp, it’s important to consider customizing the lighting experience to suit your preferences. To adjust the brightness and ambiance, incorporating dimmer switches or smart controls can provide greater control over the lighting.
Troubleshooting common installation issues is essential, especially when addressing wiring problems and handling installation errors and adjustments. By considering these further enhancements and troubleshooting tips, you can optimize the installation of the Noguchi Ceiling Lamp for your space.
Frequently Asked Questions Of How To Install Noguchi Ceiling Lamp
How To Choose The Right Noguchi Ceiling Lamp Size?
When choosing a Noguchi Ceiling Lamp, consider the size of the space where it will be installed. Measure the area and select a lamp size that complements the room’s dimensions. A larger space may require a larger lamp for optimal lighting and aesthetic balance.
What Tools Are Needed To Install A Noguchi Ceiling Lamp?
The installation process for a Noguchi Ceiling Lamp typically requires basic tools such as a screwdriver, wire cutters, and a voltage tester. It’s important to have these tools on hand to ensure a smooth and safe installation process. Additionally, following the manufacturer’s instructions is crucial for a successful installation.
Can A Noguchi Ceiling Lamp Be Installed On A Sloped Ceiling?
Yes, a Noguchi Ceiling Lamp can be installed on a sloped ceiling with the appropriate mounting hardware and adjustments. It’s essential to verify that the chosen lamp model is compatible with sloped ceilings and to follow the manufacturer’s instructions for proper installation on this type of ceiling.
Conclusion
Installing a Noguchi ceiling lamp is a simple yet impactful way to enhance your space. By following the step-by-step guide provided, you can enjoy a well-lit and stylish room. Remember to secure the lamp properly for safety and enjoy the warm ambiance it brings to your home.

I’m Emily Johnson, an affiliate marketer and blogger focused on lamps and lighting. I share honest reviews, simple buying guides, and practical tips. My goal is to help readers choose the right lamp for their space, style, and budget with confidence.