Ever wondered why your bathroom heat lamp cover feels almost inaccessible? It’s a common dilemma many homeowners face. The trick lies in knowing the proper method rather than brute force.
The concept of heat lamps was introduced to add a touch of luxury, providing warmth post-bath. However, removing the cover isn’t as daunting as it seems. Typically, you’ll need a step stool and a screwdriver, paying attention to any screws that secure the cover in place.
- Turn off the power to ensure safety.
- Gather necessary tools, including a step stool and Phillips head screwdriver.
- Locate the screws and unscrew them carefully.
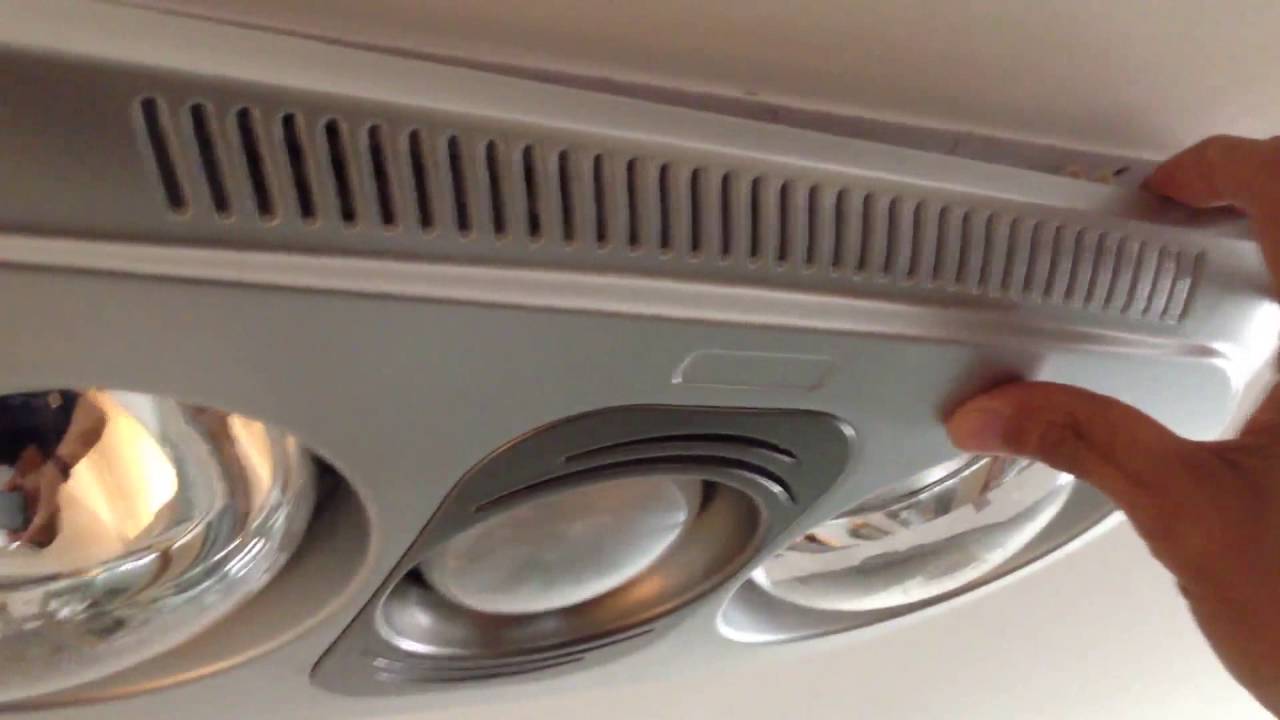
- Gently pull off the cover, checking for any clips or additional screws.
- If replacing, install the new cover by aligning and securing it properly.
- Turn the power back on and test the heat lamp to ensure successful installation.

Source: ytimg.com
How to Remove Bathroom Heat Lamp Cover
Removing a bathroom heat lamp cover is not as tricky as it might seem. Begin by turning off the power to avoid any electrical hazards. Tools you will likely need include a step stool and a Phillips head screwdriver. Check for any visible screws holding the cover in place. Sometimes, the cover might just pop off with a gentle pull.
Next, look closely at the cover’s edges to locate the screws. If screws are present, use the Phillips head screwdriver to unscrew them. Hold the cover with one hand while removing the screws to prevent it from falling. Once all screws are out, gently pull the cover away from the fixture. According to this post, it’s essential to replace outdated fixtures periodically to maintain efficiency.
Some heat lamp covers are secured with clips instead of screws. In that case, you will need to press or squeeze the clips to release the cover. Take your time to avoid damaging the cover or the clips. If the cover is stuck, you can gently use a flat-head screwdriver to pry it open. Be extra careful not to break any parts.
Once the cover is removed, you might notice dust and debris inside. This is a good opportunity to clean the lamp and fixture. Use a soft cloth to wipe everything down. Regular cleaning can extend the life of your bathroom heat lamp. According to the article here, maintaining your lamps can also provide better heating efficiency over time.
Step 1: Gather Necessary Tools
To remove a bathroom heat lamp cover, you’ll need a few essential tools. Start with a sturdy step stool or ladder to safely reach the lamp. A Phillips head screwdriver is usually required to remove the screws securing the cover. For stubborn screws, having a flat-head screwdriver can be useful too. Also, a soft cloth will help in the cleaning process.
It’s important to have everything within reach before you start. This ensures you won’t be interrupting your work to search for tools. Here is a quick list of the essentials:
- Step stool or ladder
- Phillips head screwdriver
- Flat-head screwdriver
- Soft cloth for cleaning
When gathering these tools, double-check their condition to avoid any issues while working. A worn-out screwdriver can strip screws, making removal difficult. According to this expert opinion, ensuring tools are in good shape can significantly ease the task at hand.
Once you have all the necessary tools, you can proceed with confidence. Make sure the power to the heat lamp is turned off to avoid any electrical hazards. Being well-prepared sets a solid foundation for a smooth and safe process. Now you’re ready to move on to the next step.
Step 2: Locate the Screws
Finding the screws holding the heat lamp cover is your next step. Most bathroom heat lamps have screws located at the edges of the cover. Check around the perimeter carefully. You might need a flashlight if your bathroom lighting isn’t sufficient. Sometimes, screws can be slightly hidden or camouflaged by grime or paint.
Move around to ensure you’ve identified all the screws. Some lamp covers might use clips instead of screws. In such cases, you’ll feel the clips as you run your fingers around the edge. If clips are used, you’ll need to squeeze them gently to release the cover.
For easier access, you can use a mirror to see the screw positions better. This method is particularly useful for small or tight spaces. Ensuring you know where each screw or clip is can save you time and effort. Marking their positions with a pencil can also be helpful.
Once you’ve located all the screws, make sure your screwdriver is the correct size. Using the wrong size can strip the screws, making removal difficult. A well-maintained screwdriver is crucial here. Now you’re ready to start unscrewing and move on to the next step.
Step 3: Removing the Screws
Now that you’ve located the screws, it’s time to remove them. Start by ensuring you have a firm grip on the screwdriver. Insert the screwdriver into the first screw. Turn it counterclockwise to loosen it. Always keep one hand on the heat lamp cover for safety.
Continue unscrewing all the screws around the cover. If some screws are tough to remove, apply a bit more pressure. Remember to proceed gently to avoid stripping the screws. If a screw seems stuck, you can use a flat-head screwdriver for extra leverage. Once all screws are loose, place them in a safe spot.
Using a small container can help keep the screws organized. This prevents them from getting lost and makes reassembly easier. Make sure you remember the order and position of screws. Keeping a mental note or taking a quick picture can help later. Organization is key during this step.
After all the screws are out, gently pull the cover away from the base. If the cover doesn’t budge, double-check for any missed screws. Sometimes there can be hidden ones that were overlooked. Patience is essential here. Feel around the edges again to ensure all screws are removed.
Once the cover is loose, carefully pull it down with both hands. Be cautious not to damage the cover or light fixture. Moving slowly and deliberately helps prevent accidents. Now you can set the cover aside and prepare for any further steps. This part of the process ensures you’re ready for the next task.
Step 4: Carefully pulling off the Cover
With the screws removed, you can now carefully pull off the cover. Hold the cover firmly with both hands. Use a gentle, steady motion to avoid damaging the cover or fixture. If the cover resists, double-check for any hidden screws or clips you might have missed. Sometimes, a slight wiggle can help loosen it.
Once the cover starts to move, continue pulling evenly. Ensure you’re supporting the cover’s weight to prevent it from falling. This cautious approach minimizes the risk of breaking the cover or injuring yourself. Remember, patience is key during this step. You don’t want to rush and cause any damage.
If the cover still won’t budge, consider using a flat-head screwdriver for gentle prying. Insert the screwdriver between the cover and the fixture base. Twist it slowly to create a gap. But always be aware of how much force you are applying. The goal is to release the cover without breaking it.
After detaching the cover, set it down gently in a safe place. Do a quick inspection to ensure there are no damages. This is also an excellent time to clean both the cover and the light fixture. Dust and grime can accumulate over time, reducing the lamp’s efficiency. Regular maintenance keeps everything functioning well.
Finally, make a note of the cover’s orientation. This will make reassembly easier later on. Knowing how to put it back correctly saves time. Follow these steps to ensure the lamp is back in proper working order. Now you’re ready for any additional tasks that might be needed.
Step 5: Safe Disposal of the Cover
After removing the heat lamp cover, it’s essential to dispose of it safely. If the cover is in good condition and you’re merely cleaning, place it somewhere secure. A table or countertop will suffice. However, if the cover is cracked or damaged, you’ll need to follow proper disposal methods. Glass or plastic fragments can be hazardous.
First, wrap the cover in newspaper or bubble wrap. This protects anyone handling your trash. Additionally, wrapping the cover prevents sharp edges from causing injuries. You might also consider labeling the package as ‘fragile’. This simple step keeps everyone safe.
Next, check your local recycling guidelines. Many municipalities have specific instructions for disposing of glass or plastic items. It’s essential to follow these guidelines to ensure environmental safety. Some areas may have dedicated recycling centers. Always prefer recycling over trashing materials.
If you’re replacing the cover with a new one, make sure to handle the replacement securely. Store it in a box or a padded area until you’re ready to install it. If it’s a temporary removal for cleaning, ensure the cover remains dust-free. Keeping everything organized makes reinstallation easier.
In case you’re unsure about the disposal process, you can ask for assistance. Consult your local waste management service or check online resources. According to waste management guidelines, proper disposal prevents hazards and promotes eco-friendliness. These steps ensure you are not only safe but also environmentally responsible.
Precautions When Removing Bathroom Heat Lamp Cover
When removing a bathroom heat lamp cover, safety should be your top priority. First and foremost, ensure the power is turned off at the breaker box. This eliminates the risk of electric shock. Double-check by flipping the switch in the bathroom to confirm there’s no electricity running to the fixture. Always err on the side of caution.
Next, use a sturdy step stool or ladder to reach the heat lamp safely. Make sure it’s placed on a flat surface to avoid wobbling. Secure footing is crucial when working overhead. If possible, have someone nearby to hold the ladder steady. This additional support can prevent accidents.
Wear protective gear like gloves and safety glasses while handling the cover. Gloves protect your hands from sharp edges or broken fragments. Safety glasses shield your eyes from falling dust or debris. Simple precautions like these go a long way in ensuring your overall safety during the process.
If you encounter resistance while removing screws or clips, never force them out. Forcing components can result in breakage or injury. Instead, take a moment to reassess and use appropriate tools carefully. Applying gentle pressure usually does the trick without causing damage.
It’s also important to keep your work area tidy and clutter-free. Ensuring all tools are within reach prevents unnecessary movements that could lead to falls or mishaps. A clean workspace allows for better focus and efficiency when working on any task, including lamp cover removal.
Finally, if you aren’t confident in performing this task alone, seek professional help. Electricians are equipped with skills and tools to handle such jobs safely and efficiently. According to experts, engaging professionals eliminates risks associated with DIY electrical tasks, particularly if you’re unsure about any part of the process.
Why Regular Cleaning of Bathroom Heat Lamp Cover is Crucial
Regular cleaning of your bathroom heat lamp cover is essential for several reasons. First, dust and grime can accumulate, blocking light and reducing the lamp’s effectiveness. This can make your bathroom appear dimmer and colder. A clean cover ensures the maximum amount of heat and light is emitted. Over time, this can improve the overall ambience of your bathroom.
Regularly cleaning the heat lamp cover also extends the life of the lamp. Dirt buildup can cause the lamp to overheat, leading to premature wear and tear. Keeping the cover clean helps the lamp operate more efficiently. This saves you money on replacements and energy costs. It’s a simple maintenance task that pays off in the long run.
Furthermore, a clean lamp cover improves air quality in your bathroom. Dust and allergens can accumulate on the cover, circulating every time the lamp is on. Regular cleaning helps to reduce these irritants, making the bathroom a healthier space. Cleaner air can be particularly beneficial for those with allergies or respiratory issues.
Another reason to keep the cover clean is the aesthetic appeal. A dirty lamp cover can make the whole bathroom look unkempt. Regular cleaning keeps everything looking fresh and well-maintained. This is especially important if you’re planning to sell your home or have guests over. First impressions matter, and a sparkling clean bathroom makes a difference.
Cleaning the cover is not a time-consuming task. You can easily incorporate it into your regular bathroom cleaning routine. A quick wipe down every few weeks is usually sufficient. Using mild soap and water can effectively remove most dirt and grime. Keeping up with this routine ensures your bathroom stays bright and comfortable.
Different Types of Heat Lamp Covers
Heat lamp covers come in various types, each designed to meet different needs and preferences. The most common material used is glass, which is known for its durability and ability to withstand heat. Glass covers often have a sleek, modern look, making them a popular choice for contemporary bathrooms. However, they can be fragile and require careful handling.
Another popular option is plastic heat lamp covers. These are typically made from heat-resistant materials and are less prone to breaking compared to glass. They can come in a variety of colors and transparencies, allowing you to customize the look of your bathroom. However, over time, plastic covers might discolor due to the heat.
Metal covers are also available and are known for their sturdiness. These covers are usually made from stainless steel or aluminum, offering excellent durability. Metal covers can either be polished for a shiny finish or brushed for a more muted look. They are often used in industrial or modern bathroom designs.
Some heat lamp covers incorporate decorative elements. These can include etched or frosted glass designs, adding an aesthetic touch to the functionality. Decorative covers can be a bit more expensive but offer a unique look. They’re ideal for homeowners looking to add a bit of flair to their bathroom.
Here’s a quick comparison of different types of heat lamp covers:
| Type | Material | Advantages | Disadvantages |
|---|---|---|---|
| Glass | Glass | Durable, modern look | Fragile, requires careful handling |
| Plastic | Heat-resistant plastic | Less prone to breaking, customizable | May discolor over time |
| Metal | Stainless steel or aluminum | Very durable, sturdy | Can be more expensive |
| Decorative | Varies (usually glass) | Unique aesthetic | Higher cost |
Choosing the right type of heat lamp cover depends on your specific needs and style preferences. Whether you value durability, aesthetics, or customization, there’s a suitable option available. Consider the pros and cons of each type before making a decision to ensure you get the best fit for your bathroom.
Tips for Installing New Bathroom Heat Lamp Covers
Installing a new bathroom heat lamp cover can be straightforward if you follow a few essential tips. First, ensure you have all the necessary tools ready, such as a screwdriver and step stool. Check the new cover for any defects before starting. It’s easier to fix or replace a faulty cover before installation. Having everything prepared saves time and reduces stress.
Next, follow the manufacturer’s instructions closely. These guidelines are designed to ensure safe and effective installation. Different covers might have unique installation steps. Reading the instructions carefully can prevent mistakes. If instructions are unclear, looking up video tutorials can be helpful.
Once ready to install, align the cover correctly with the fixture. Proper alignment is crucial for a secure fit. Make sure the screw holes or clips line up perfectly. If the cover is not aligned, it may come loose. Double-checking this step ensures stability.
Use a soft cloth to handle the cover, especially if it’s made of glass or has a decorative finish. This prevents fingerprints and keeps the cover clean. Gently tighten the screws or secure clips to avoid damaging the new cover. Over-tightening can crack glass or deform plastic covers, so proceed with care.
If the cover includes additional features like seals or gaskets, ensure they’re placed correctly. These components help in maintaining the seal and preventing moisture build-up. Misplacing them can reduce the effectiveness of your heat lamp. Paying attention to small details ensures optimal performance.
After installation, turn the power back on and test the heat lamp. Make sure everything is working as expected. A quick test helps catch any issues early on. Verifying that the lamp functions correctly brings peace of mind and ensures your bathroom stays warm and well-lit.
Frequently Asked Questions
Curious about bathroom heat lamps and their maintenance? Here are some common questions and detailed answers to help you out.
1. How often should I clean my bathroom heat lamp cover?
You should clean your bathroom heat lamp cover every three to six months. This helps prevent dust buildup, ensuring optimal light and heat output. Regular cleaning can extend the life of both the bulb and the cover, making your bathroom a brighter and warmer place.
If you notice significant dirt or grime accumulating sooner, it’s best to clean more frequently. Consistent maintenance keeps your lamp working efficiently and improves overall hygiene by reducing dust in the air.
2. Can I replace a broken glass heat lamp cover with a plastic one?
Yes, you can replace a broken glass heat lamp cover with a plastic one, provided it is designed for heat resistance. Plastic covers are more durable and less prone to breaking but may discolor over time due to heat exposure.
Before switching materials, check if the new cover fits your existing fixture properly. Using compatible parts is crucial for maintaining safety and functionality within your bathroom setup.
3. What tools do I need for removing a bathroom heat lamp cover?
The basic tools you’ll need include a Phillips head screwdriver, step stool, and possibly a flat-head screwdriver. These will help you reach and unscrew the cover effectively without causing damage.
A soft cloth can also be useful for cleaning any dust or debris during removal. Having all tools ready makes the process smoother and safer.
4. Are there any precautions I should take before removing the heat lamp cover?
The most critical precaution is to turn off the electricity at the breaker box to avoid electrical shocks. Ensure you’re using sturdy equipment like ladders or stools that are stable on flat surfaces for safe access to the fixture.
Additionally, wearing gloves helps protect against sharp edges or potential breakage during removal. Safety first always ensures a smooth procedure without unintended mishaps.
5. Can frequent cleaning improve my heat lamp’s efficiency?
Absolutely! Frequent cleaning removes dust and grime that can block light and reduce heating effectiveness, making your lamp perform better overall. This practice not only enhances illumination but also distributes warmth more evenly across your space.
A cleaner environment means less strain on your electrical components as well, prolonging their lifespan while minimizing energy use over time. It’s an easy yet impactful maintenance tip!
Conclusion
Removing and maintaining your bathroom heat lamp cover is essential for both efficiency and safety. Regular cleanings can extend the life of your lamp, reduce energy costs, and improve the overall ambiance of your bathroom. Following proper steps and precautions ensures a smooth process.
Whether you have a glass, plastic, or metal cover, the key is consistent maintenance and careful handling. Always make sure to use the right tools and turn off the power before starting any work. These simple yet effective measures keep your bathroom bright, warm, and safe.

I’m Emily Johnson, an affiliate marketer and blogger focused on lamps and lighting. I share honest reviews, simple buying guides, and practical tips. My goal is to help readers choose the right lamp for their space, style, and budget with confidence.